
My comprehensive list of fixes and information that I have found over the years of living at 937 Condos. Scroll down, hope you find it useful 🙂
also: for residents of 937 Condos – it’s worth checking out the Community Google Group , theres a lot of information on there from years past and it’s all searchable. e mail jbucky1 at gmail dot com if you want access.
Updated: 12/1/2025
- Bathroom Areas
- Contractors, Cleaners & Handy people
- Cleaners
- Direct TV
- Drywall and attaching stuff
- Floors
- Front Door
- Garage Door Opener
- HVAC – (Thermostat)
- Insurance
- Internet
- Kitchen Area
- Lighting & Bulbs
- Hallway
- Kitchen
- Bathroom
- Locks
- Paints
- Patio
- Recycling at 937
- Sink Clogs
- Smoke Detectors
- Thermostat
- Washer Dryer
- Windows & screen cleaning
DRYWALL AND ATTACHING STUFF
This isn’t a disco, this ain’t no country club either… first off the studs are metal not wood, secondly the studs are quite large and you should avoid them. (Definitely use an electronic detector ~$30), it will save you time and hassle of patching messed up holes). Then the drywall ranges from 0.5″ to 1″ thick depending on where you are in the condo.
I have used regular plugs and toggle bolts in these condos but the best method of attachment is EZ Anchor – Drywall Anchors.
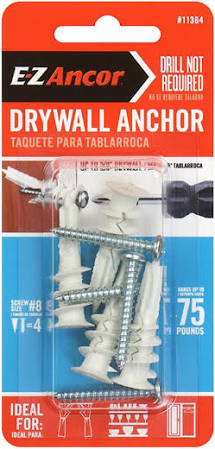
These are the best things I have found to date and only $3 for the small pack. (Toggle bolts are also great, but you have to drill a bigger hole). EZ Anchors come in two sizes 50lb rated ones and 75lb.
Word of caution, (especially for attaching curtain rails) at the perimeter of every window there is about 1.5″ of metal. Don’t try mount here or drill into it, move your attachment points, you will thank me later.
RECYCLING, COMPOST AND TRASH
Trash chutes are on every floor, Don’t place Cat Litter in them, it will jam the machine.
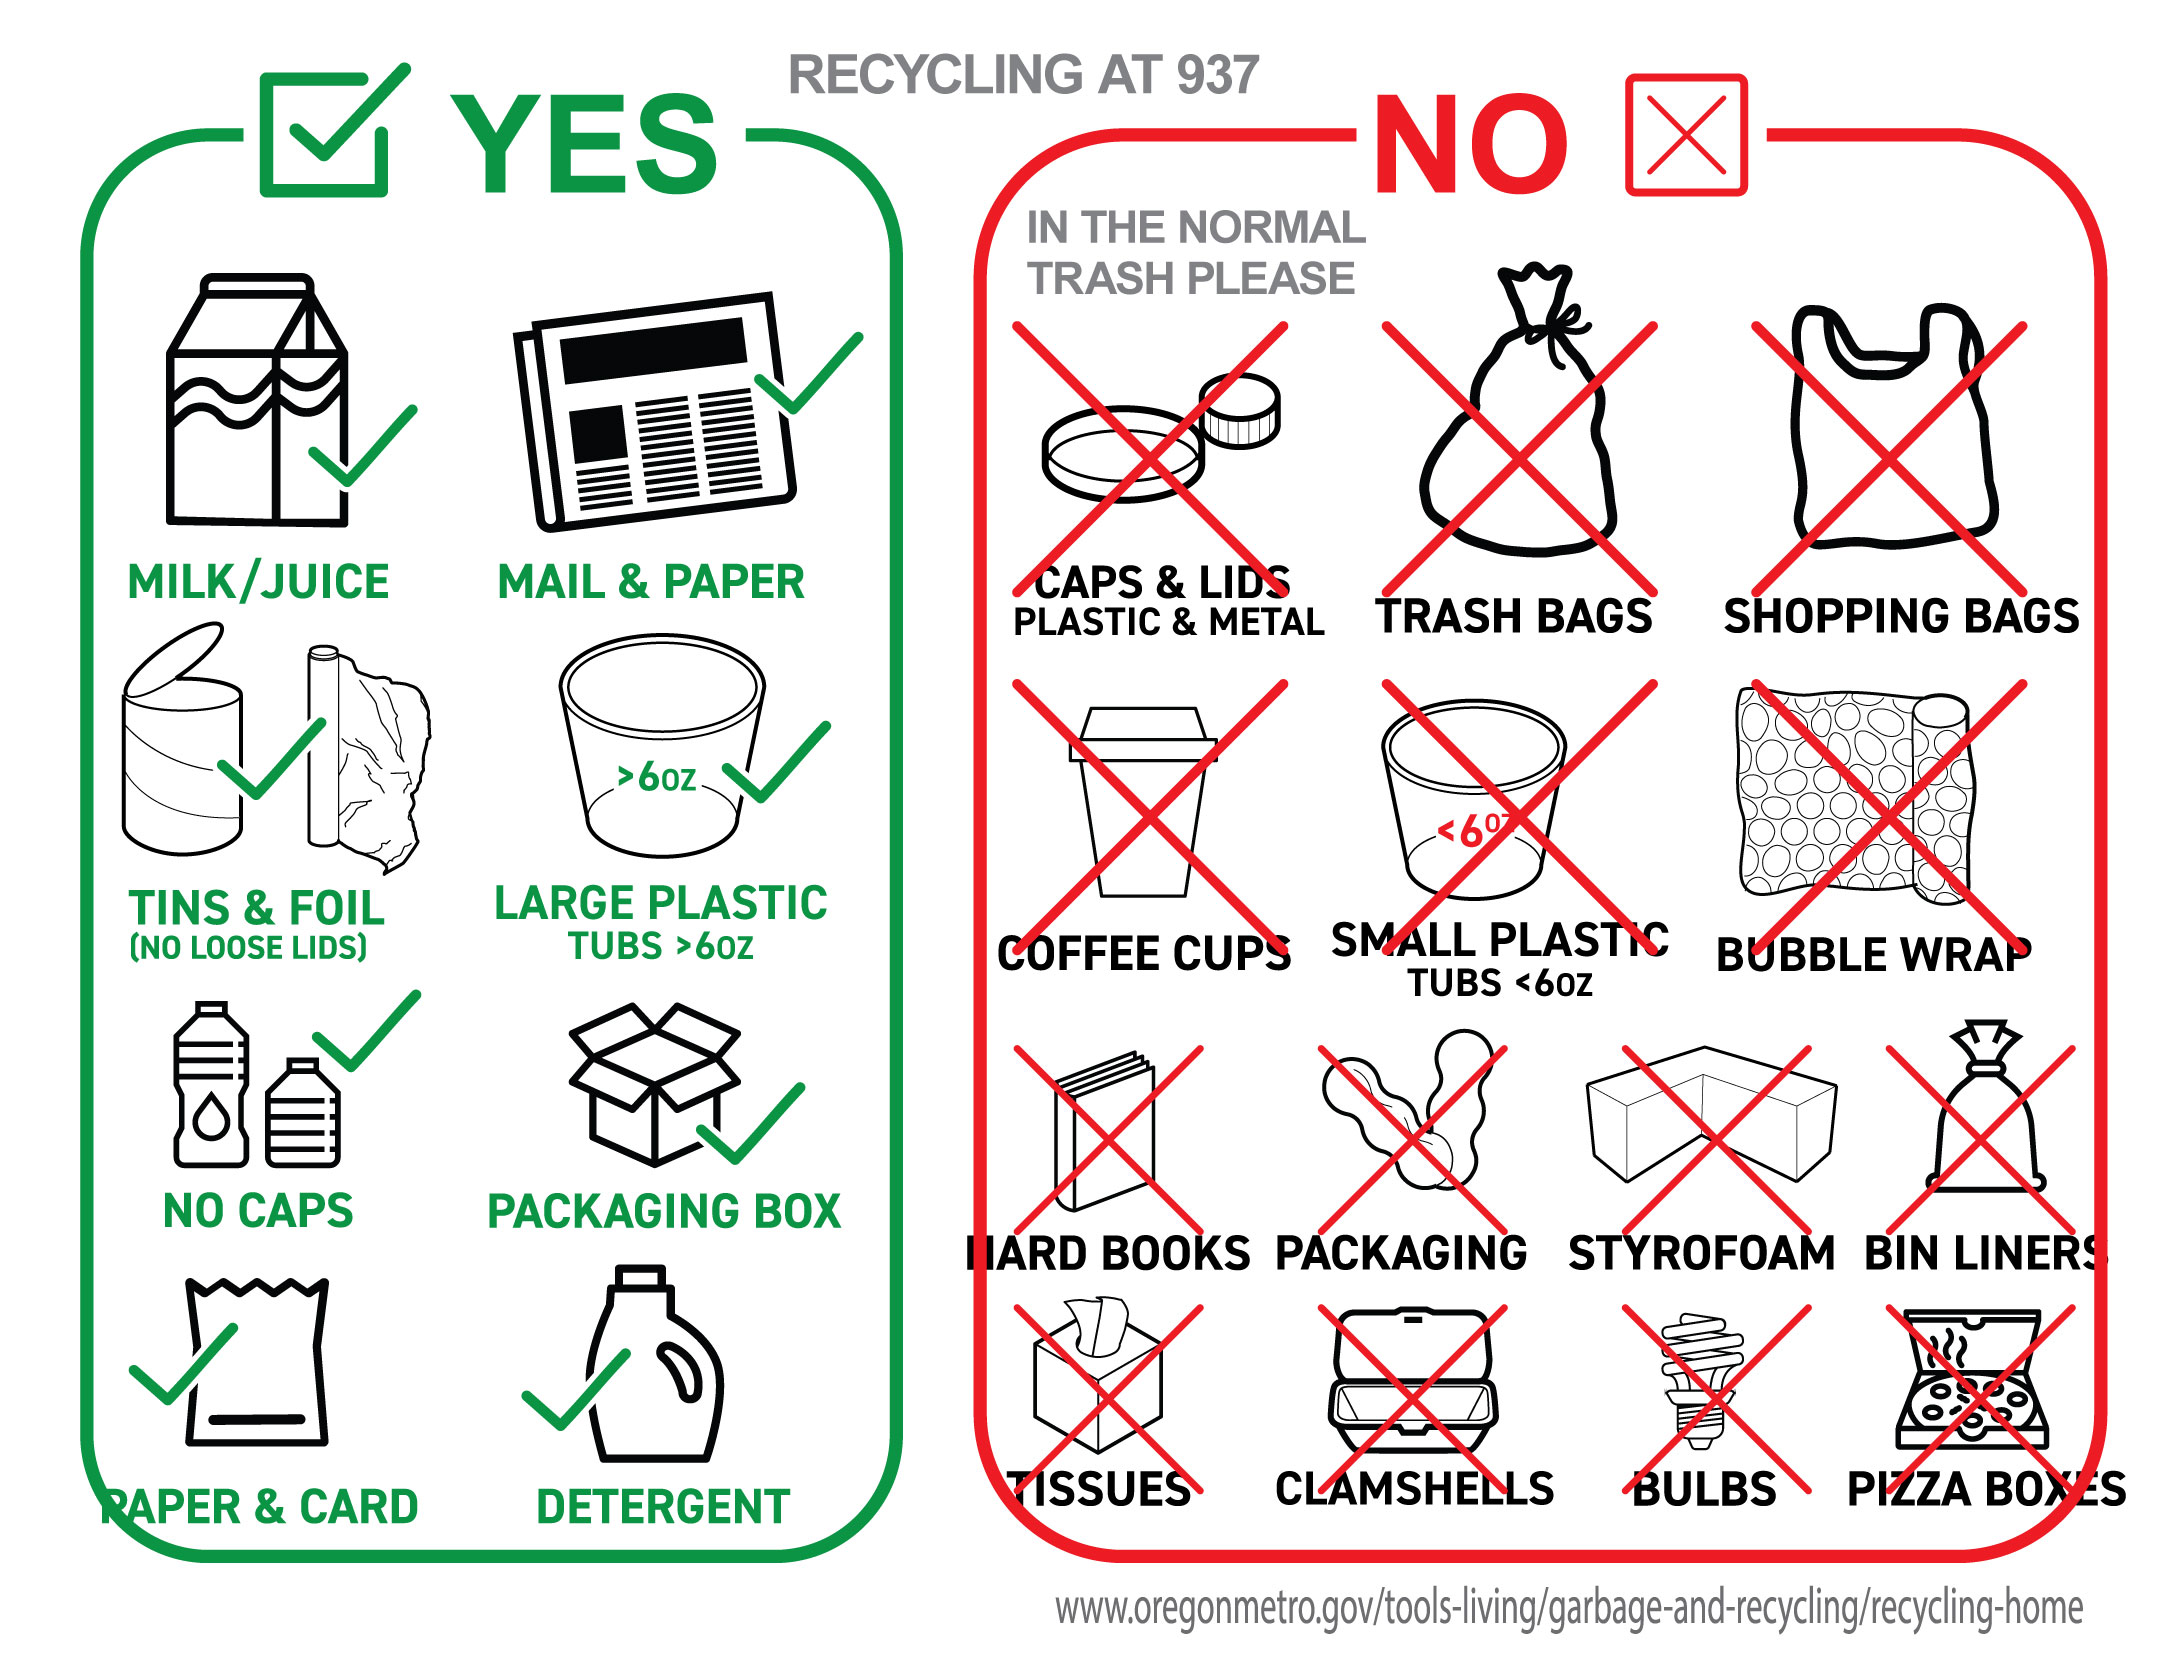
Recycling is of the “commercial” grade, so it has different rules than a normal suburban dwelling, make sure you take a look at the guide below.
There is a compost bin near the dumpster, its green and has a label on it that shows what you can put in to, again its “commercial” so different rules apply.
KITCHEN
REFRIGERATOR
Most units have the Liebherr refrigerators, they are a bit of an uncommon spec for the good old USA, super flush with unique width. I have found them to be pretty reliable, but I know many Americans in the building complain.
Cabinetry specs for Liebherr 1651 Refrigerator here
General Use & Care Manual for Liebherr 16 series here
Servicing Manual for Liebherr Fridge Freezer combo here
Parts link here
https://www.dsu-nl.com/en-EU/search-by-brand/liebherr
Preventative / Periodical maintenance : On the inside back wall of the refrigerator wall there is a small shelf to collect condensation, this shelf drains to a small hole. Male sure this small hole is kept clean of debris. A cue tip can do that.
FREEZER
To avoid potential problems, it is recommended to turn off the icemaker. If the icemaker is in use and it breaks, repairing it can be expensive and time-consuming due to difficulties in finding replacement parts and limited availability of service companies.
if you are not going to use the ice maker for a while. put it in “clean mode” and leave it there.
- Remove drawer.
- Press and hold the on off button till the light goes out. Keep holding and the light will start flashing.
- Insert the drawer while led is flashing – all the way in.
- The unit will do its thing and rotate the tray.
- The ice maker will then power off
DACOR OVEN
Ours went kaput and the upper oven element stopped working. Tuned out to be bad solder joints on the control board that switch the element, I read this is a fairly common problem. I managed to trace it and fix it pretty easy without having to buy a whole new control board. Make friends with someone who is handy with a multimeter and solder iron and this is an easy fix vs a $600 board. You can trace the wires from inside the oven cavity, I believe its a Yellow wire for the upper element, but you should confirm if you are DIY’ing this.
EXTRACTOR FAN HOOD
Since this is above the cooktop this can become very greasy and really affect how well the extraction works. It should suck!
The unit has two removable filters, both are metal framed with metal top sheets and filter material on the inside. Taking apart the individual filters is not recommended, I tried and its more of a hassle than it’s worth!
Removing them from the unit is easy, squeeze the handle on the filter towards the front and the filter will drop down (when re installing remember the place the back lip first then the handle edge, plastic handle is toward the front)
Cleaning – Three options here, you can buy some new ones, somewhat expensive and wasteful or you can soak and clean. One way is to put them in your dishwasher, thats not a bad idea, might want to do it without your crockery in there. Another way is to use a degreaser solution and soak them in the sink. I have had a lot of luck with a Simple Green solution and soaking in warm water for a few hours , agitating every so often, then leaving to dry out before reinstalling. A lot of dirt will come out.
How often to do this? if you cook a lot, do it once a year.
Here’s a link to buy some new ones for you lot that have extra money and like creating waste
SINK
I fixed a few peoples leaks under their kitchen sinks. If you find you have a small water leak under your sink. Check the hose connection on the flexy arm near the head (above the sink), they come loose and can cause a slow / sometimes fast leak that runs down the outside of the pipe to create a mess inside your cabinet! . Easy fix (its plastic connection nut), tighten it gently!
BOSCH DISHWASHER
Generally, Some basic cleaning in the lower filter basket area, will fix the / avert many problems. The owners manual for this units shows you how to remove the filter that is located on the inside bottom of the unit. Sometimes stuff gets caught in there, worth a clean. Then below the round filter is a metal mesh area with a lower plastic area that is worth checking for contaminants that can confuse the optical sensor.
If your dishwasher has water or soap bubbles in the bottom.
1. Check you in sink disposal is clean and not bunged up,
2. On the control panel press Power Scrub Plus and Regular Wash together, this will forca a reset and the display should read zero.
3. Close the door, the dishwasher should now perform a drain and if you had water in the bottom of the dishwasher you should hear it pump out.
4. Remove filter and clean around the sensor as mentioned above
Using the auto diagnostics:
If you have the original dishwasher in your unit, they are smart and normally they show an error code on the control panel, if something is really wrong. You can activate this diagnostic by following these steps if you are having issues and want to check.
If you are having problems you can do a diagnostic.
1. Turn the DW off
2. Hold the Power Scrub and the Regular Wash buttons then press the Power On button
3. This puts you in diagnostic mode you will see P0 on the display , then pressing the flashing Regular Wash Button you can see the “E” error codes and scroll through them
4. To exit simply press the Power Off button
Error codes are as follows: E1 Heating Error, E2 NTC Error, E3 Filling Error, E6 Aqua sensor Error
As units become old Error E6 becomes a common problem, depending on the situation an E6 error may mean that your dishwasher never completely finishes a cycle or leaves a pool of water in the bottom. The solution is replacing the sensor it’s a $50 replacement part, (Bosch 00165279 Water Sensor) but 3 or 4 hours of work to replace it.
Another common problem and a preventative item is the door becomes loose from many years of opening and dropping the door open or slamming it shut too hard. This is a simple evaluation. On the inside sides of the door are several screw heads (3 each side on left and right) around the perimeter of the metal inner door – these are actually Torq T20’s heads, not Phillip Crossheads. Just makes sure these are tight, they have a tendency to loosen, which then causes a lot of issues with leaks and door errors.
There’s lots of help online at Bosch website. Info, manuals and parts diagrams here
REMOVING KITCHEN DRAWERS
1) Pull the drawer all the way out as far as it can, toward you.
2) On the right hand of the drawer slide at the back, push the triangular black plastic tab DOWN
3) On the left hand of the drawer slide mechanism at the back pull the triangular black plastic tab UP
4) Pull the drawer towards you to remove fully from the slide mechanism..
5) When replacing the drawer, the plastic tabs should automatically catch, no need to pull up or down, just slide it all the way in and check to see if they catch.. But aligning both the left and right drawer slides can be tricky and you may need someone to help you on the larger drawers.
BATHROOM
BATHROOM FANS
The original ones are in ceiling Broan fans either above your shower or above the toilet depending on your unit. I found that ours weren’t really sucking air anymore. Some are really just dirty and need a clean and others the motor and fan unit is worn and needs replacing. These bathroom fans are basically a metal box above your ceiling that contain a motor, a fan cage and a light bulb.
In both my fans I replaced the motor and blower cage, its available as one unit.
More about servicing, installing – here
PECULIAR BATHROOM STINKS
This seems like it should be in conjunction with the paragraph above, but its a less frequent small and only really happens if you have a second bathroom that you infrequently use.
The smell comes from the P Trap in the shower /bath
If the shower / bath has been unused for a while the water in the trap may dry up or become stagnent.
To fix – run the water for 5 mins.
the smell should go away
SHOWER
Don’t get me started Hans Grohe brand , which are the fixtures – normally the water mixing cartridge that combines hot and cold will give up. Its a $160 and unless you are super handy, you will need a plumber. Cartridge here
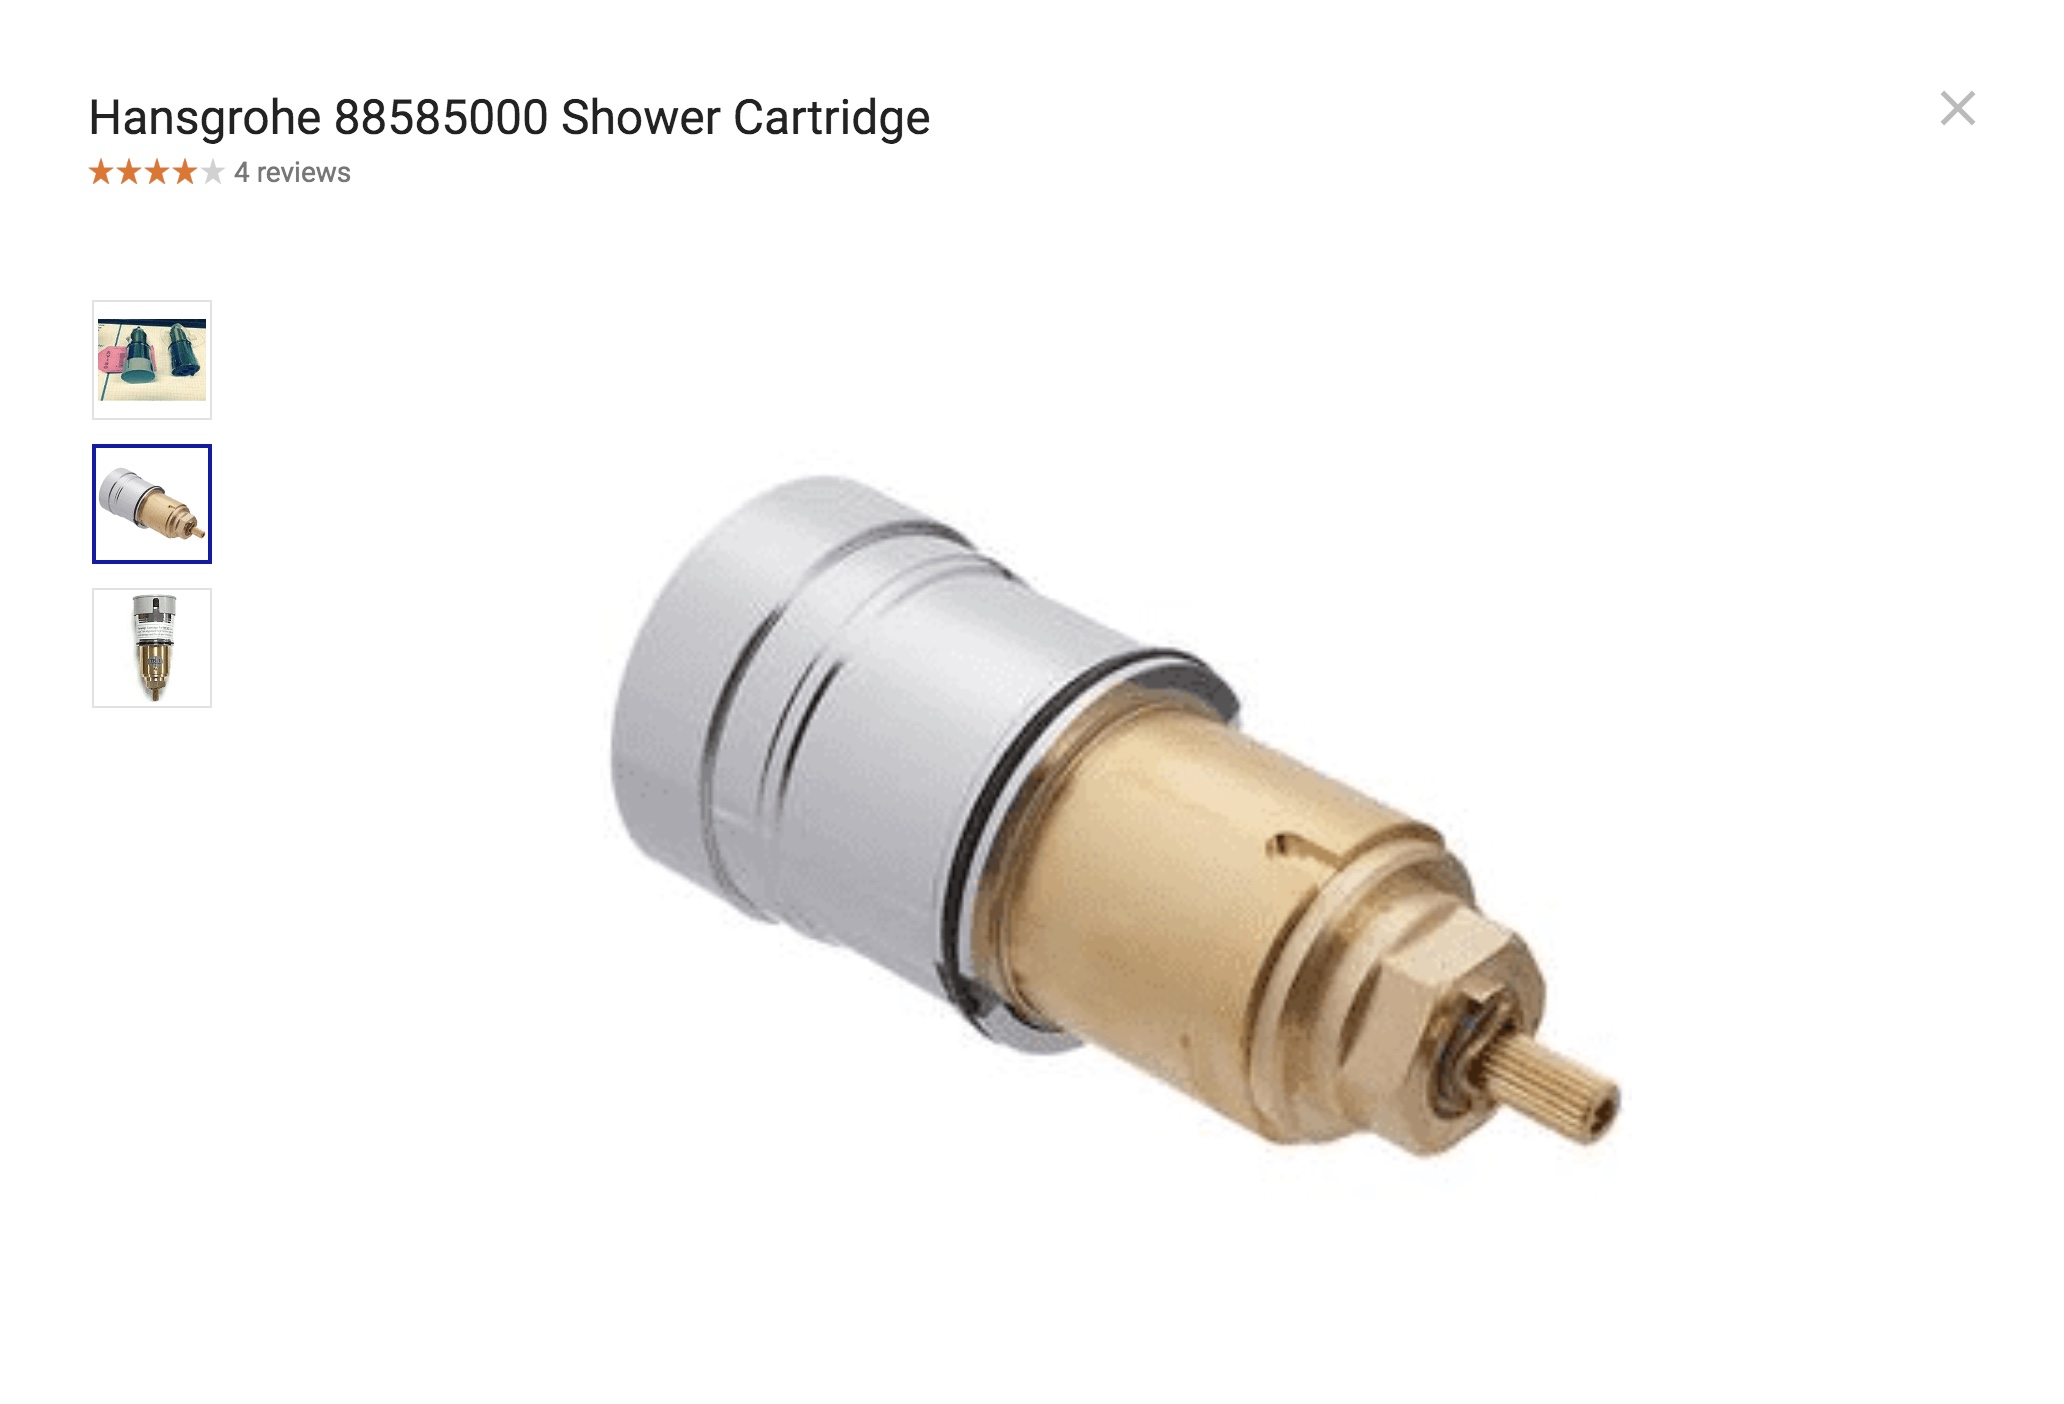

SHOWER KNOB / HANDLE: If you want to remove, attach or reposition the handle – look on the underside. There is a small set screw which is either a 2.5mm or 3mm hex (cannot quite remember). Loosening will allow you to slide off the handle from the main shaft shown above. *Handle is very heavy, take care not to drop.
NOTE: When you go to re-install the handle, make sure to align grub screw with the divot / notch. Also note the water temperature control is the splined shaft, so be sure to aline the outer knob position with respect to that. If you find your shower to too cold or too hot, you may have this aligned poorly.
CLOGS and REMOVING HAIR
If your tub or shower is draining slow, and you have long hair or a person that lives with you has long flowing locks, you might want to check and remove hair buildup.
On the bath tub you will / may need a 1/4″ square drive it attached to a screwdriver or wrench.
Pull the plunger up, turn the small knob counter clockwise, now if the whole plunger thing unscrews out then bobs your uncle and you don’t need the next step. However if just the small knob comes off you will be faced with a hole with a square receptacle, insert the square 1/4″ drive and turn counter clockwise, this will remove the lower part of the plunger. Giving you access to the hairy goodness.
Now clean up all the gunk, you don’t need chemicals, just pull it all out, pliers help. have fun with that I have done it many times.
Install in reverse order. Righty tighty.
On a stand up shower, theres just two screw heads to remove the drain plate. Then you can use one of them hair hook things that you can get at the diy shop..
On the sink, theres a couple of things here. Your partners hair can be caught in two places. One – around the plunger area that open and closes the drain or two in the P trap – the U shaped area under your sink.
Normally because our plumbing is so narrow there will be hair at the plunger, so I suggest trying that first before going down the route of removing the P Trap.
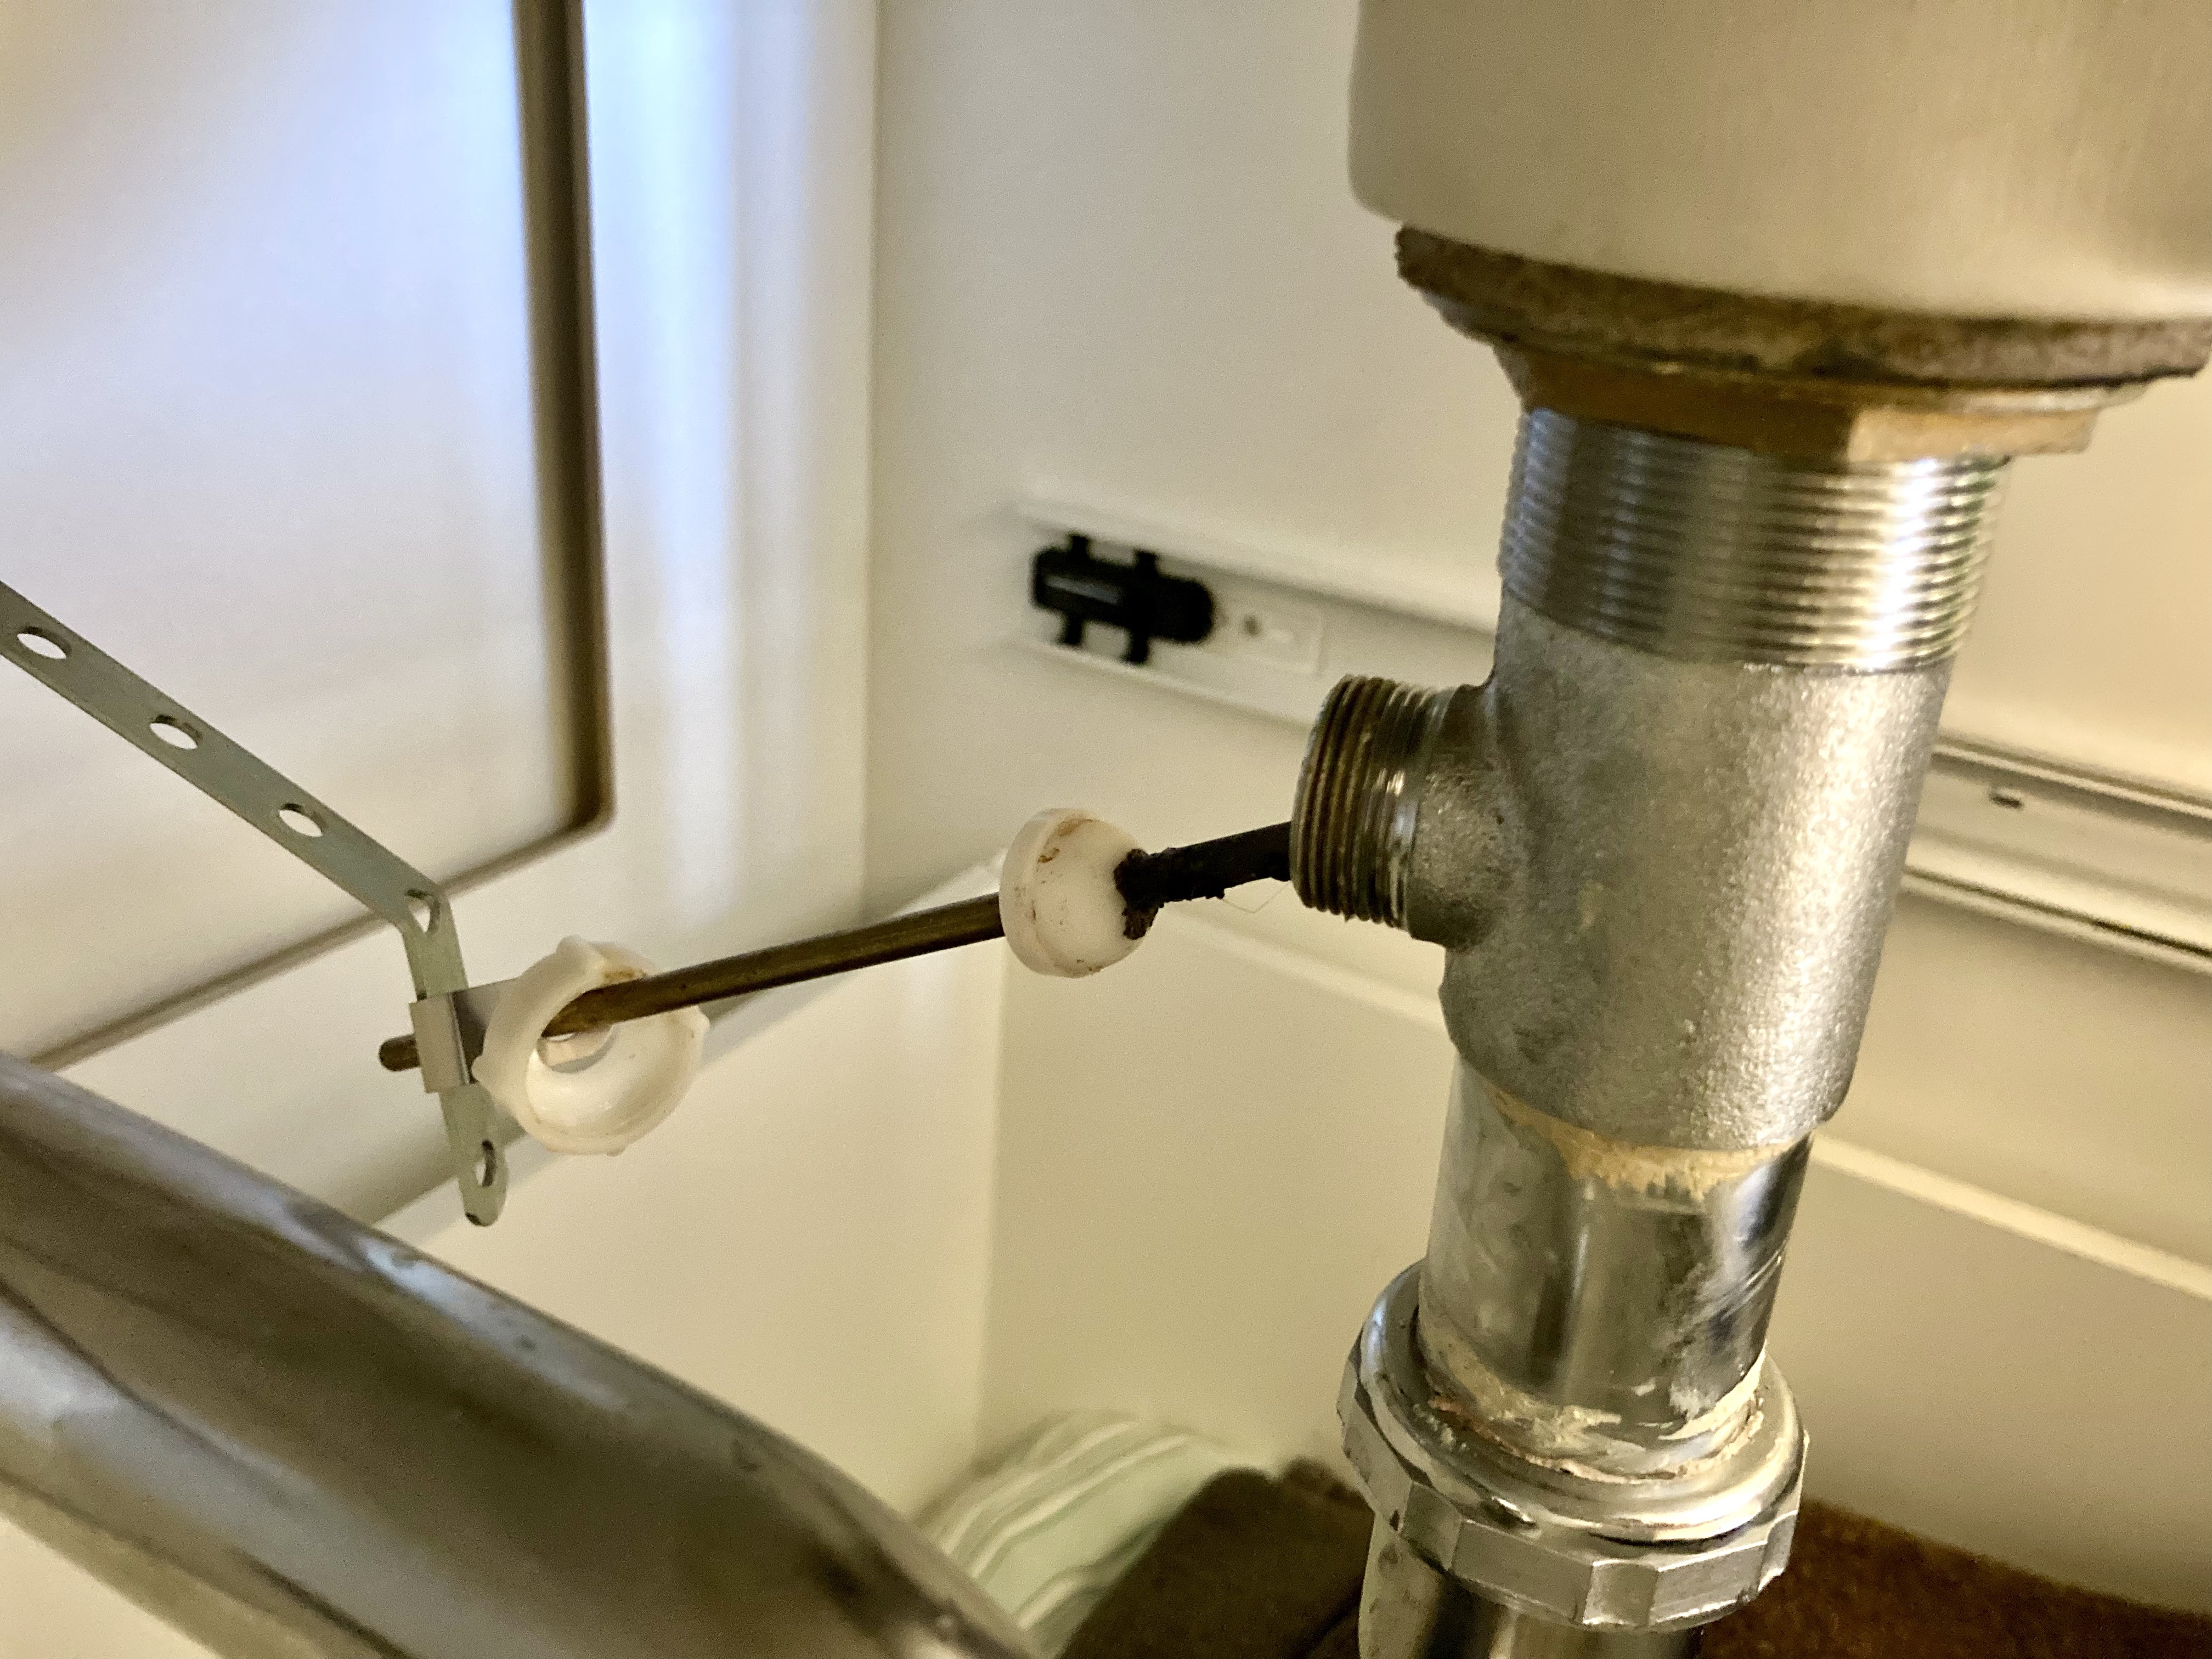
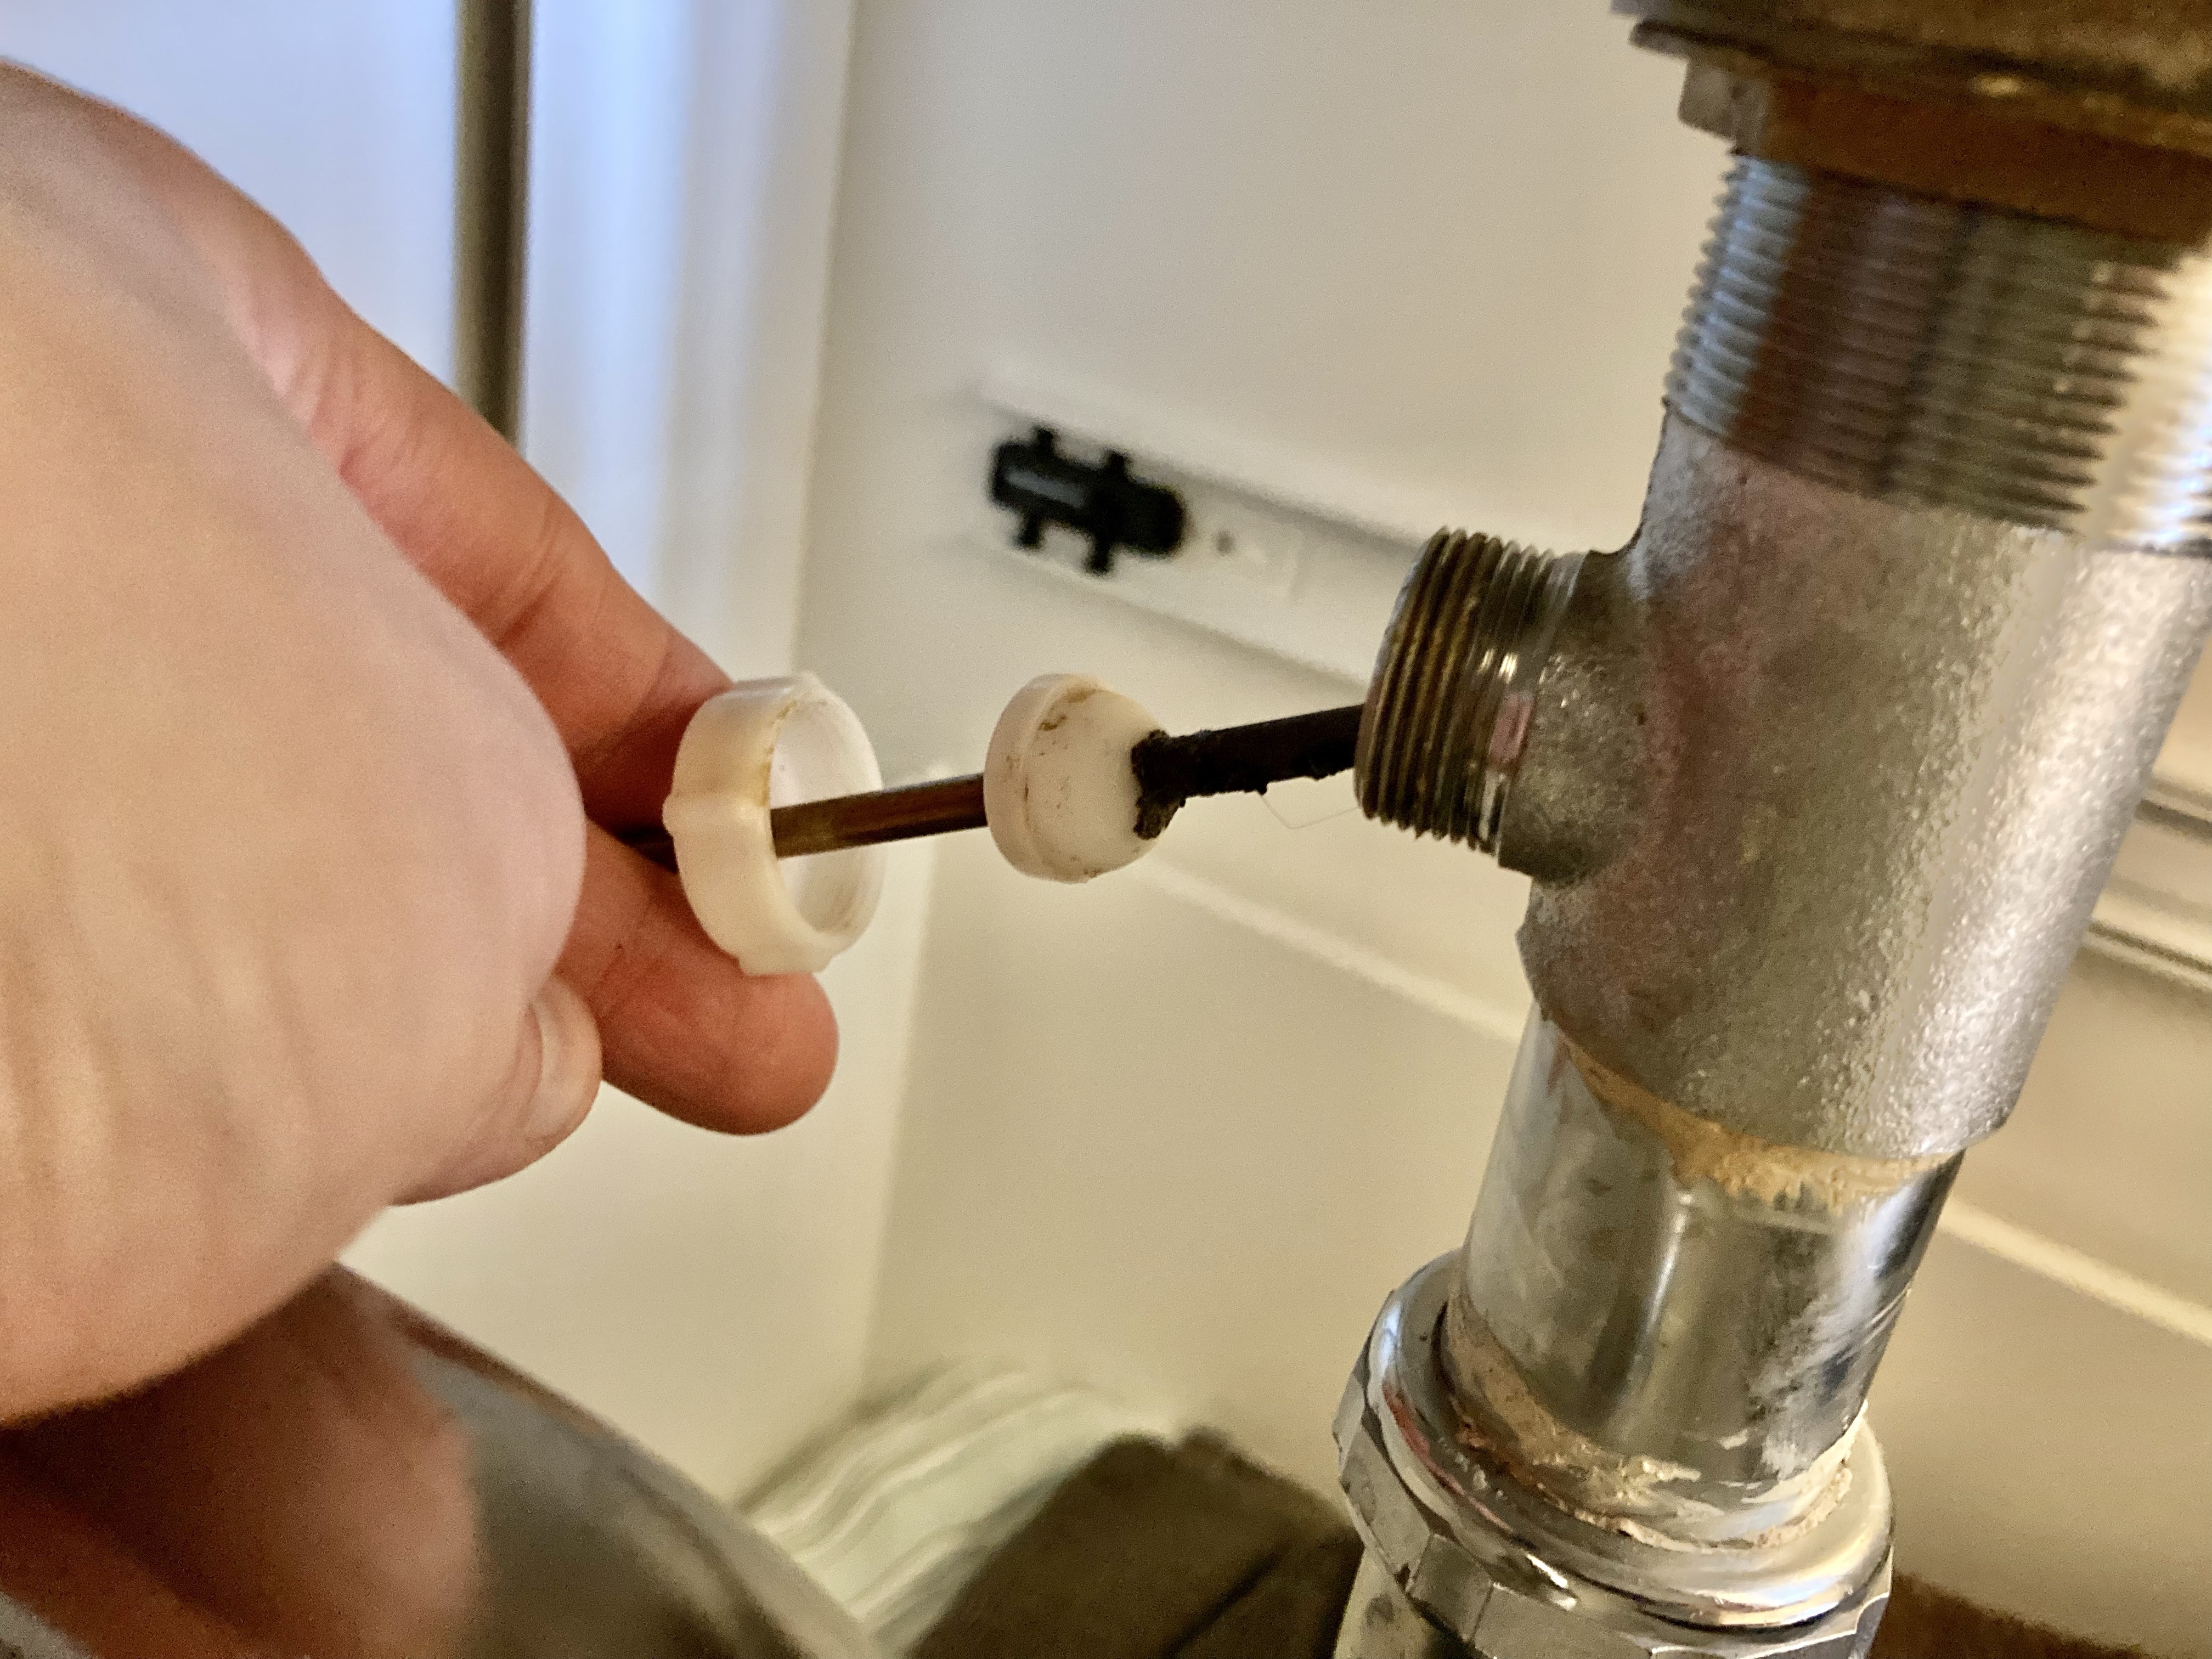
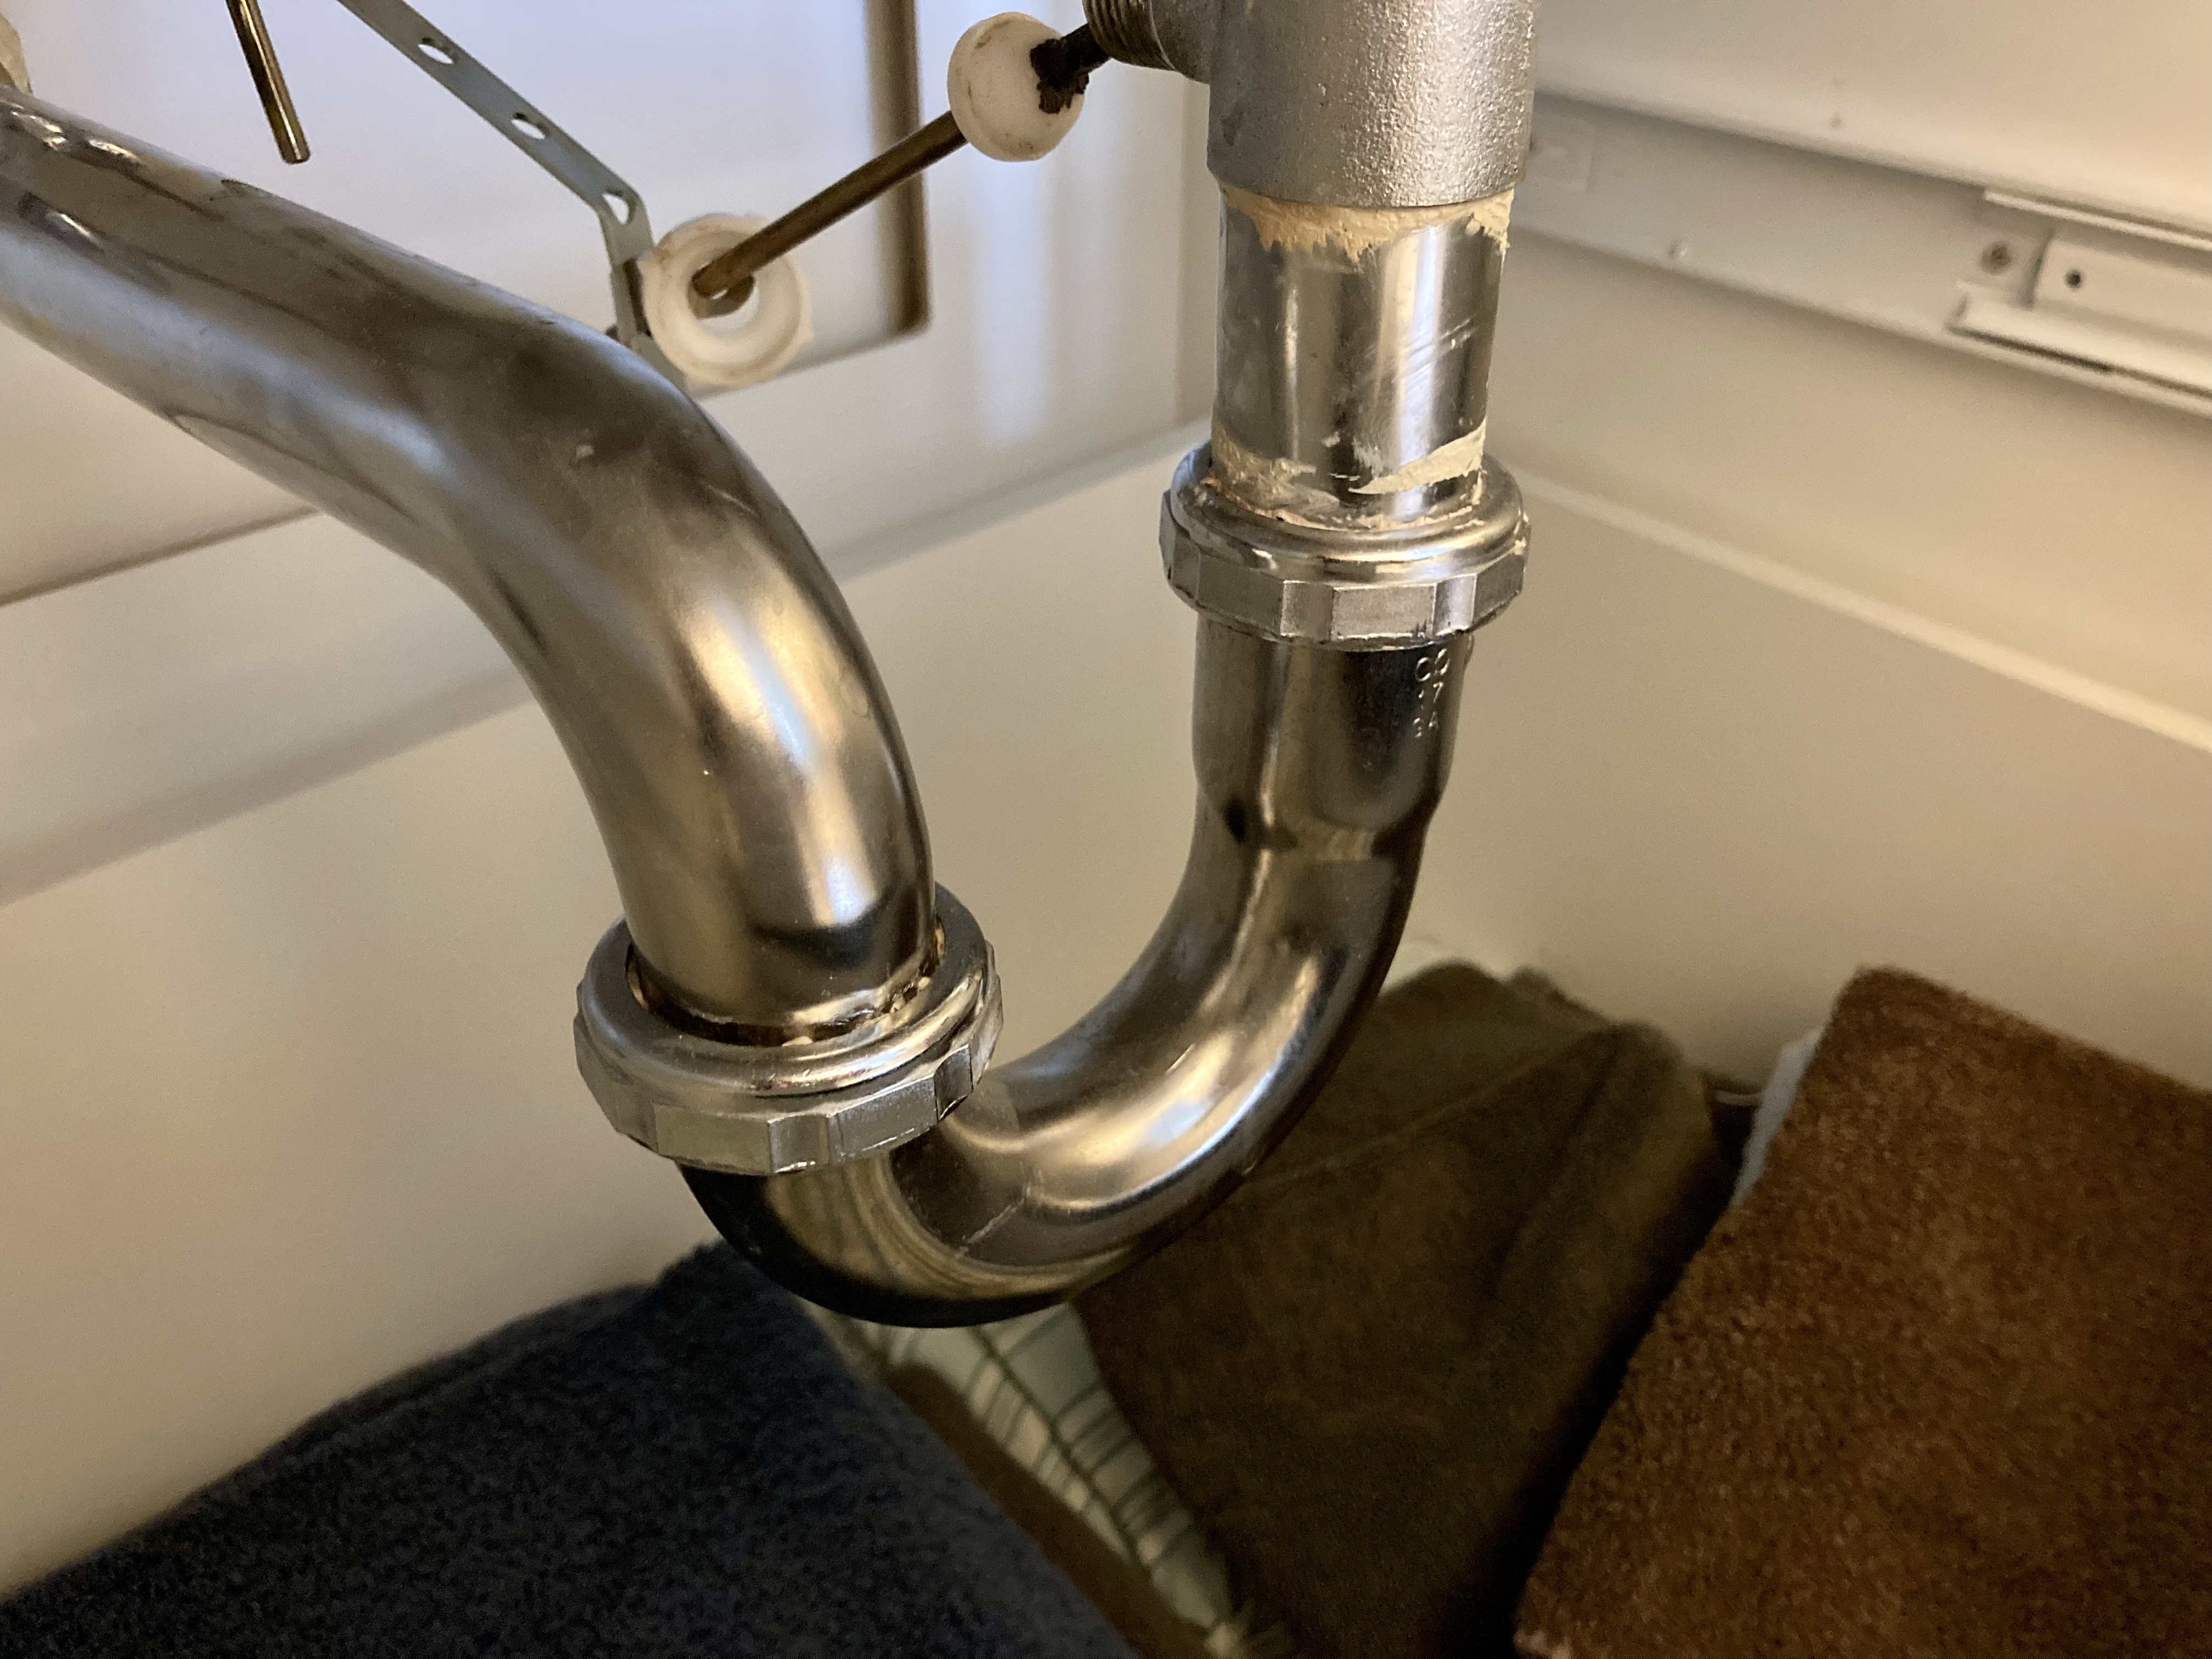
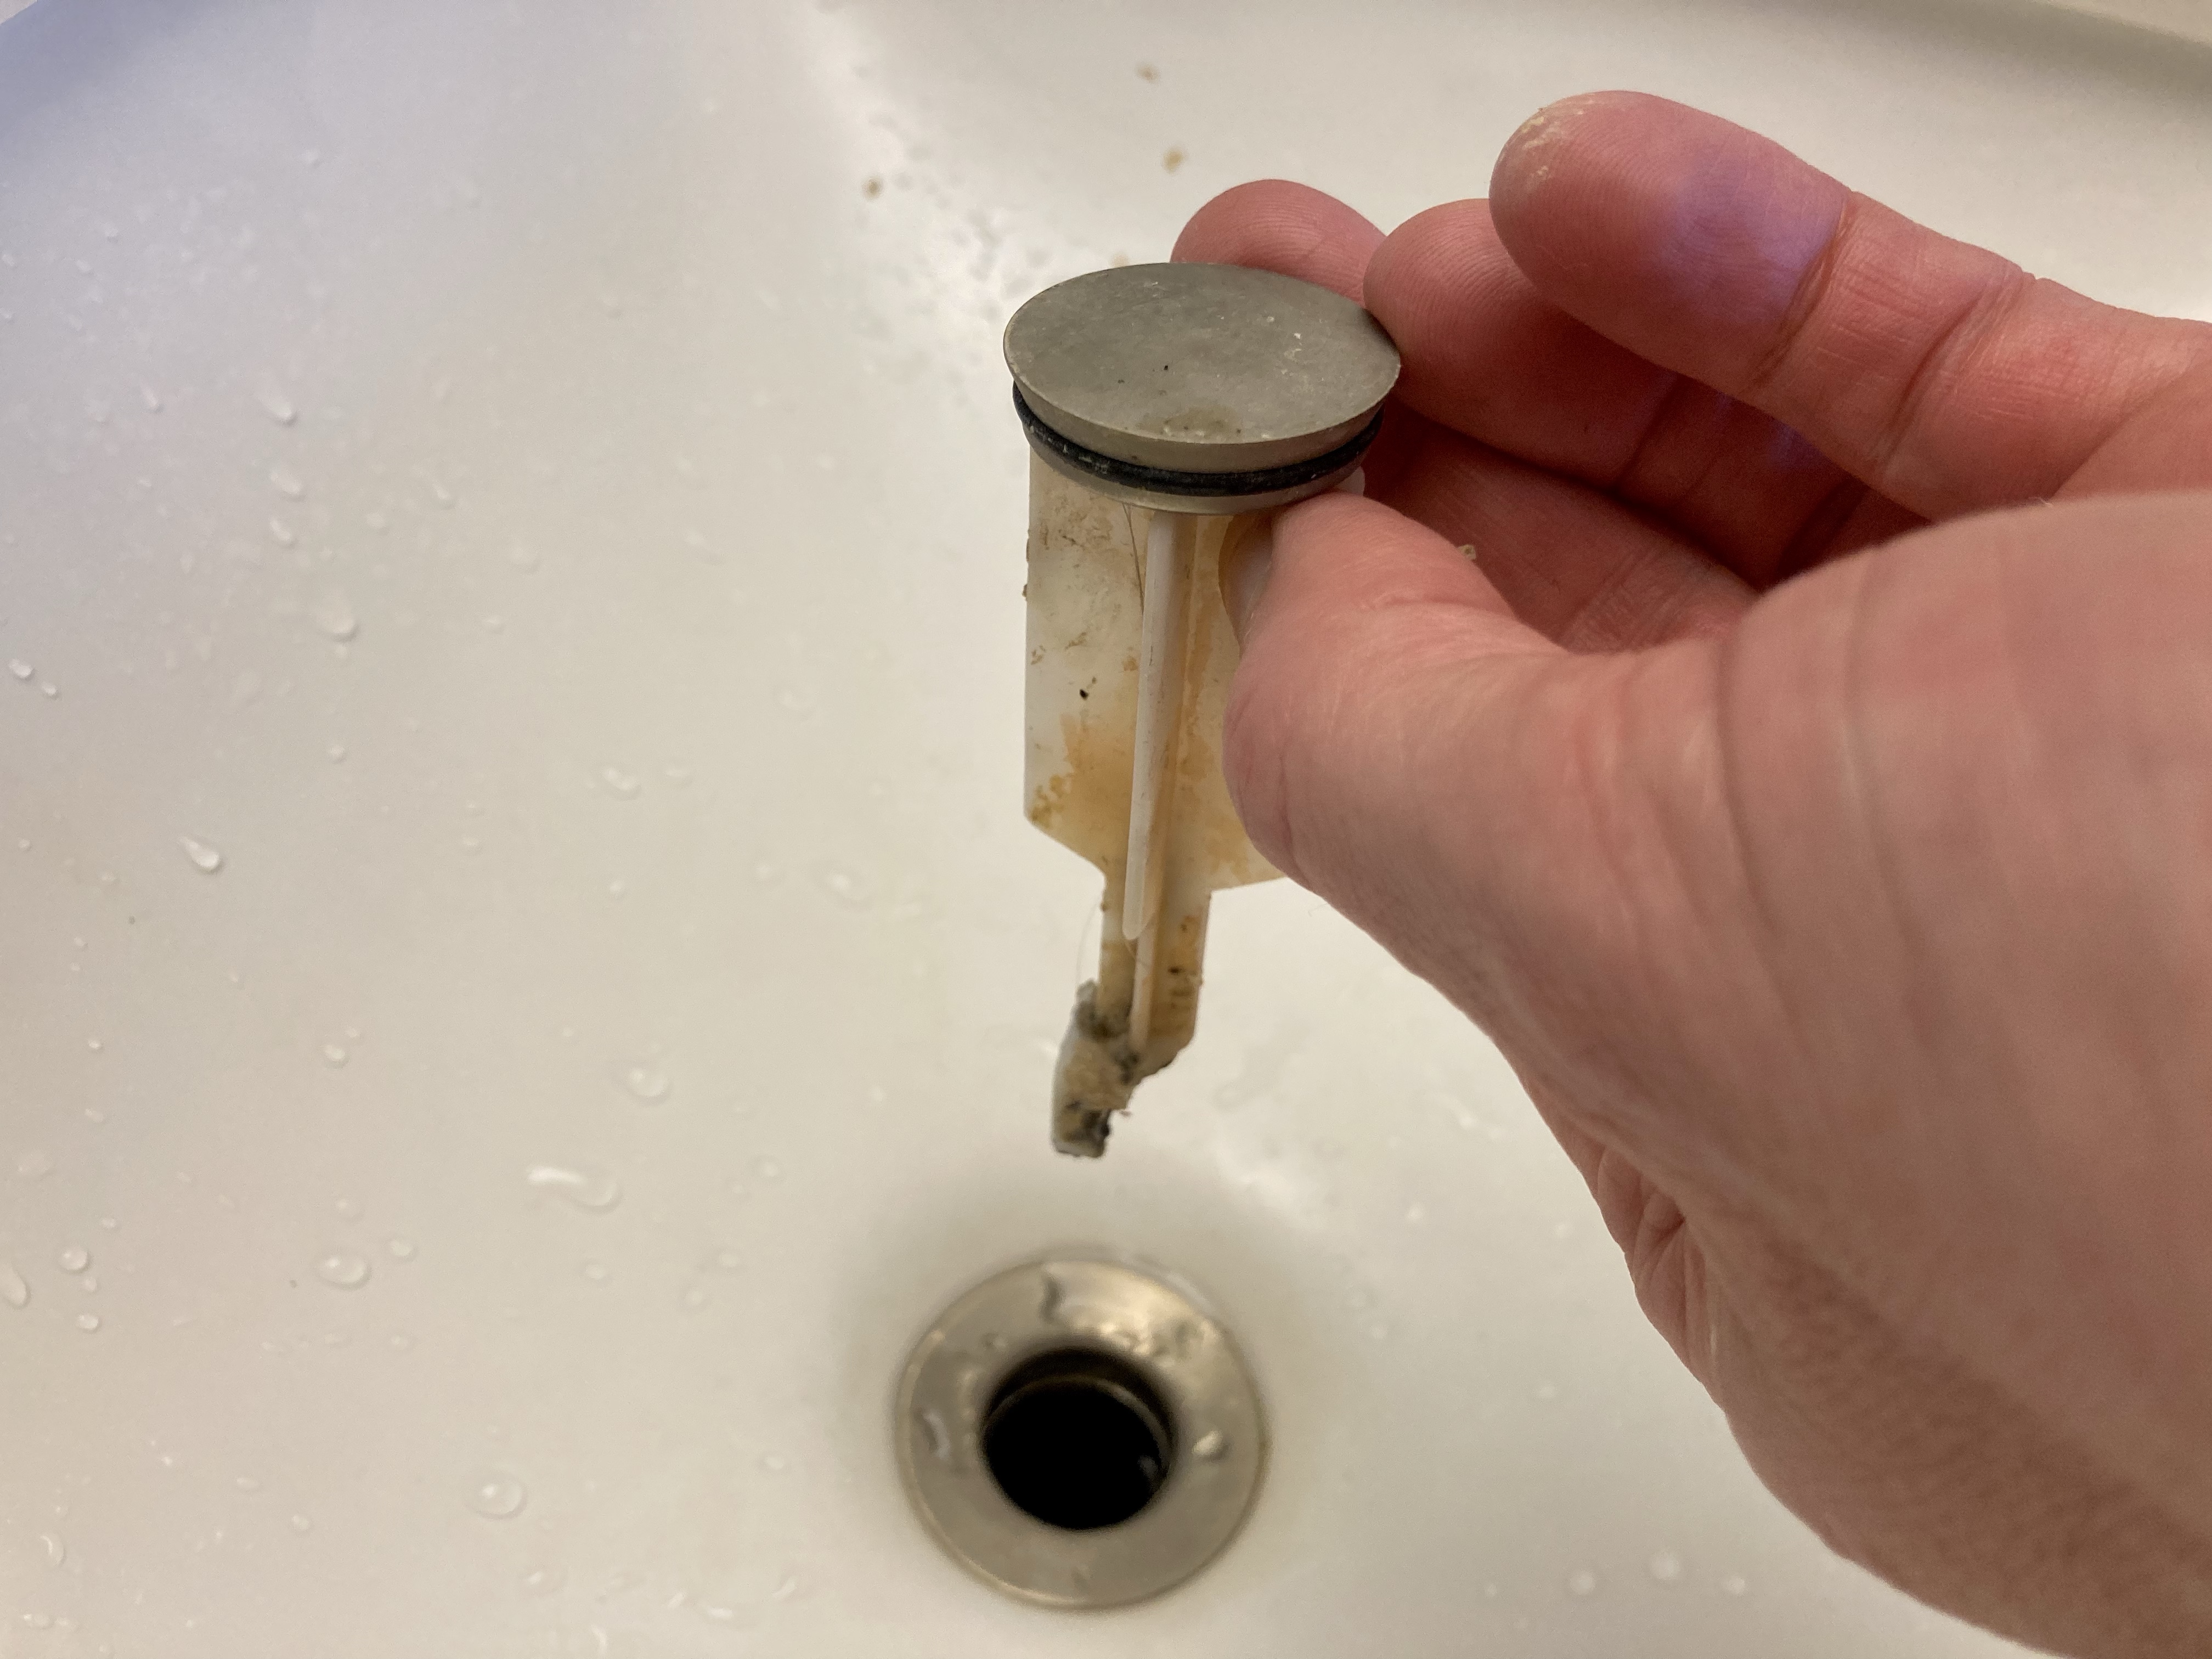
To remove the sink plunger and access all your partners nasty hair you will need to remove the mechanism under the sink that opens and closes the plunger. Its a simple mechanism that just kinda scoots the plunger up and down.
Remove all water from your sink, open the cabinet door to access the underneath, on the back of the down pipe from the sink you will see a mechanism, at the end of the mechanism where it attaches to the sink pipe you will see a plastic or metal nut, no more than 1/2″ diameter. – unscrew that nut. It should be hand tight but often over so many years you may need a tool.
Unscrewing the nut will allow you to scoot the metal finger out that acts to grabs onto the plunger.
Move the finger / mechanism back away from the pipe. Go back to the top of the sink and lift the plunger out (its plastic on the backside)
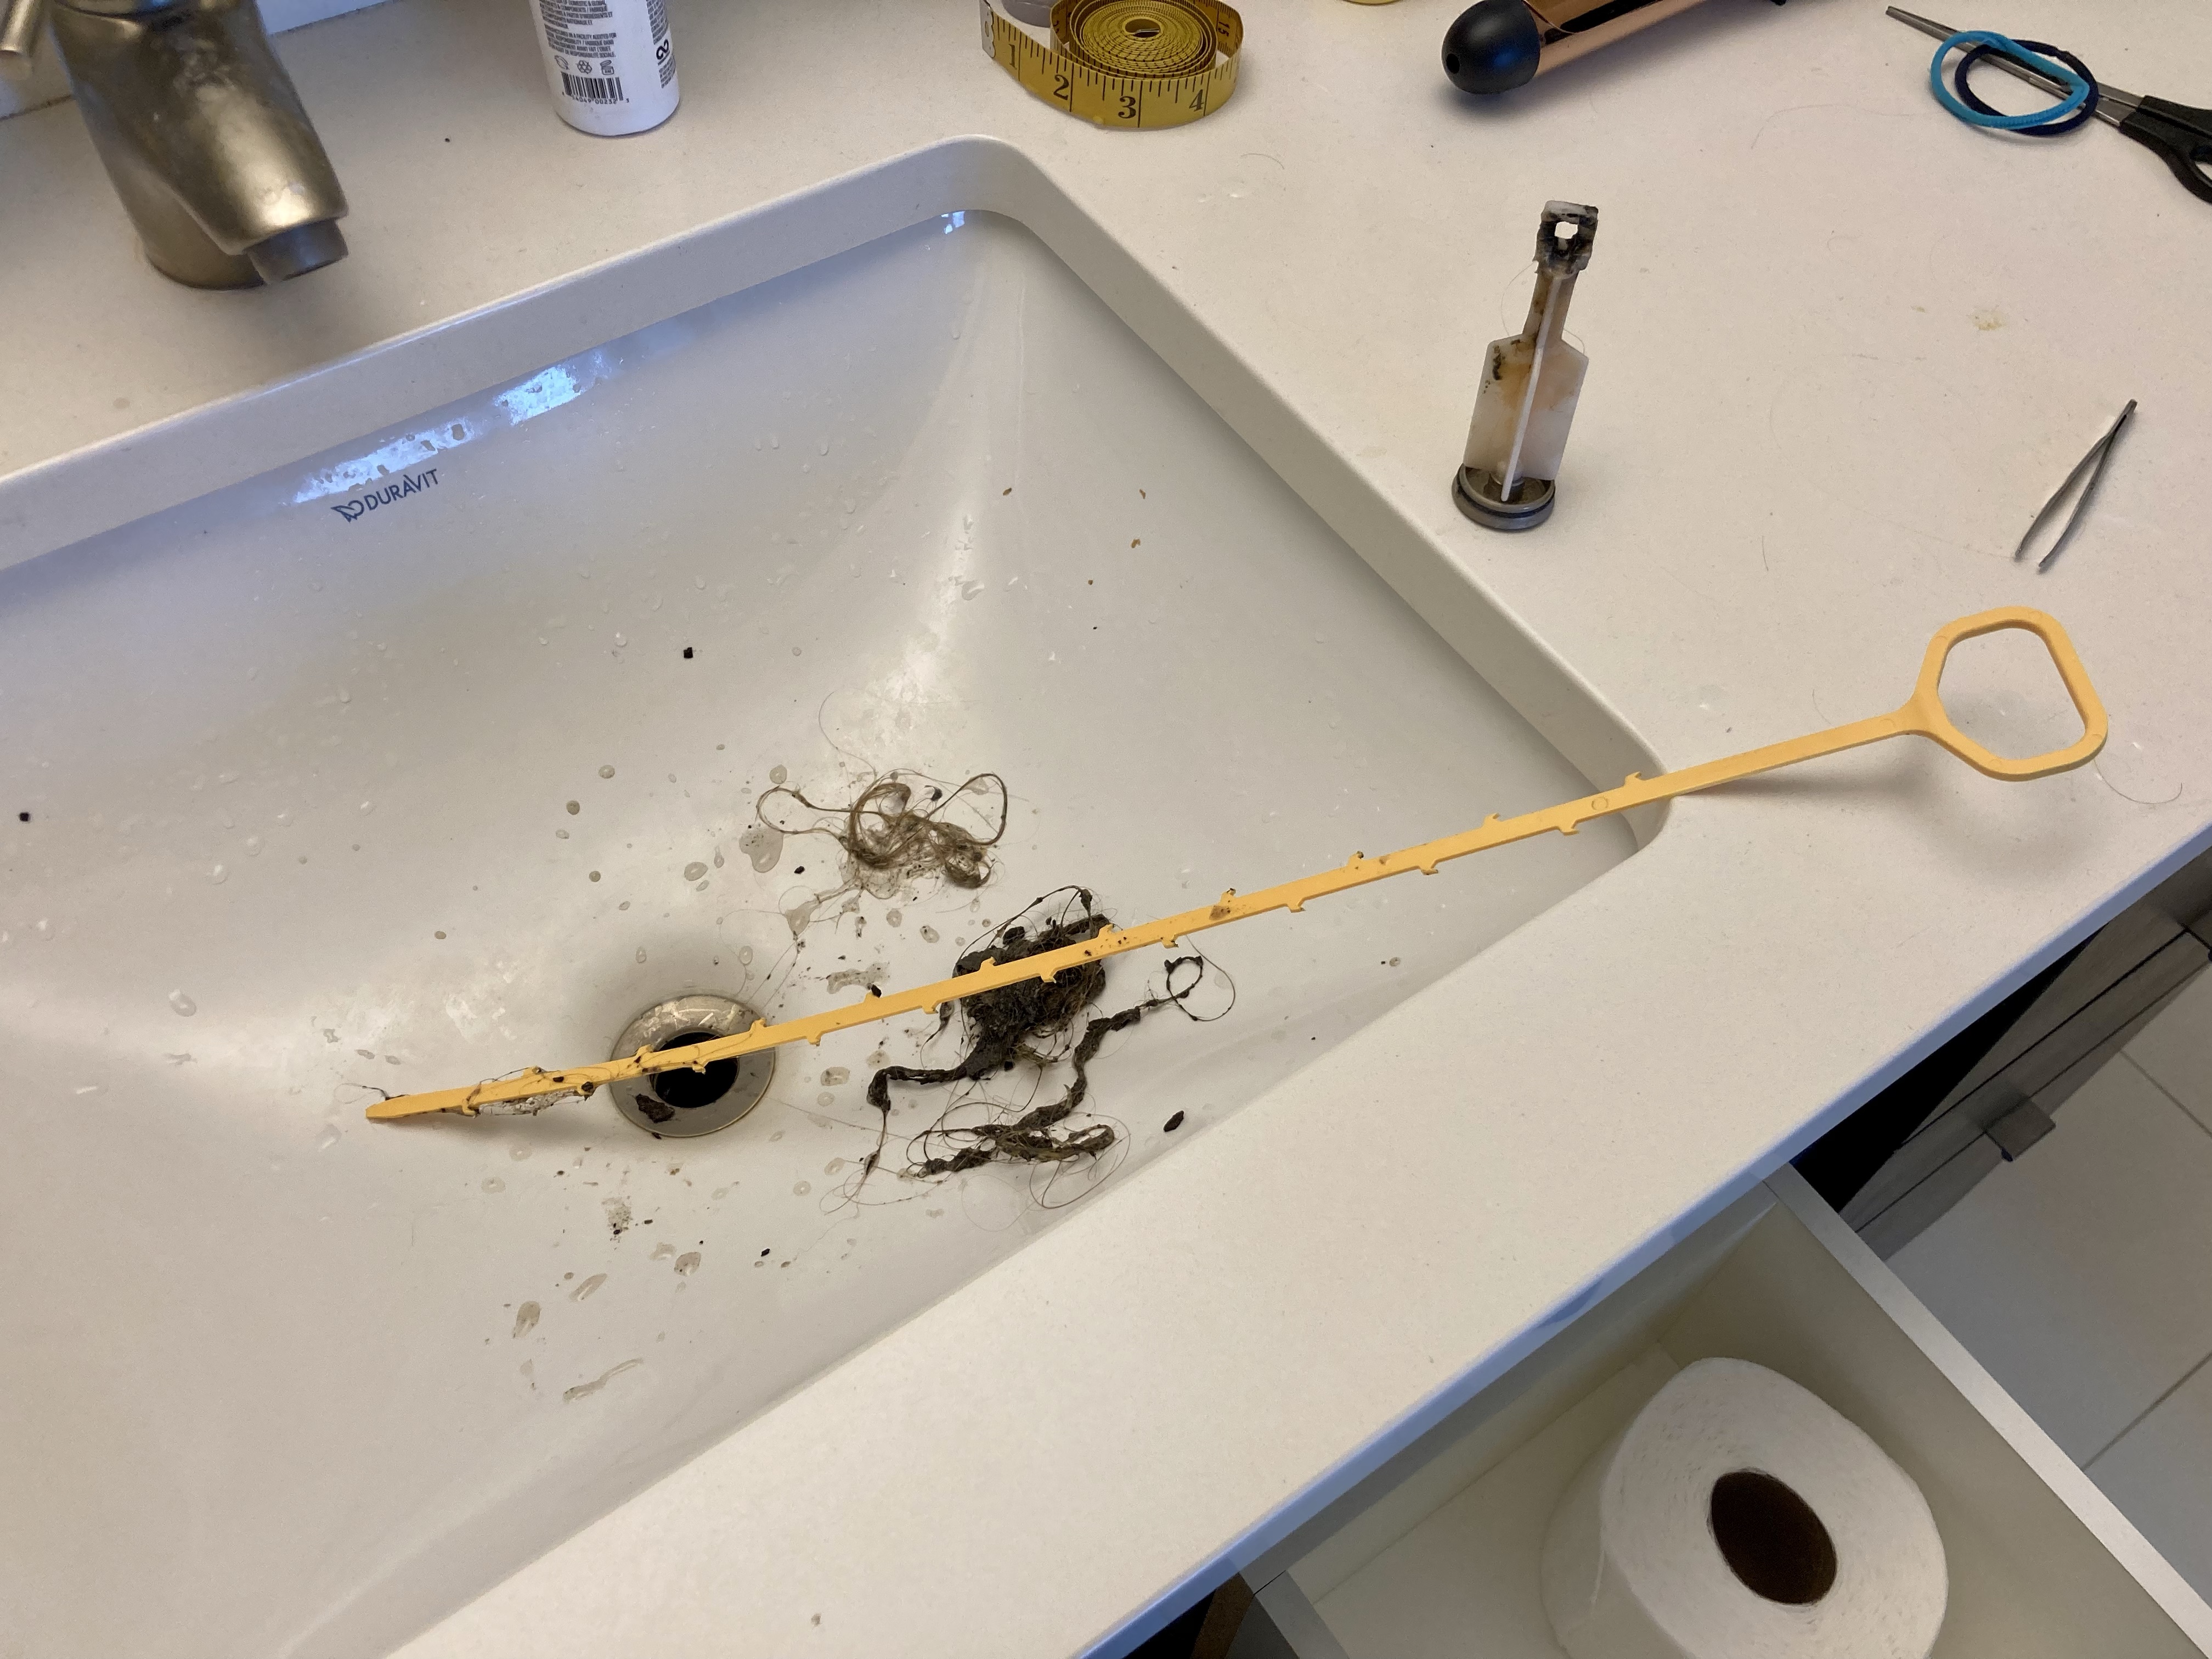
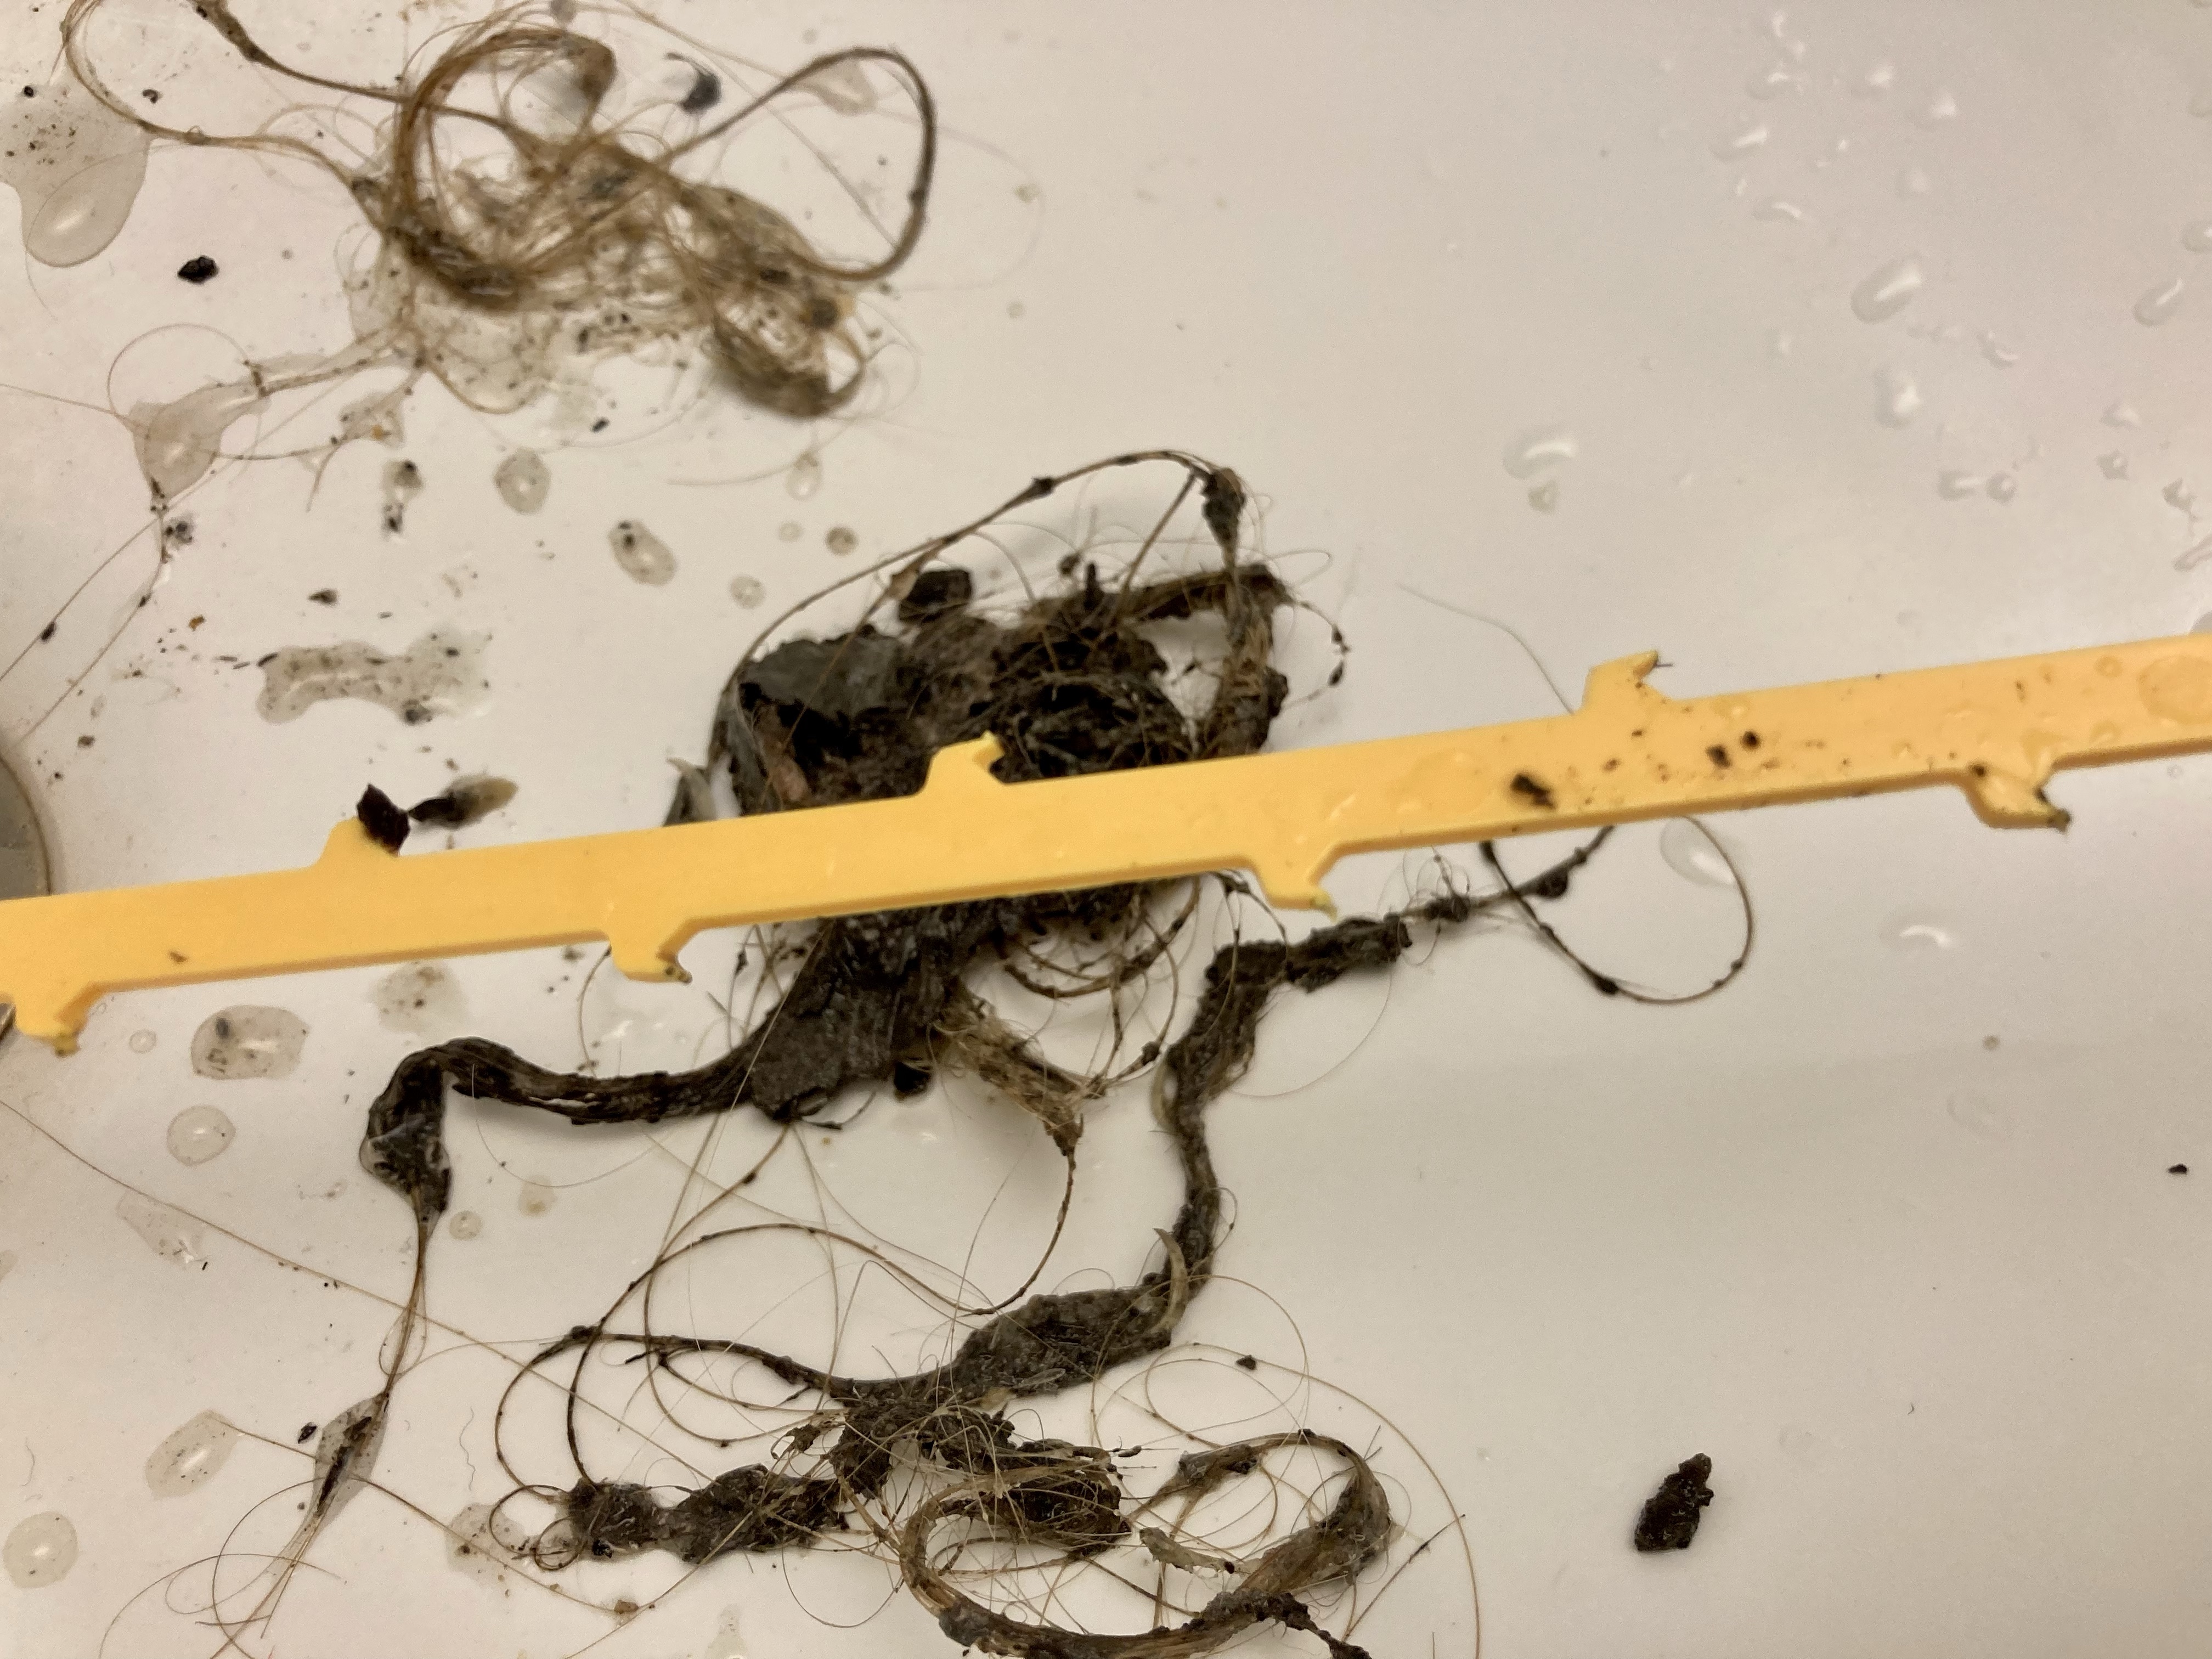
This will give you access to hair loveliness.
While you have the plunger out, use of of them hair snagging hook things to snake down into the P trap. This might pull some other nasty hair for you.
Re-Assembly is a little more tricky but no big deal.
At the sink bow, Put the plunger into the sink . Before doing so Notice the orientation and the (slot for the finger) should be orientated towards the rear of the pipe to allow contact with the metal finger.
Underneath the sink, insert the metal finger into the hole in the sink pipe. If its all lined up it will go in easy, if there is any difficulty pull the finger back, pull up the plunger and check the orientation of the slot.
When the finger goes into the plunger then tighten up the nut. Be careful not to cross thread it. Also only tighten with a firm finger tightness, no more is needed and if its a plastic nut, you run the risk of breaking it.
Check that the plunger goes up and down with the lever / rod at the back of the faucet.
Flush some water down the sink.
You are in business till you partner clogs it all up again.
Images below

SHOWER AND WATERFLOW
If you press firmly on the small rubber nozzles of the shower head, just sort of give it a massage with your fingers!. It will restore water flow! it breaks up any minerals or deposits that restrict the water flow. I just did it on ours and it can make a big difference
BULBS AND TUBES
See the lighting section.
WASHER DRYER
I haven’t had many problems. The original units are Frigidaire stacks, which are well designed and been in-service many years. Other companies like GE and Maytag will buy these units and re brand them. Just a great piece of info for ya there 🙂
Dryer –
clean your lint filter (near the door)and get the tubes sucked once every few years. getting your tubes sucked actually makes your unit more efficient and perform better, so its worth it plus the avoidance of fire hazard
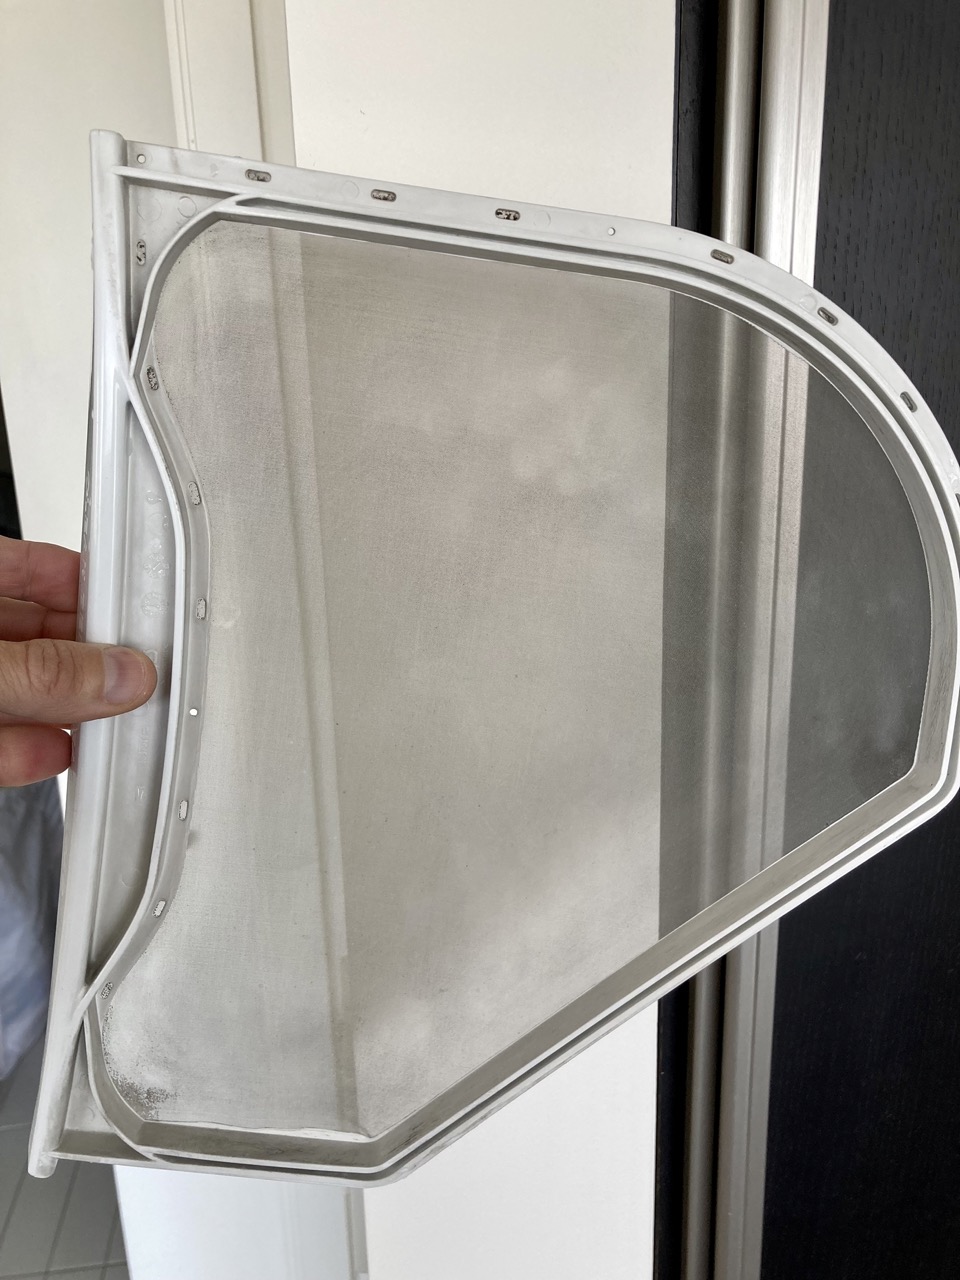
Cleaning the lint filter – right inside the door is a removable filter, it is made with a fine mesh that captures lint. I have found that you can easily remove large lint from this filter by bunching with your fingers, which you should do on a regular basis. BUT, if you have had this filter for a while there is a high probability that it’s not doing the best job look close… because the finer mesh is actually still somewhat clogged. The mesh is very fine and needs extra hand to get clean. I see this as a once in 5 years kind of clean.
The easiest way to clean this micro dirt in order to get it 90% clean is to submerse in water, soak in the sink and use a little bush to scrub and flex the mesh to release the dirt. Becareful not to press too hard, the mesh is delicate.
Here is one I cleaned, sorry I don’t have a before photo
Washer –
Lint Trap – there is no user serviceable lint trap on the machine, its buried in the back of the unit where the water comes it. Theoretically you could do it, would be a big pain that needs removing the unit from the closet and pulling lots of stuff apart.
Gasket – if you don’t dry the gasket or leave it open to air it may mould. Easy thing to do is to wipe the gasket with a dry cloth after use and leave the door ajar a little, this will prevent moulding. Many dudes can replace then for $500. It’s an OEM part that’s designed to be replaced and about $110 and is a bit fiddly to do yourself as it needs two tensioned spring clips removing. I have a link somewhere, hit me up if you need it.
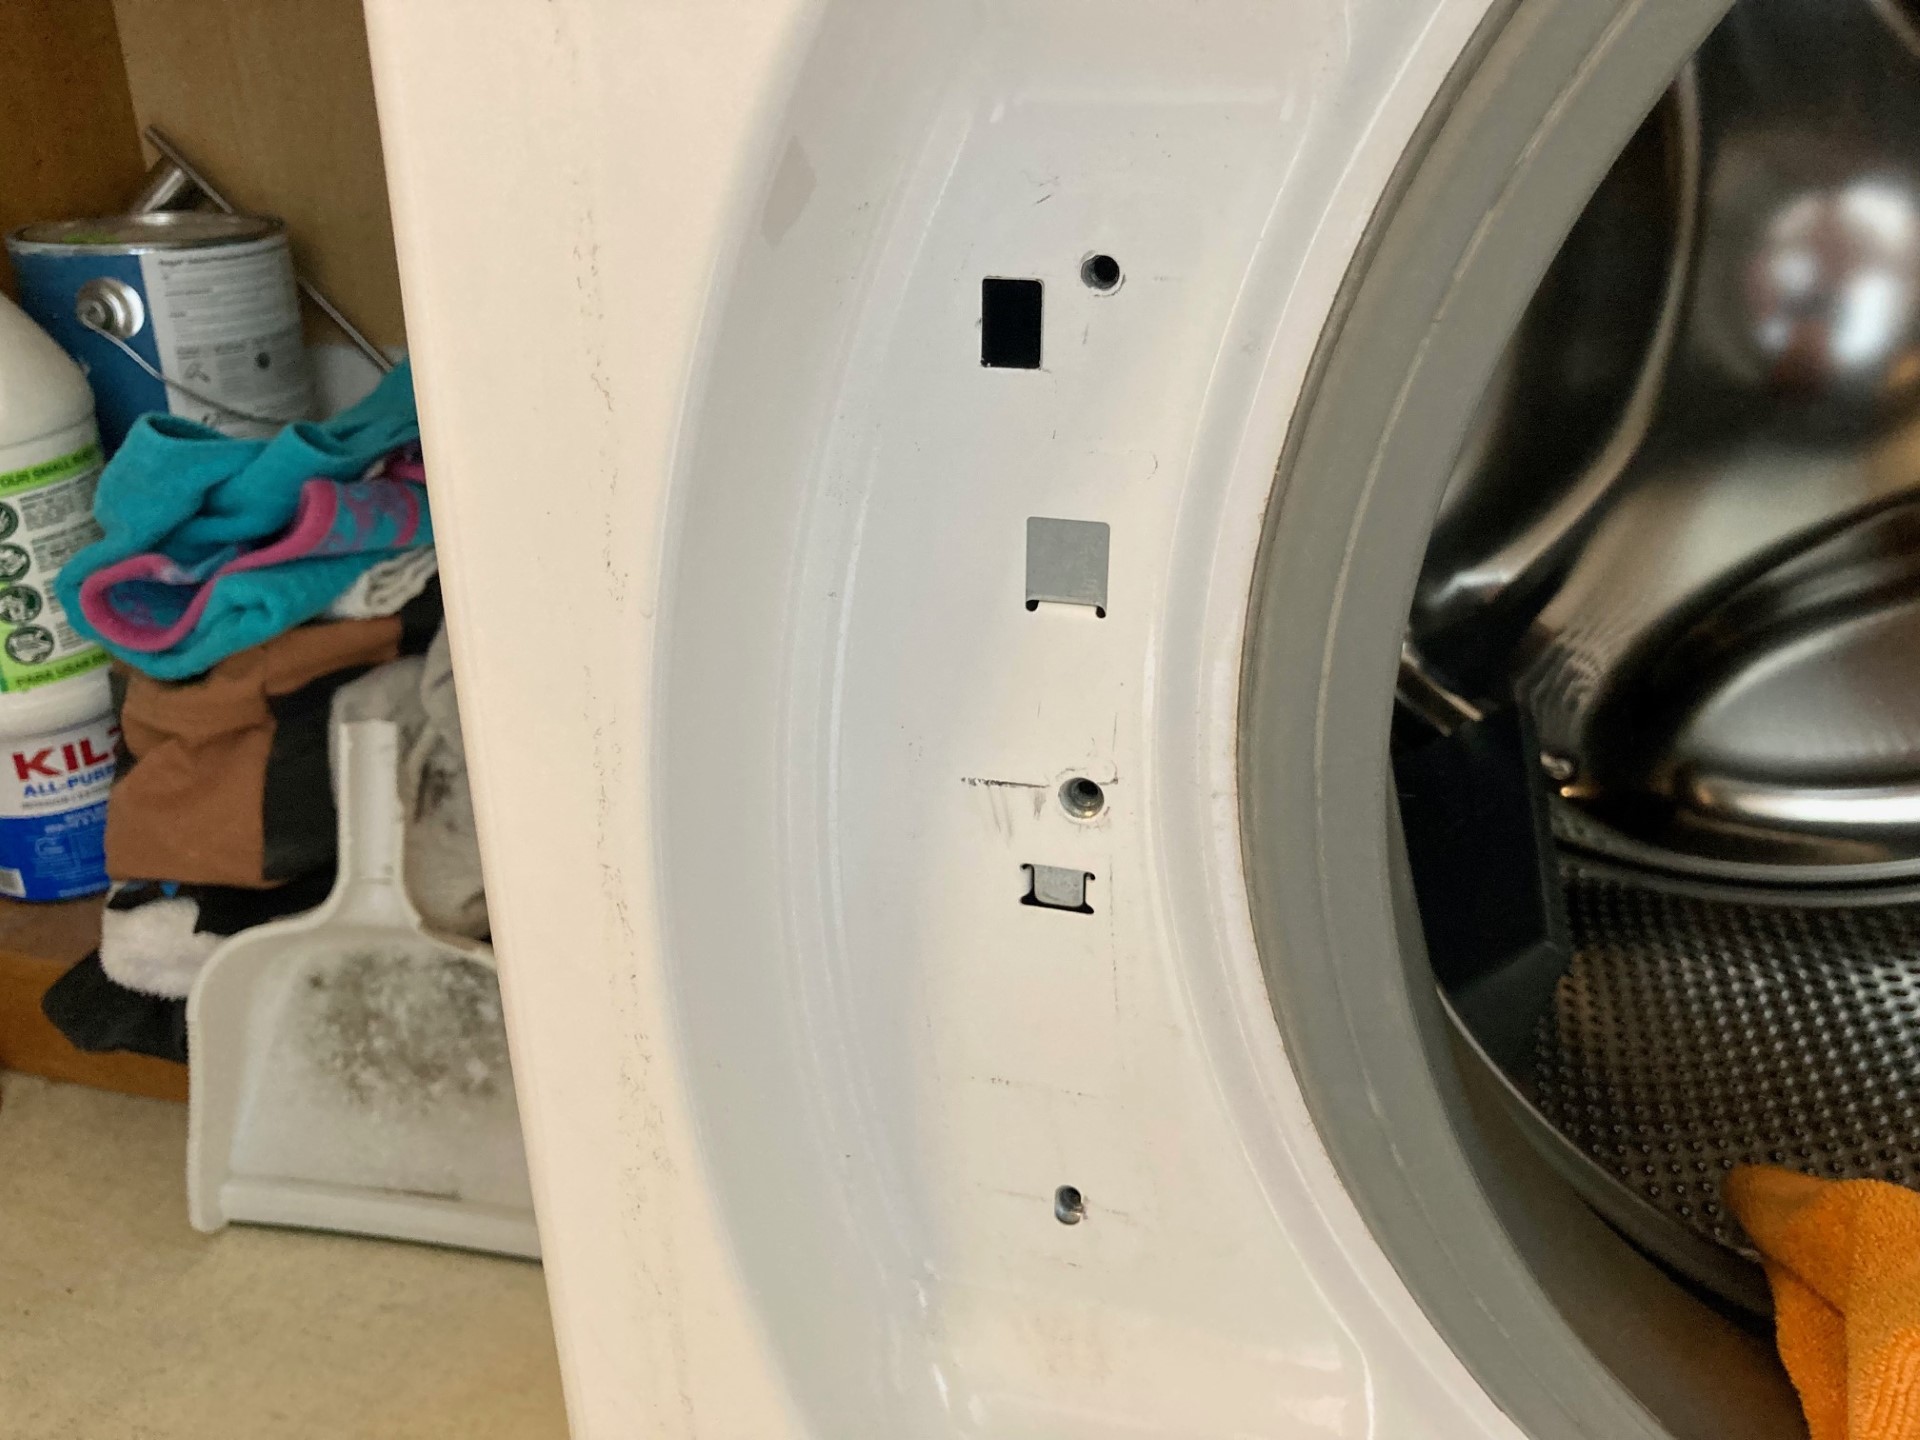
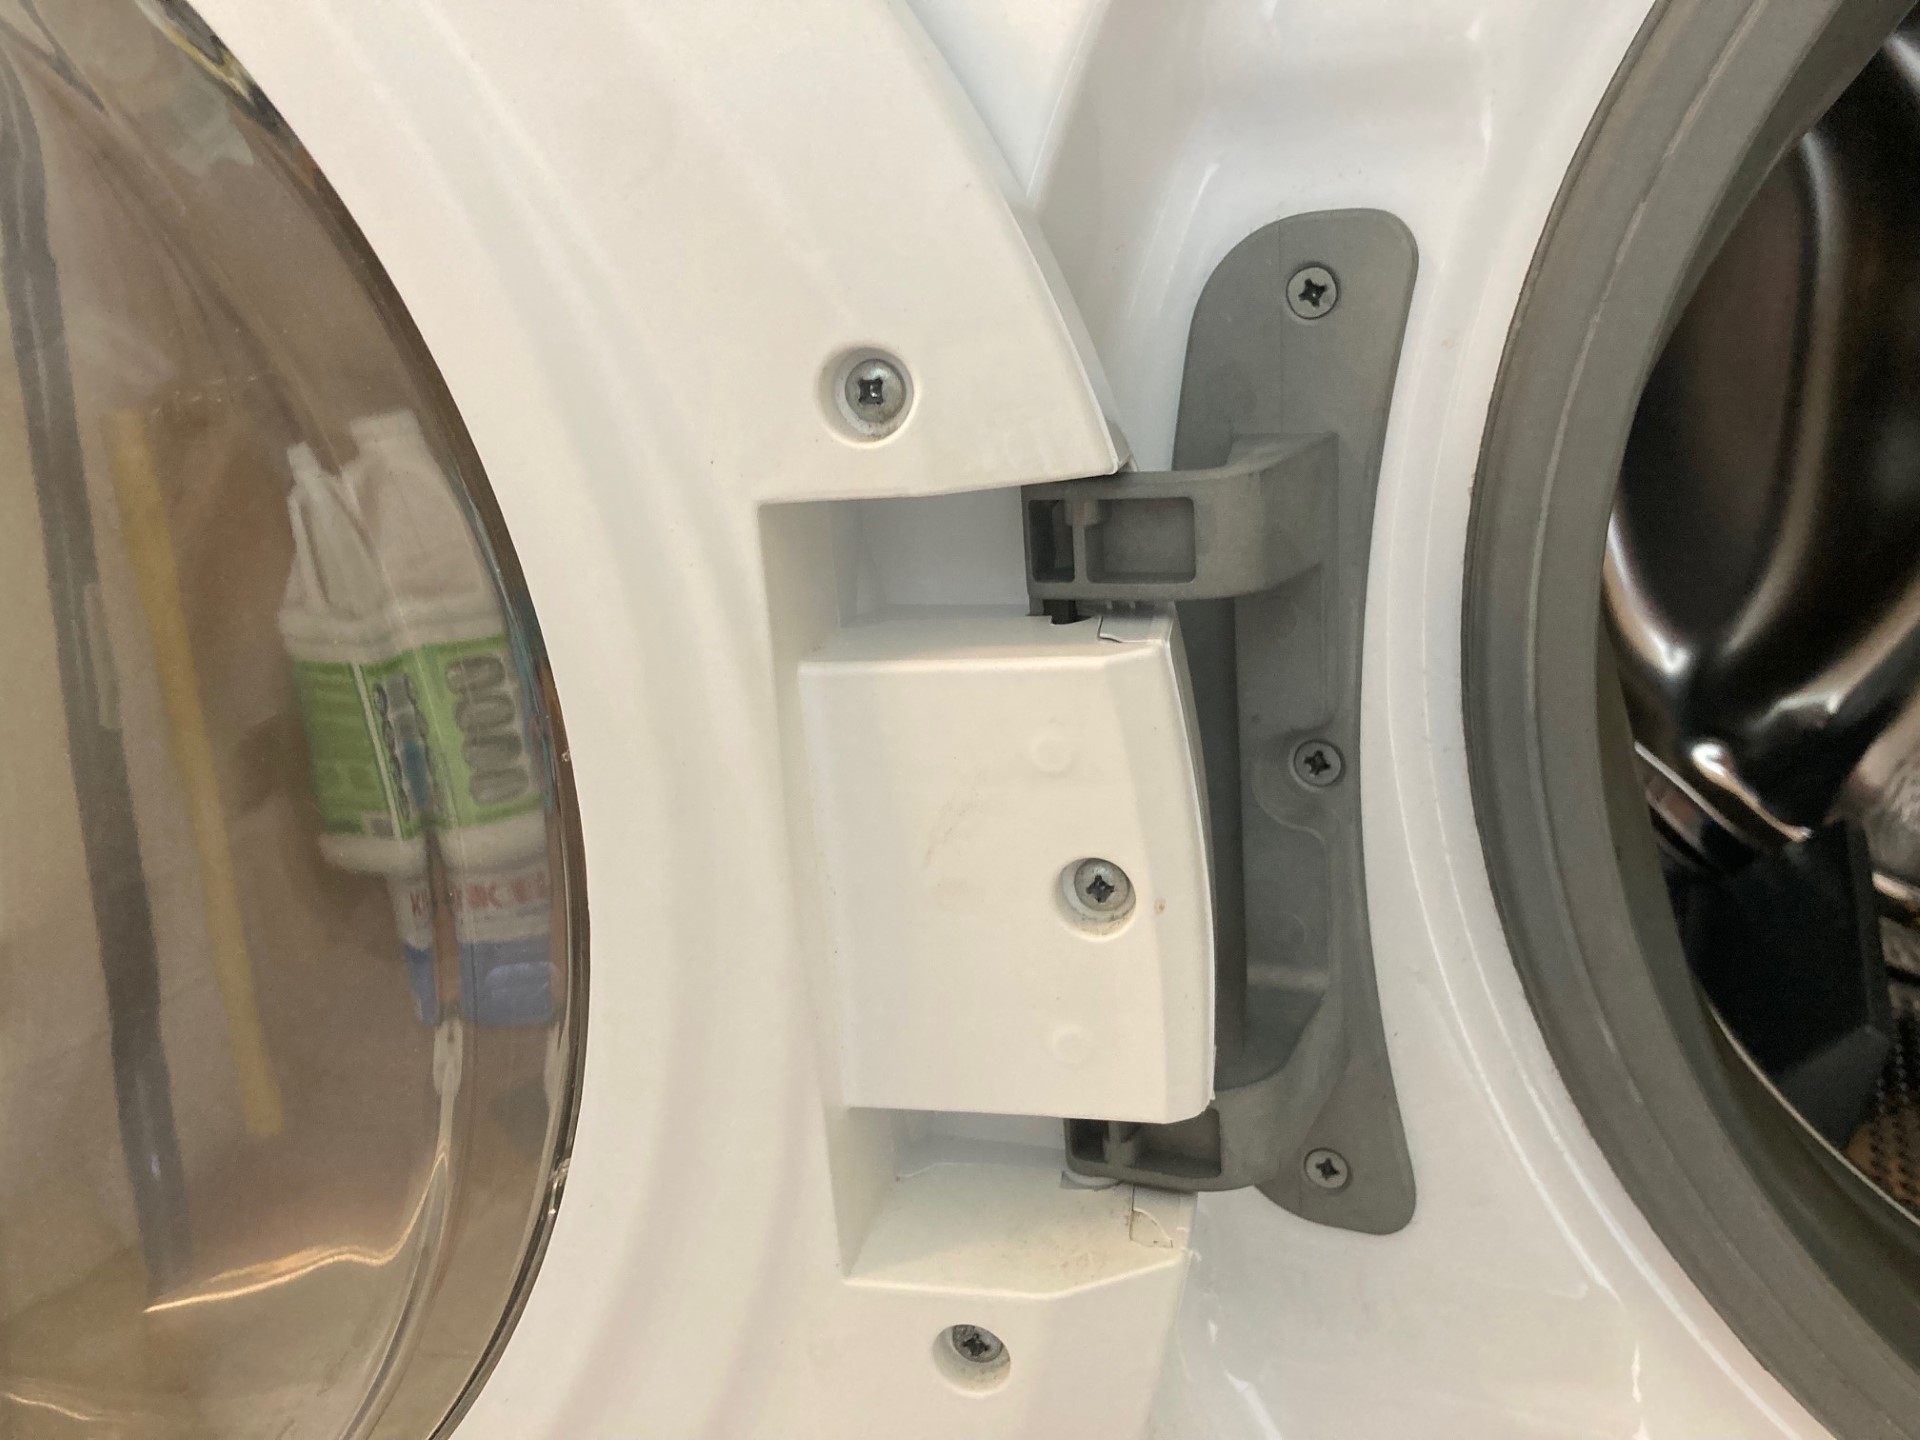
Replacing the door!
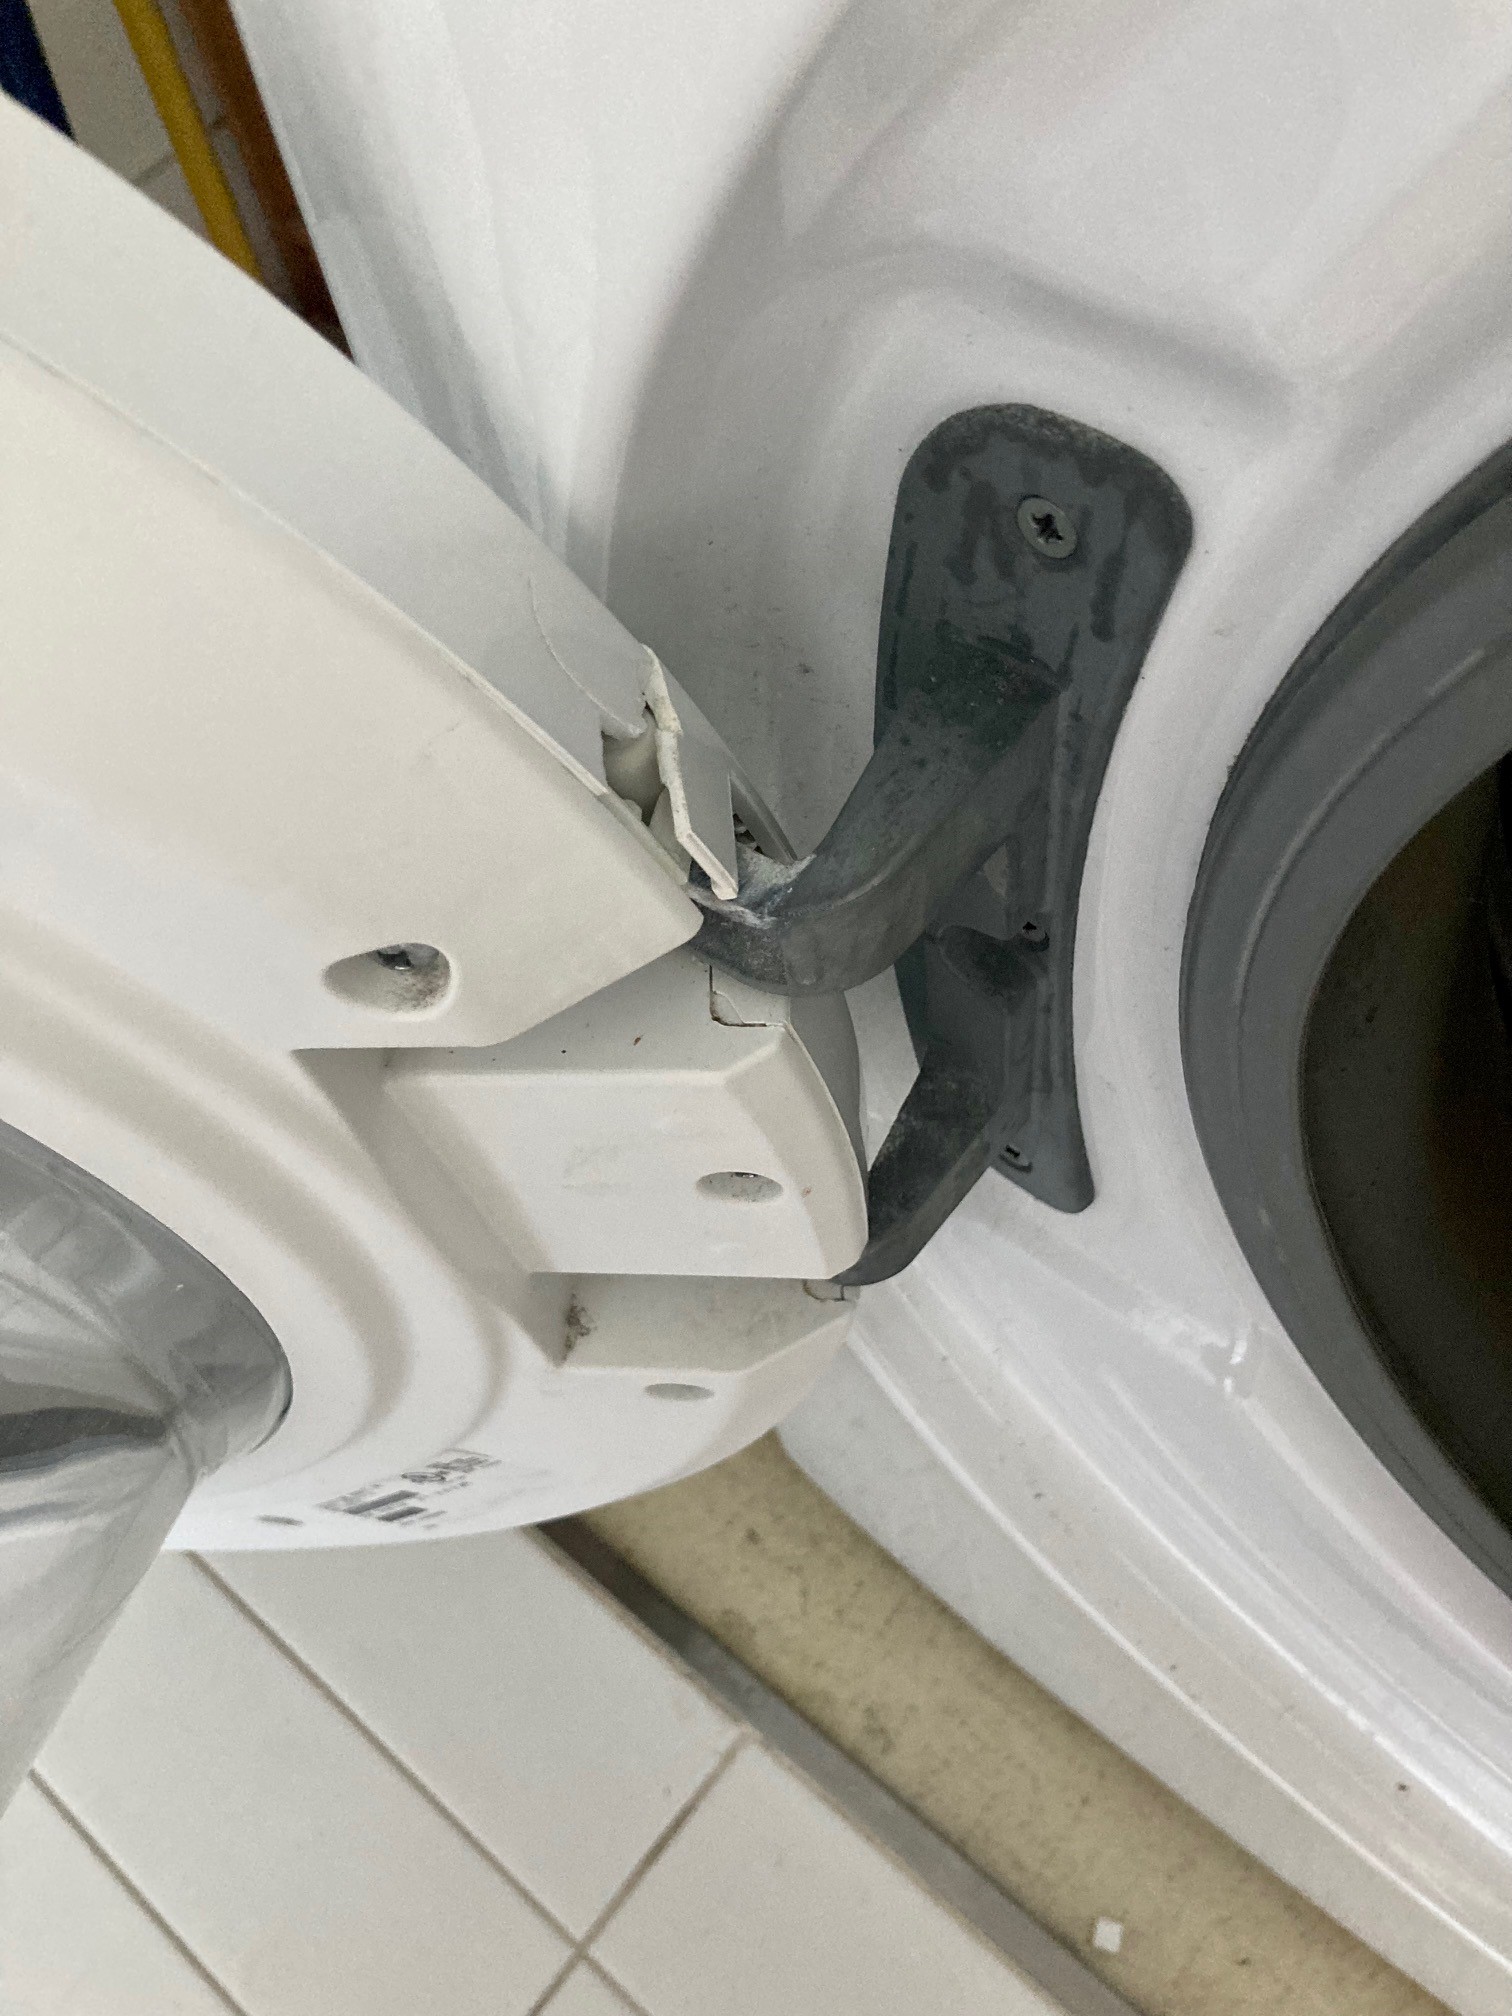
I recently replaced parts on the door unit on our original Frigidaire Stacked Affinity unit. Model FAFW4011LWO
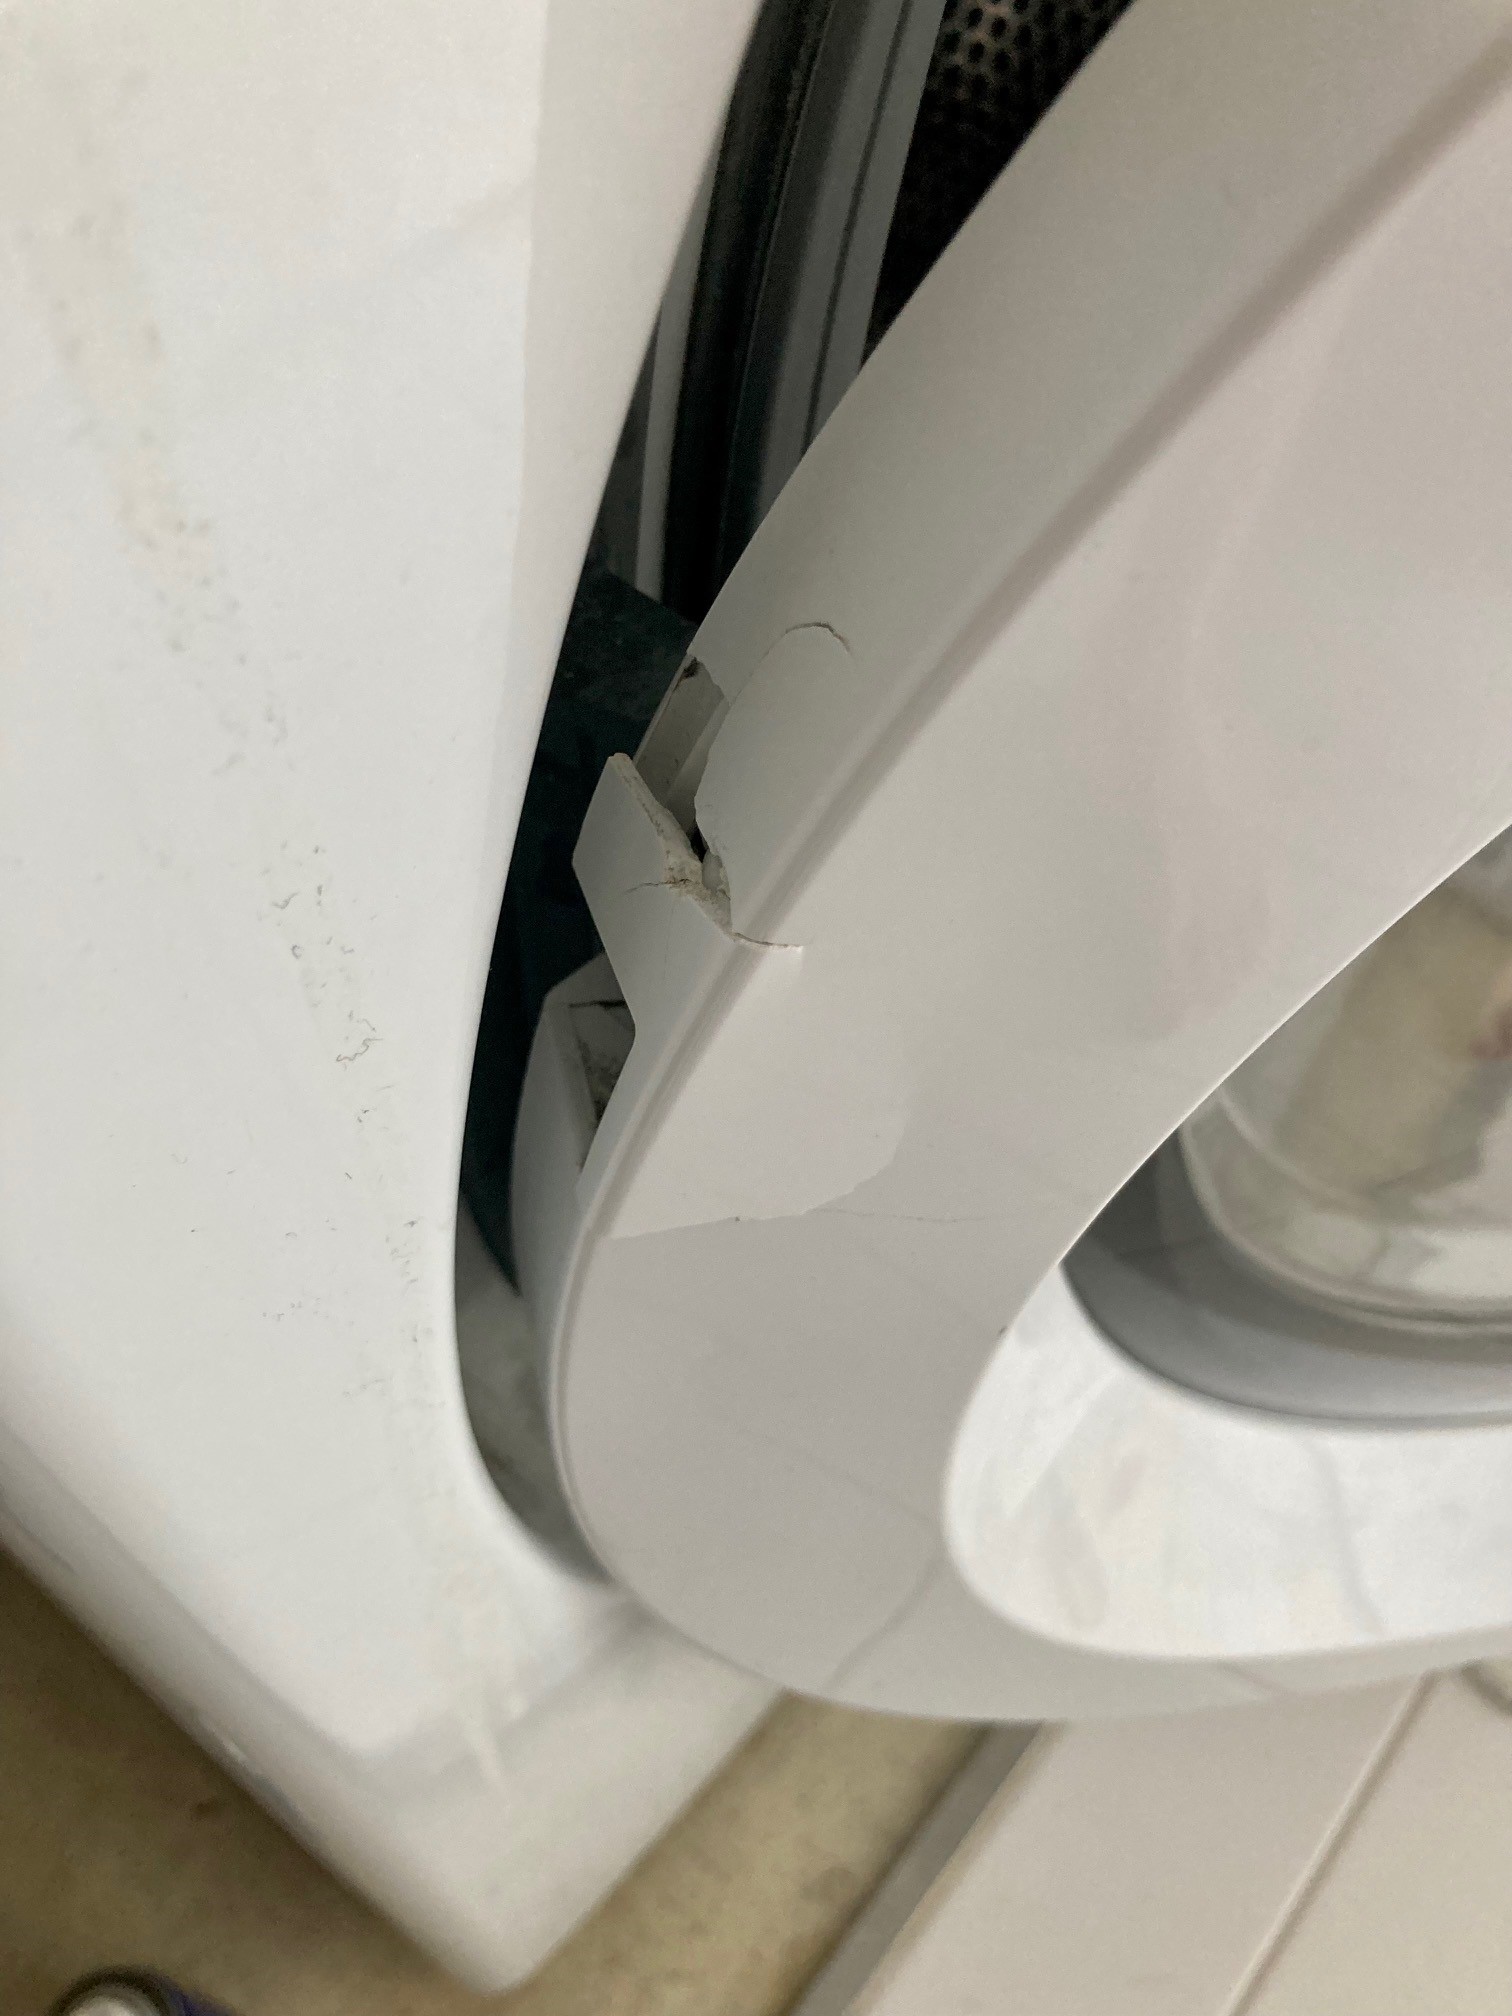
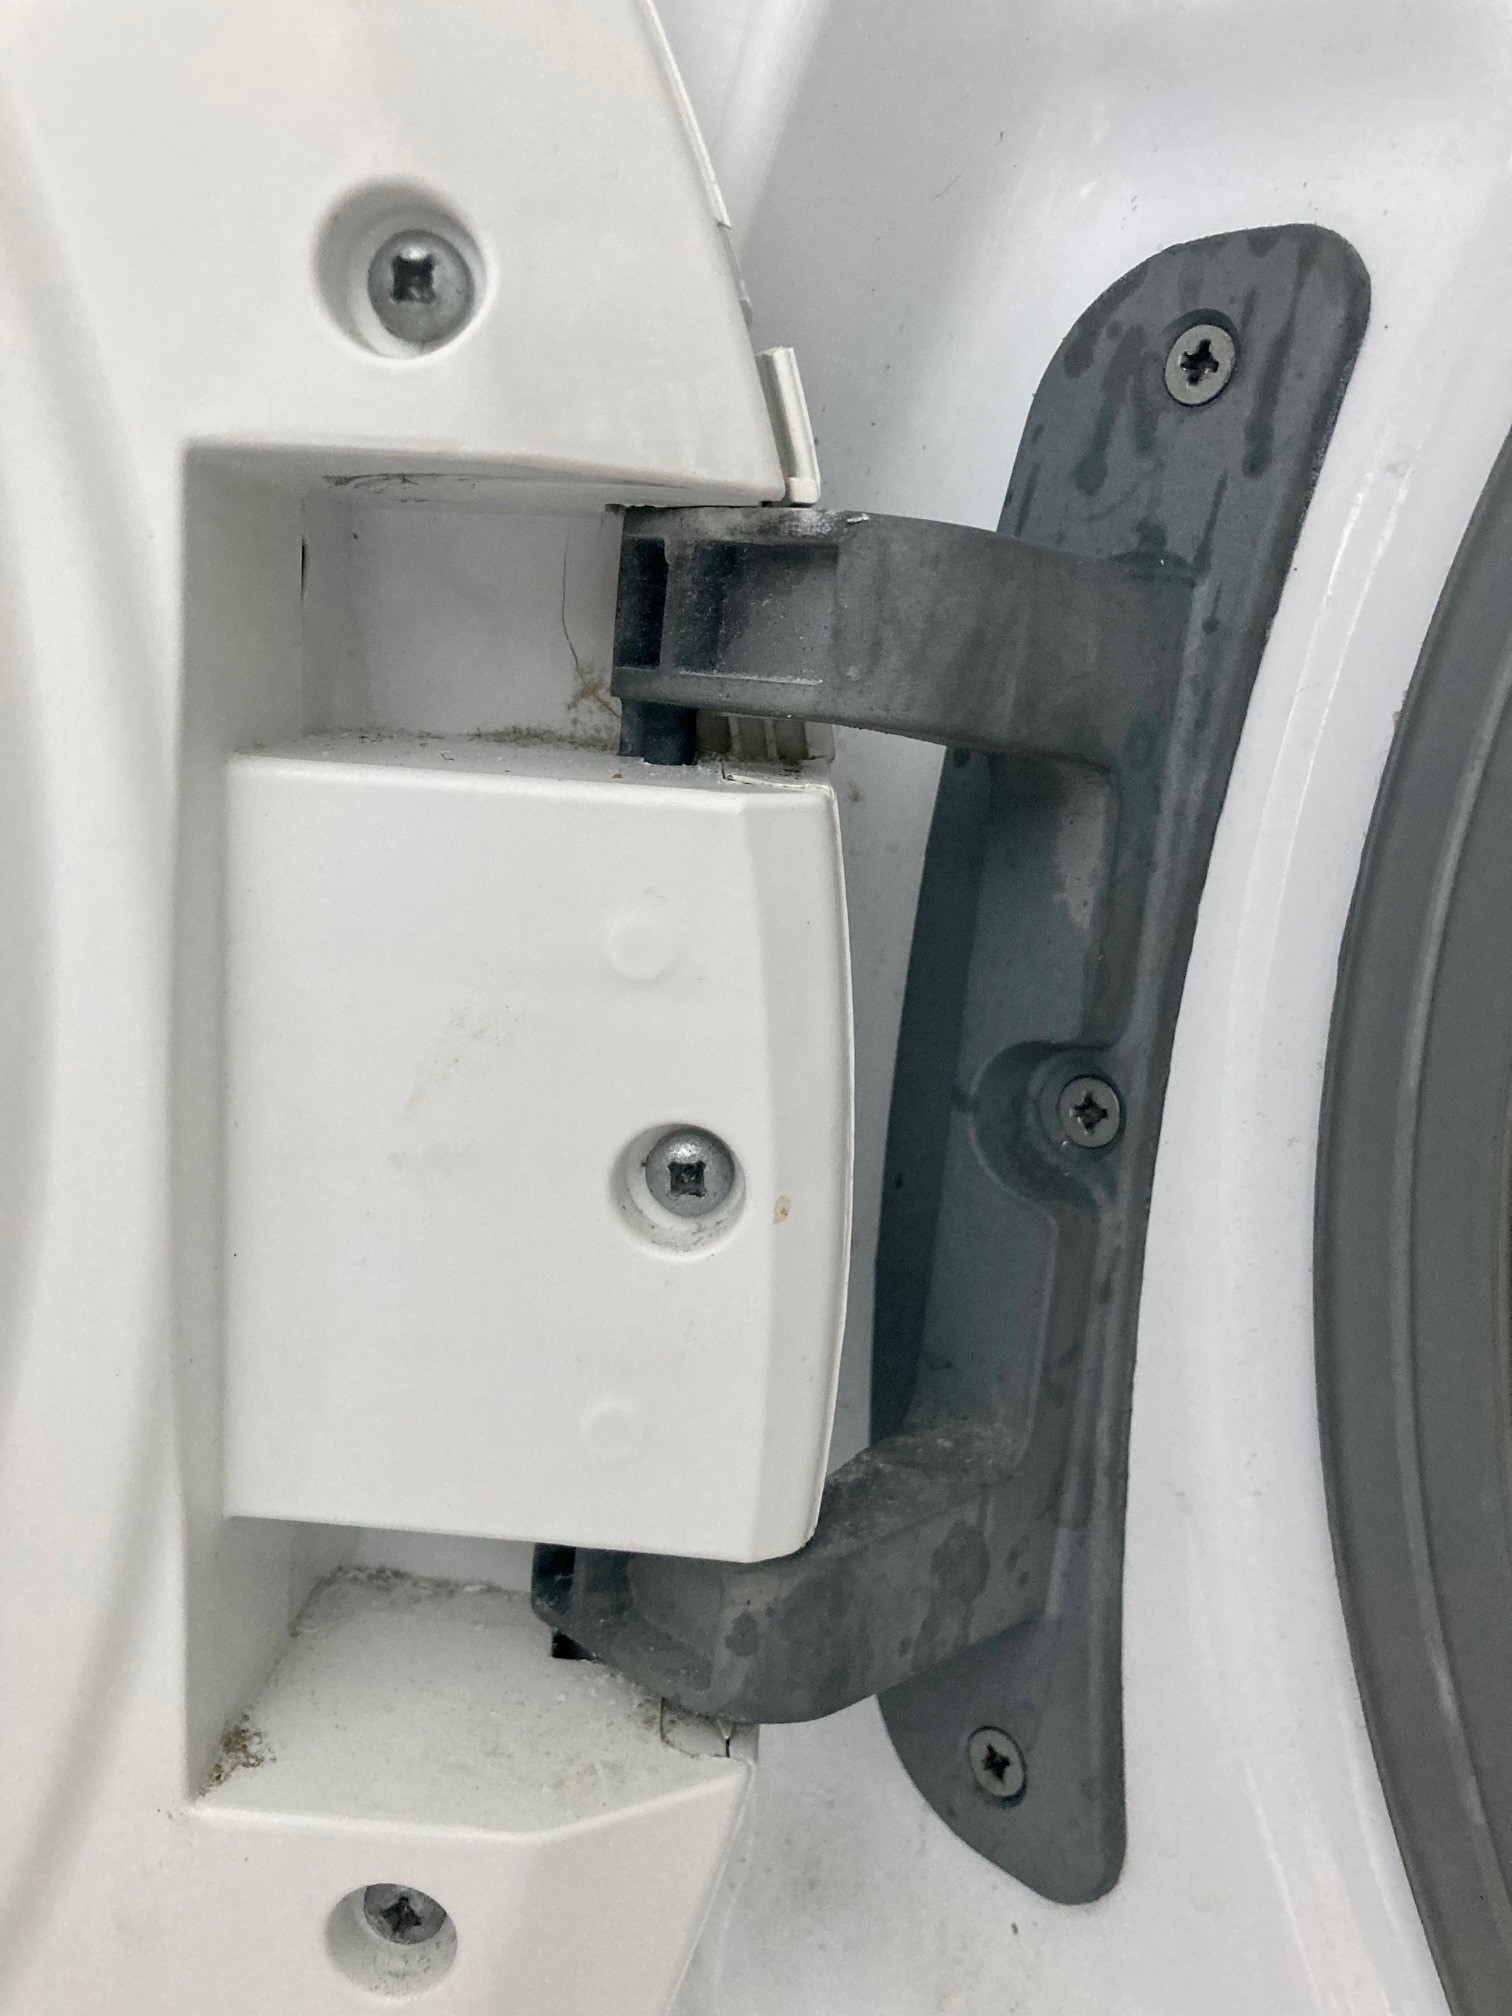
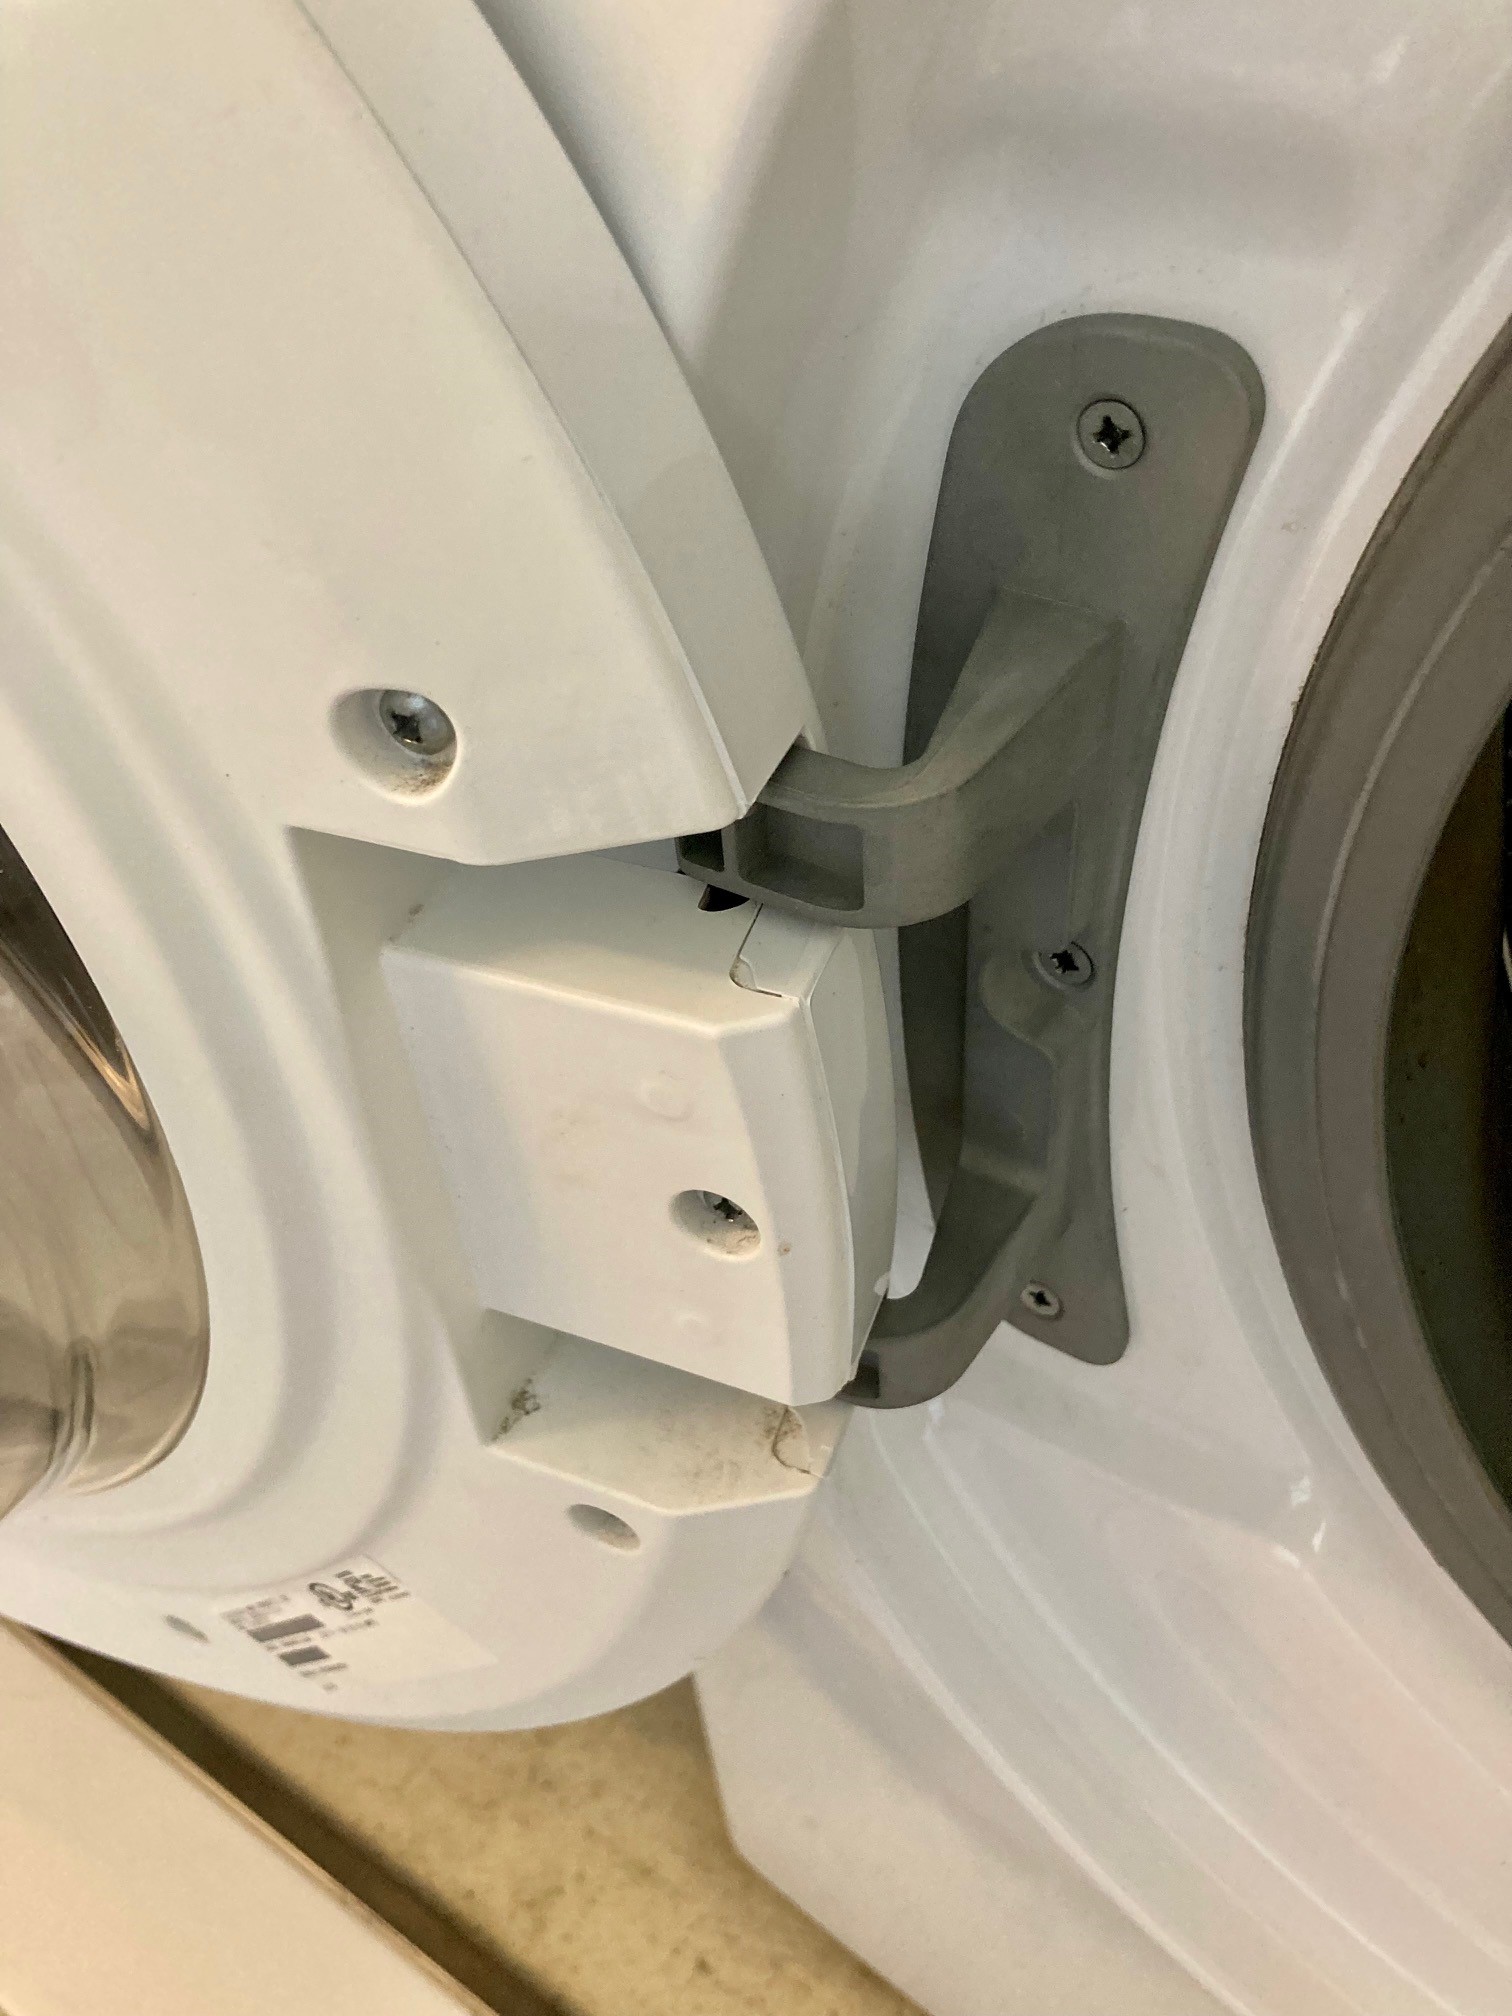
The problem: The door wasn’t closing very well because the hinge had broken , probably from someone leaning on it. A symptom of this can be a slight seepage of water from the very lowest part of the rubber door gasket.
The diagnosis: the lower part of the metal hinge had broke and was causing breaking to the top of the front plastic cover. The plastic cover aligns the hinge tabs that make the door close properly.
Replacement parts can be bought online, they are not cheap but available and probably less expensive than a repair man.
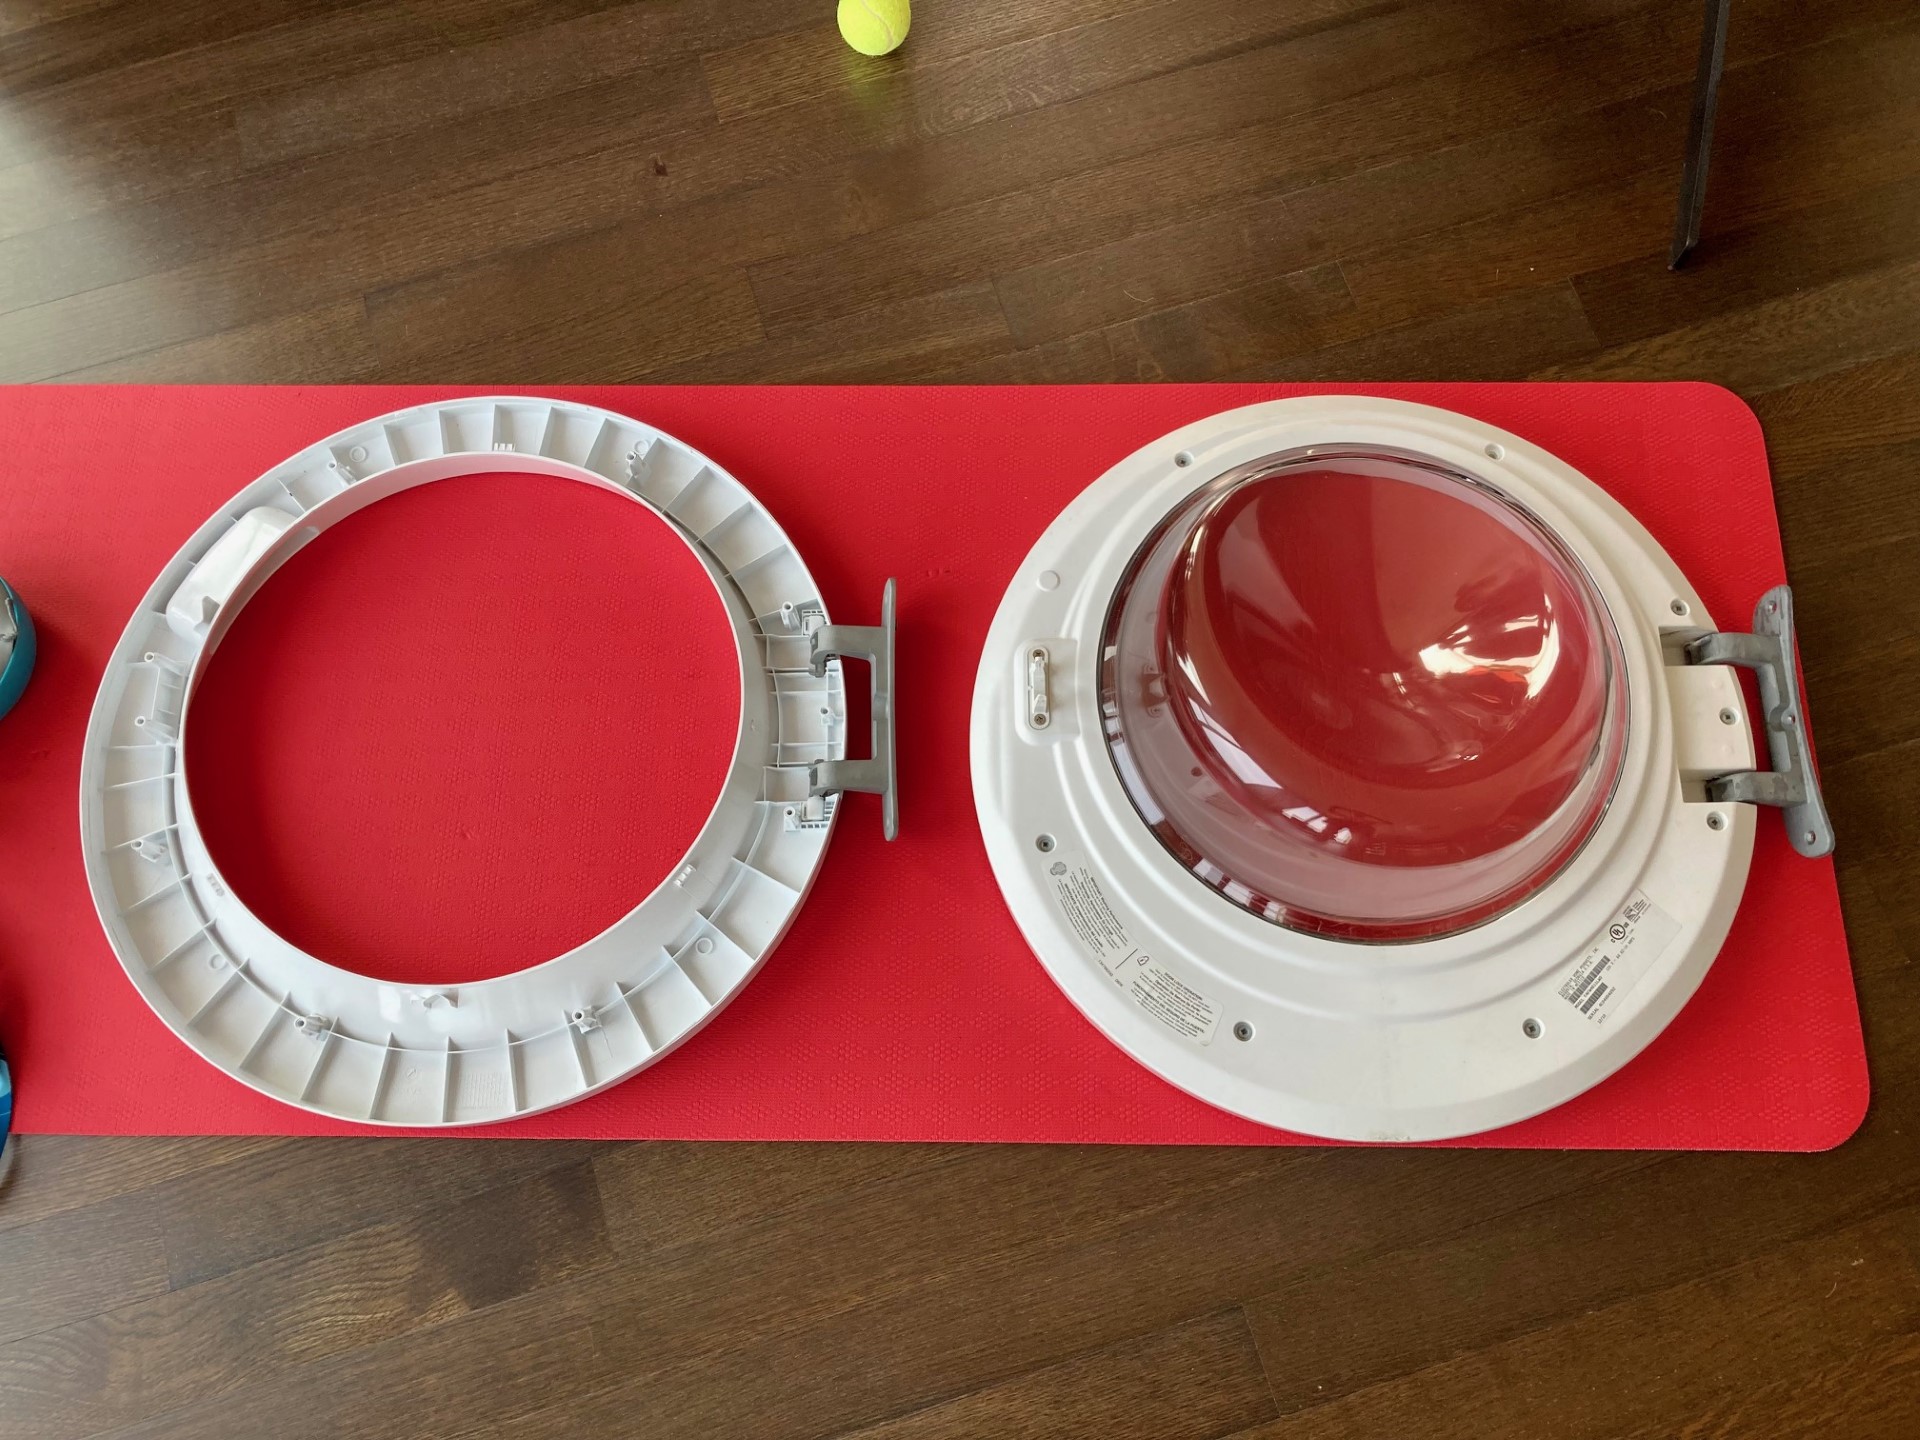
I replaced the door hinge and a plastic front cover that had cracked with the broken hinge.
Both parts I bought on Amazon. The plastic part was said to be an OEM Frigidaire part and the metal hinge was a copy part by a company called SZHY-LINK.
Below are the Part Numbers
| Part# | |||
| Hinge Assembly | this was broken | 134550800 | ~$30 copy ~$80 OEM |
| Outer Plastic Door | plastic was broken | 134550500 | ~$105 OEM |
| Flat Transparent Plastic | 137577700 | note: I didn’t need to replace this | |
| Glass (Bowl shape) | 134366400 | note: I didn’t need to replace this | |
| Inner Plastic Door | 134550700 | note: I didn’t need to replace this |
There is a website called repairclinic.com, the prices there are inflated, so I searched elsewhere and found items I needed on Amzaon and some other sites. Frigidaire parts are pretty easy to get a hold of.
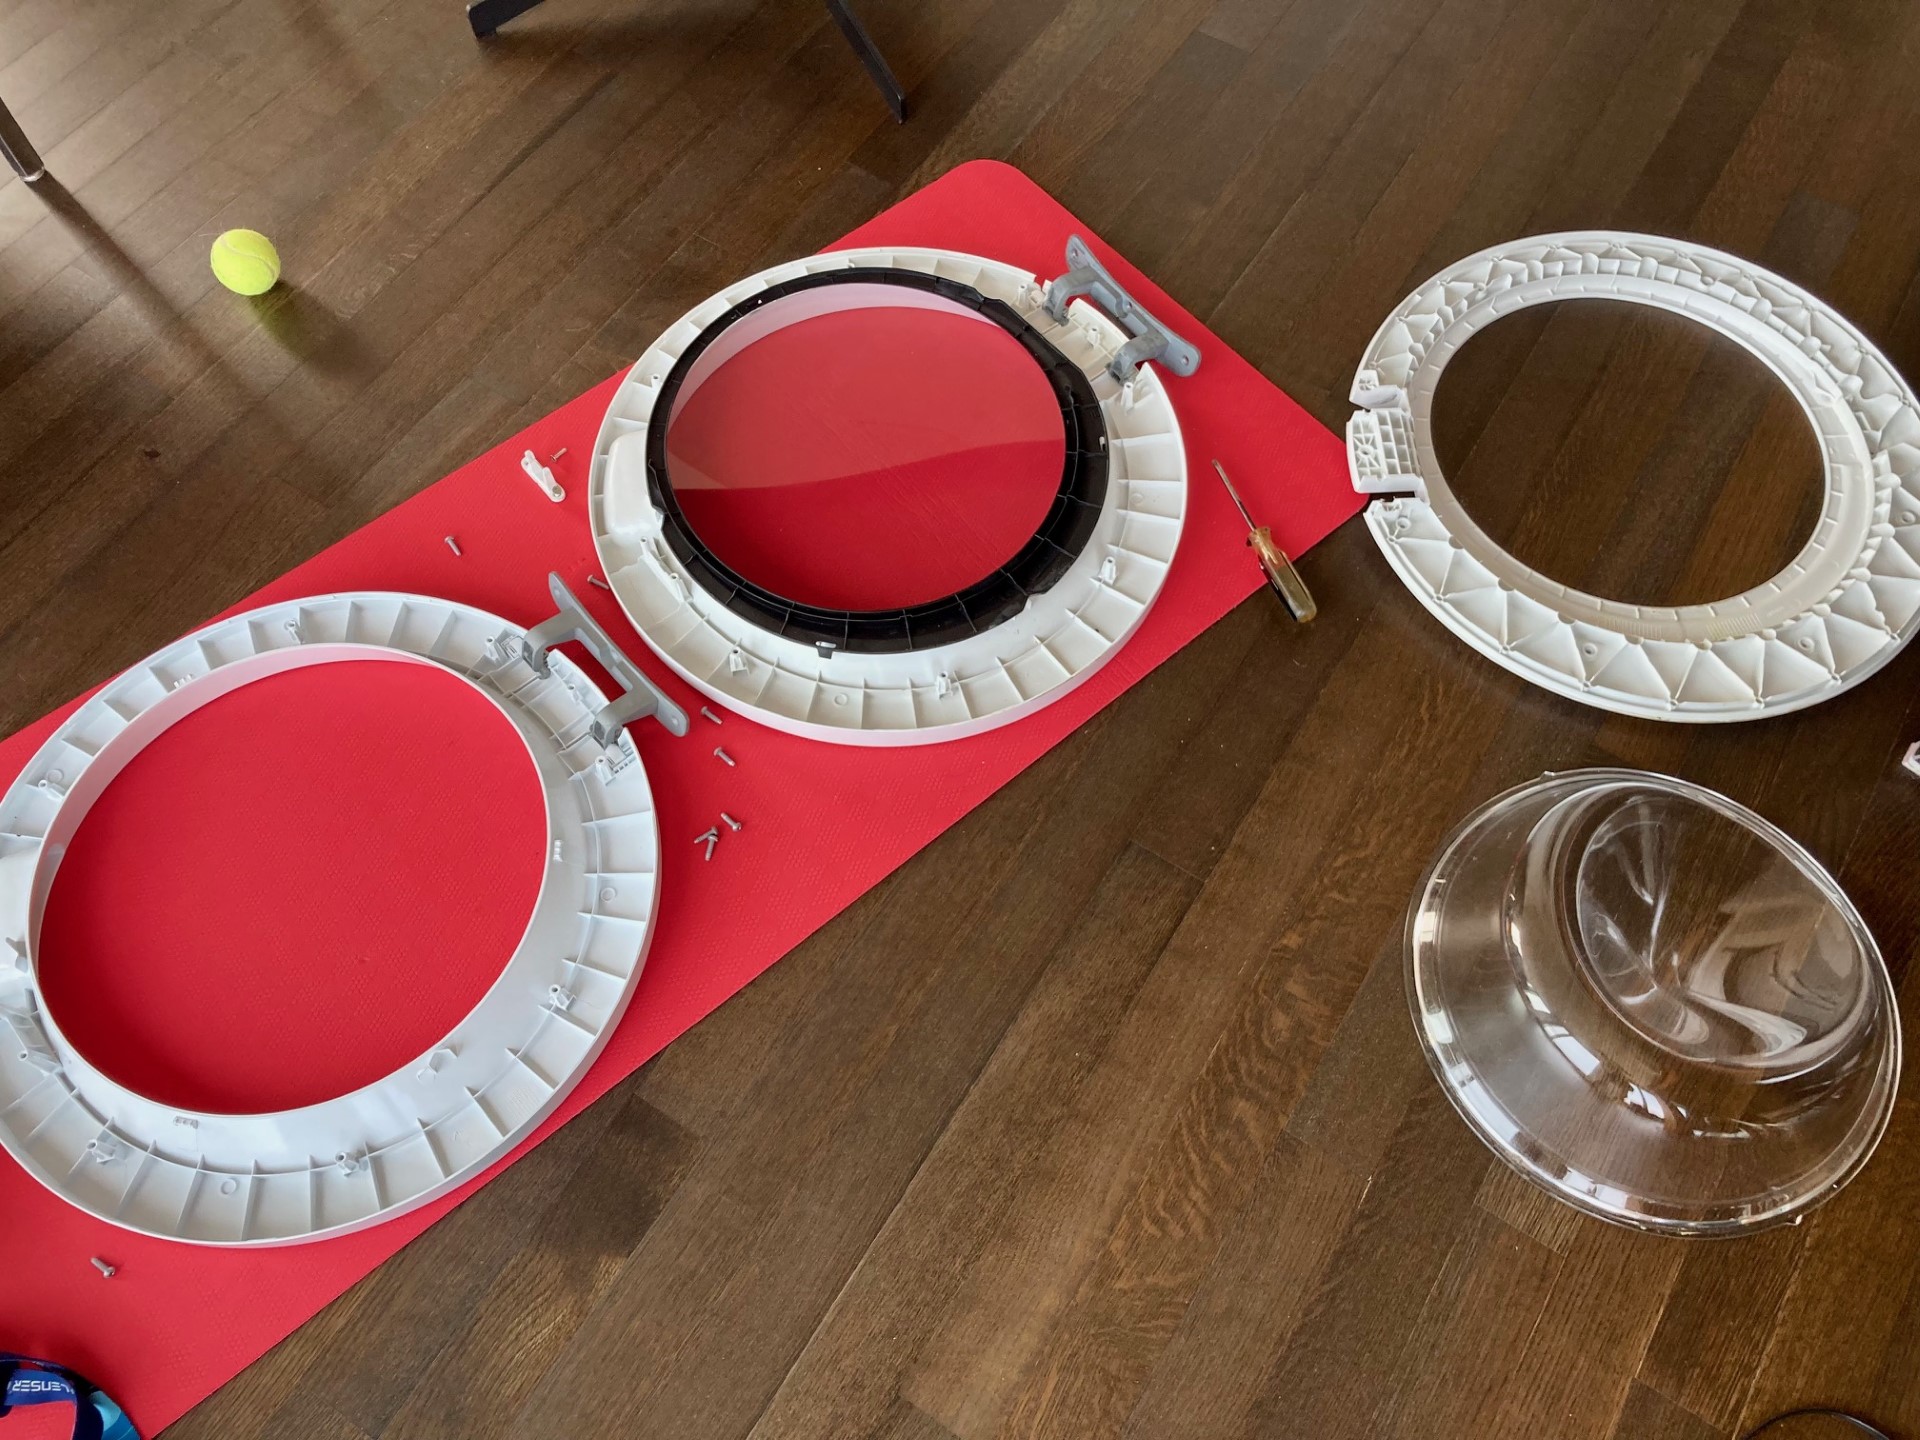
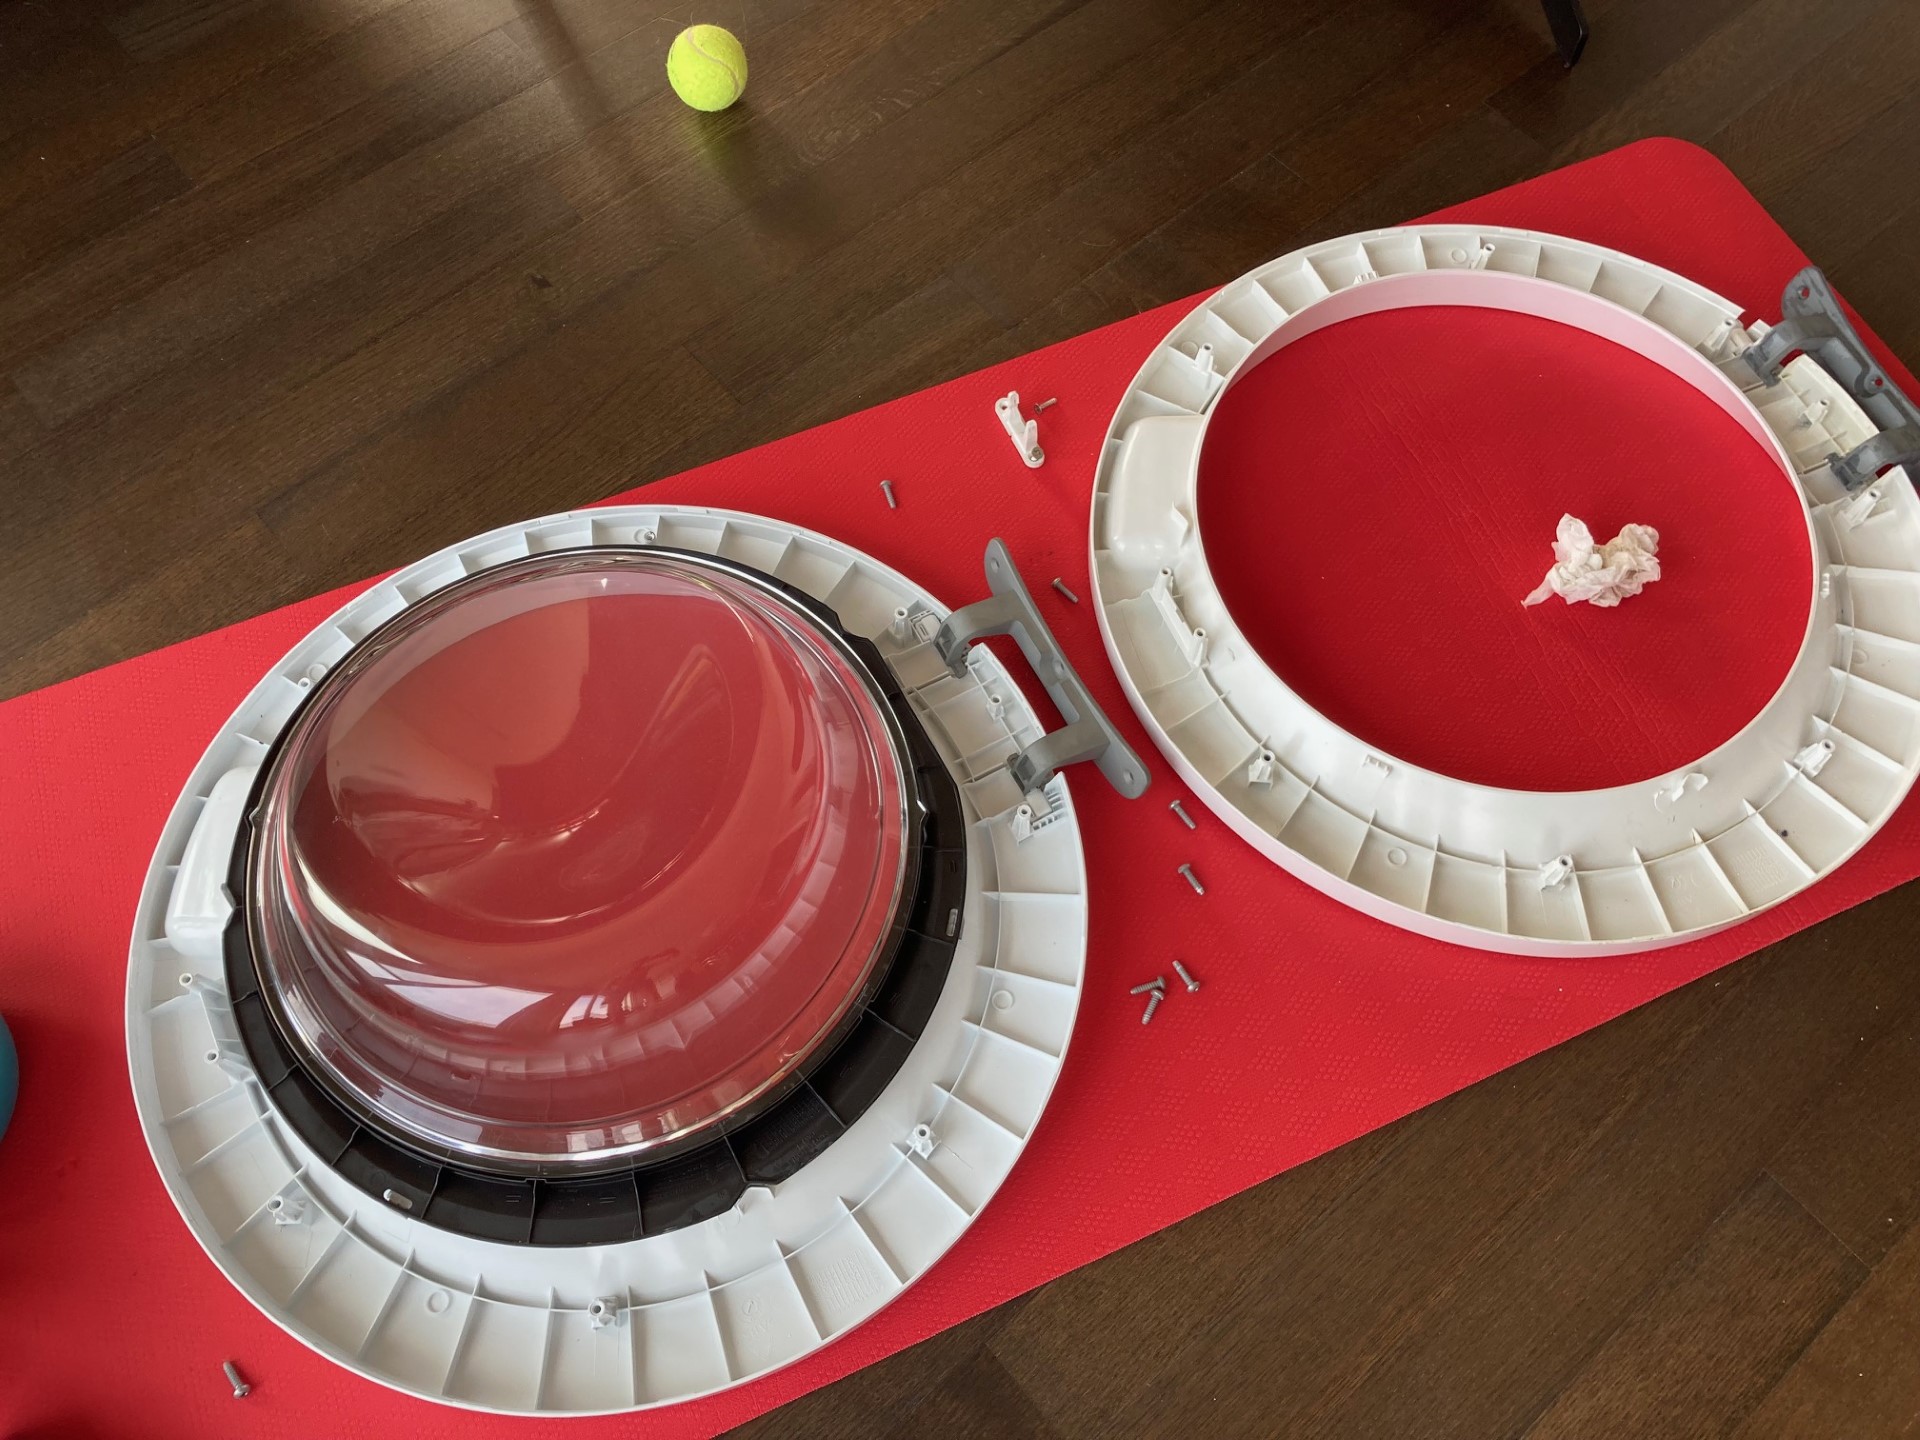
The fix is quite simple only needing a screwdriver.
1. remove the hinge and door from the machine (3 screws), be careful not to strip a screw and make sure you have the right size cross head screwdriver.
2. lay the door on a flat surface and remove 10 screws from the door
3. remove the two screws that hold the strike latch
4. Pull off the inner door, it has some snaps but should come off easily allowing you access to the hinge and items which retains the glass.
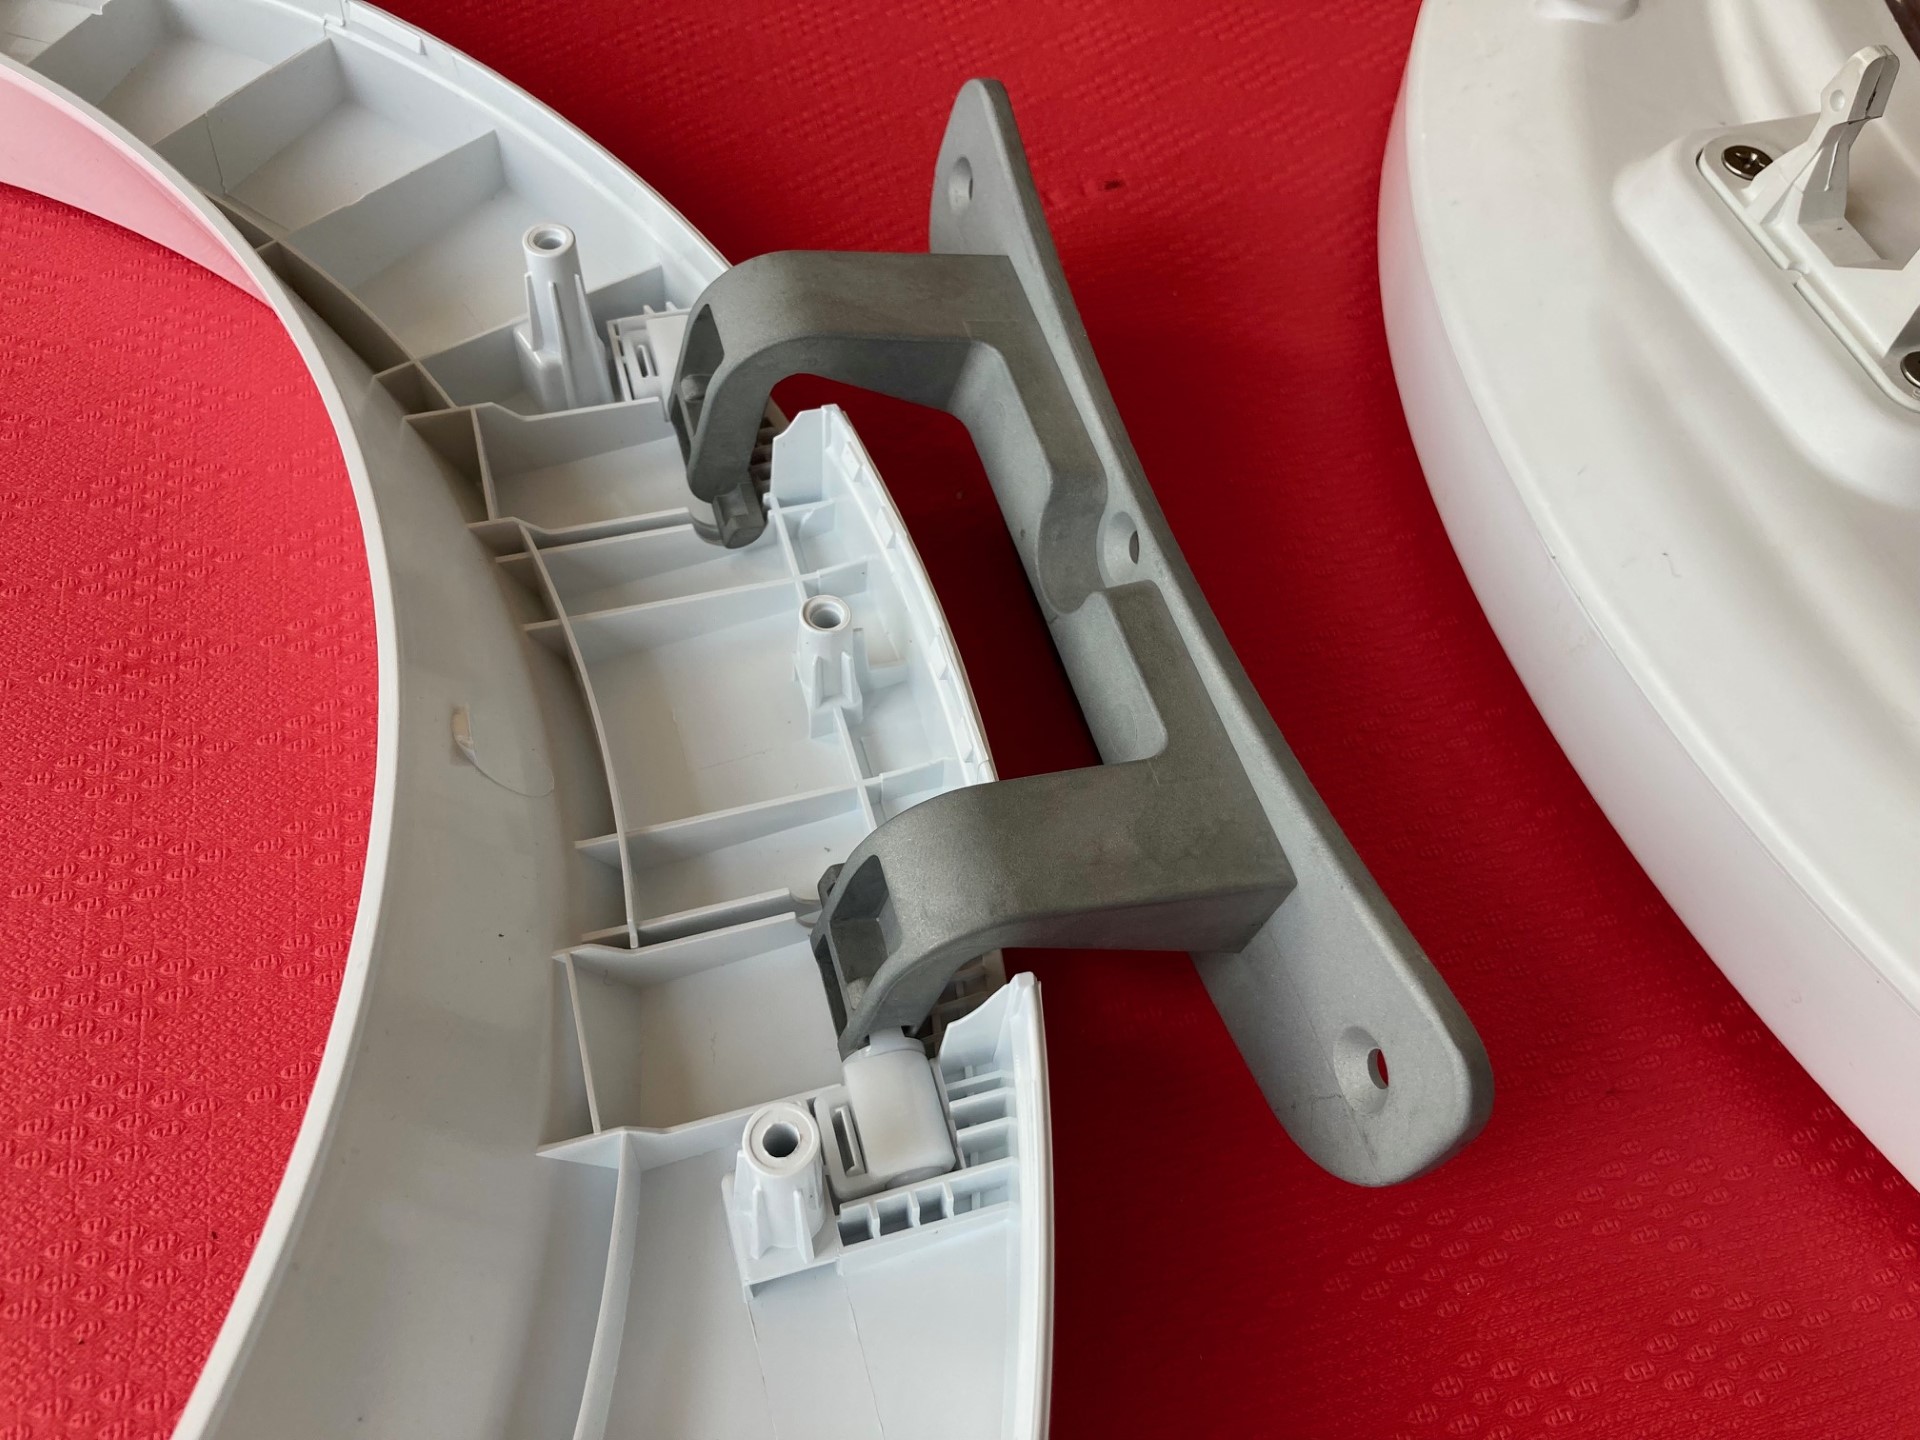
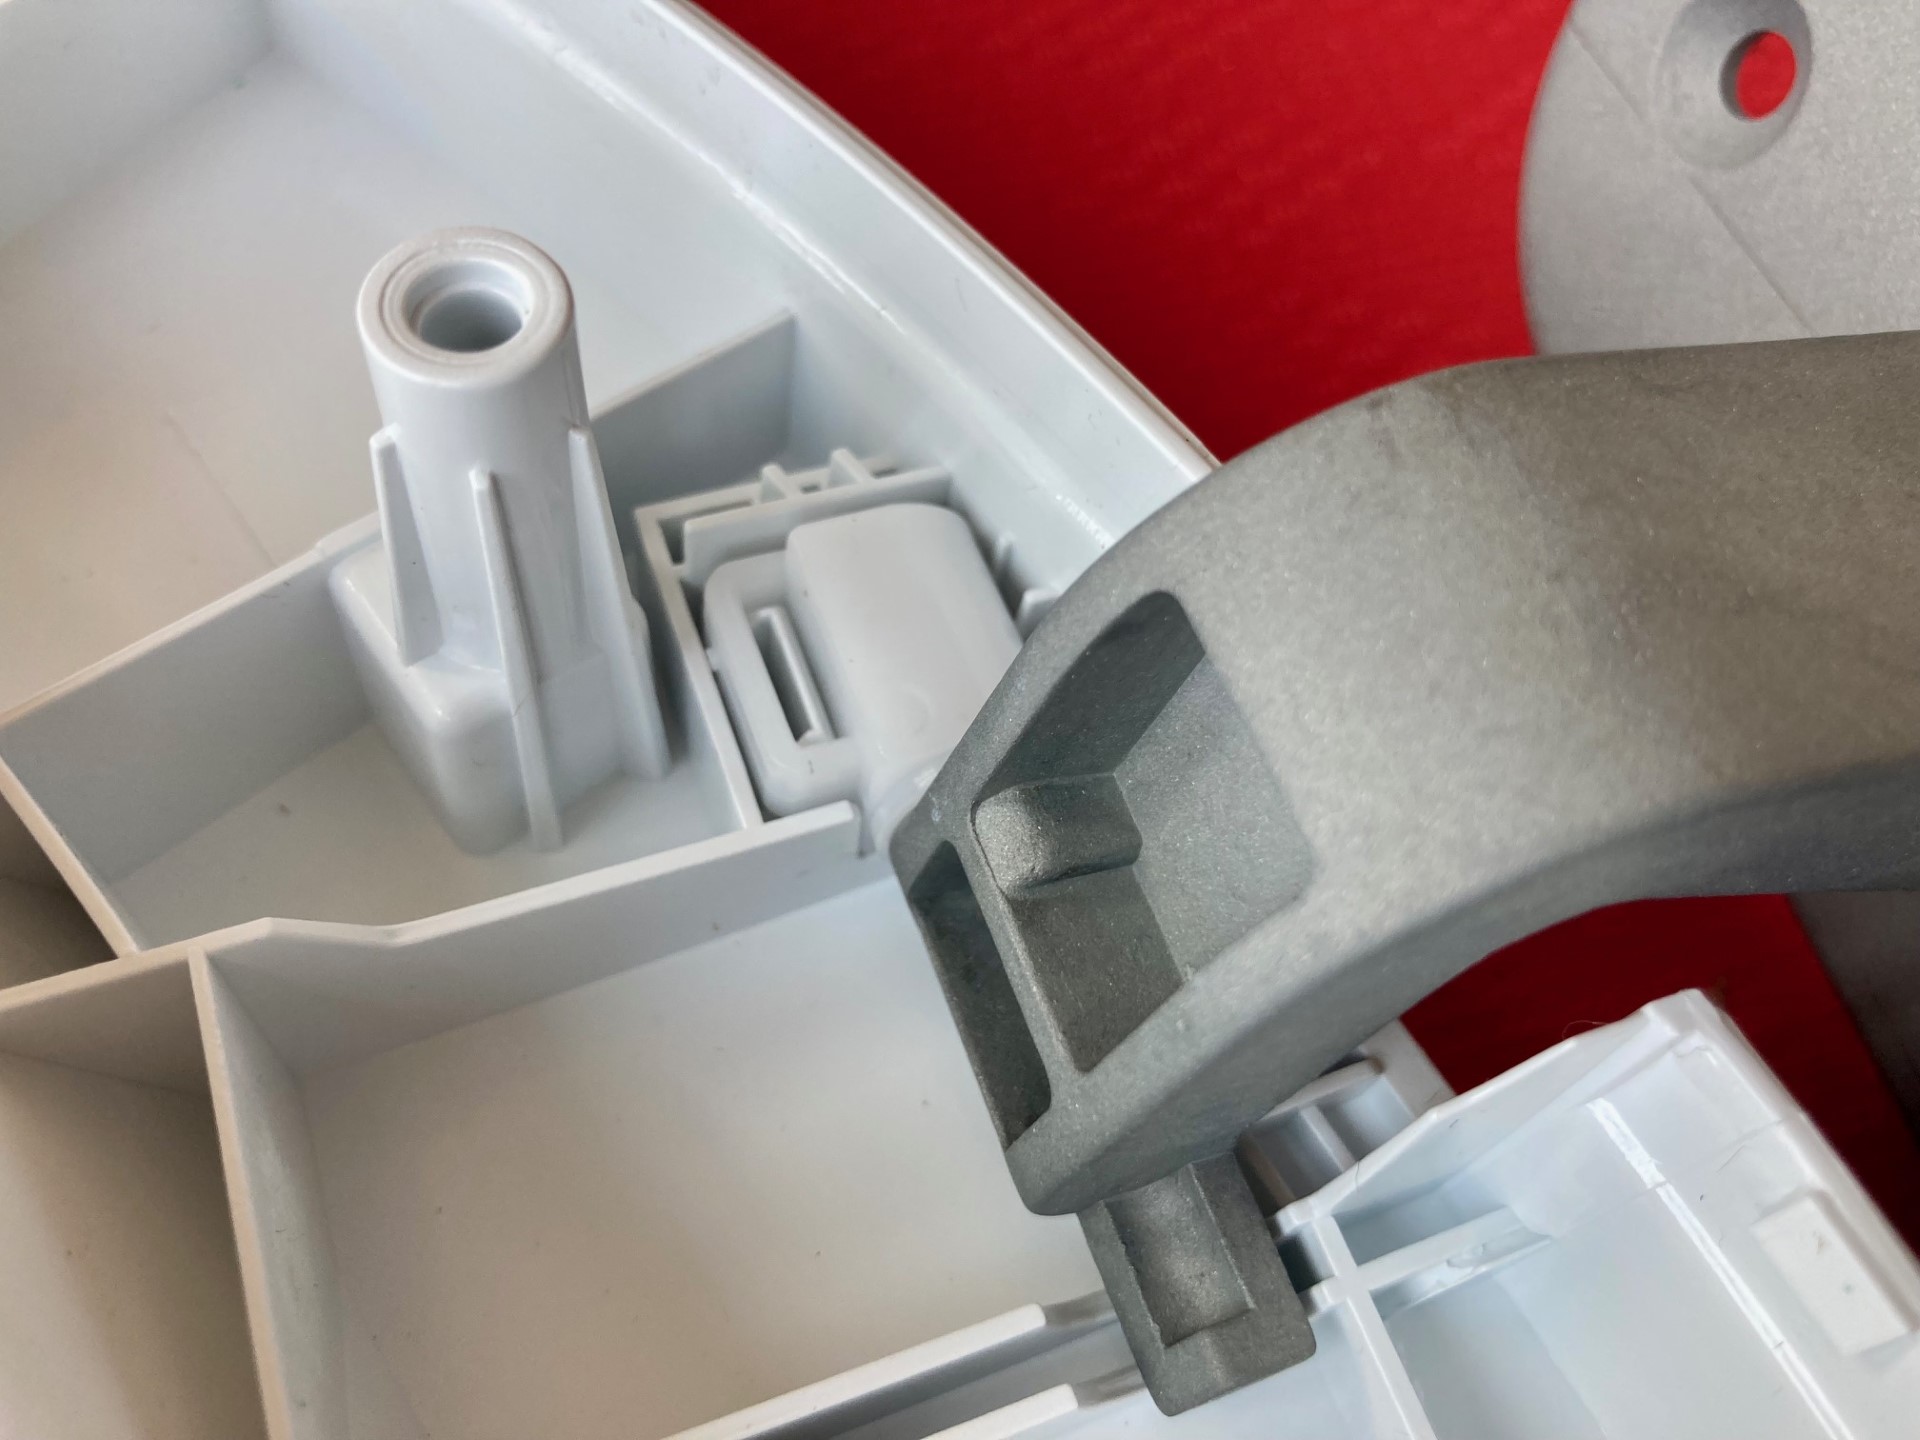
5. Lay the new outer door next to it and transfer the parts.
6. Ensure you have the hinge the correct orientation and Screw back together
7. Screw the door back onto the washing machine, note the tab on the backside of the hinge, this ligns with a hold at the top.
FLOORS
The original floors of 937 are stained and waxed. They are also of a thickness that was used for extra noise dampening. It’s not a common thickness.
New floors often use polyurethane coating which is a bit more durable than wax.
There’s a couple for things you can do to look after your floors.
1 – Use a polish and sealer – The manufacturer BONA makes a gloss and matte floor polish which is very good. This offers protection. We have used this a few times and our neighbors have also. Bona say to use this very frequently, but I don’t think thats the real case. Once a year will be fine.
https://www.bona.com/en-us/homeowner/bona-polish/
2 – Don’t use harsh chemicals on the floors
3 – Use mild cleaners – BONA also have. a hard wood cleaner which is very mild and good.
https://www.bona.com/en-us/products/homeowners/cleaners/wood-floor/
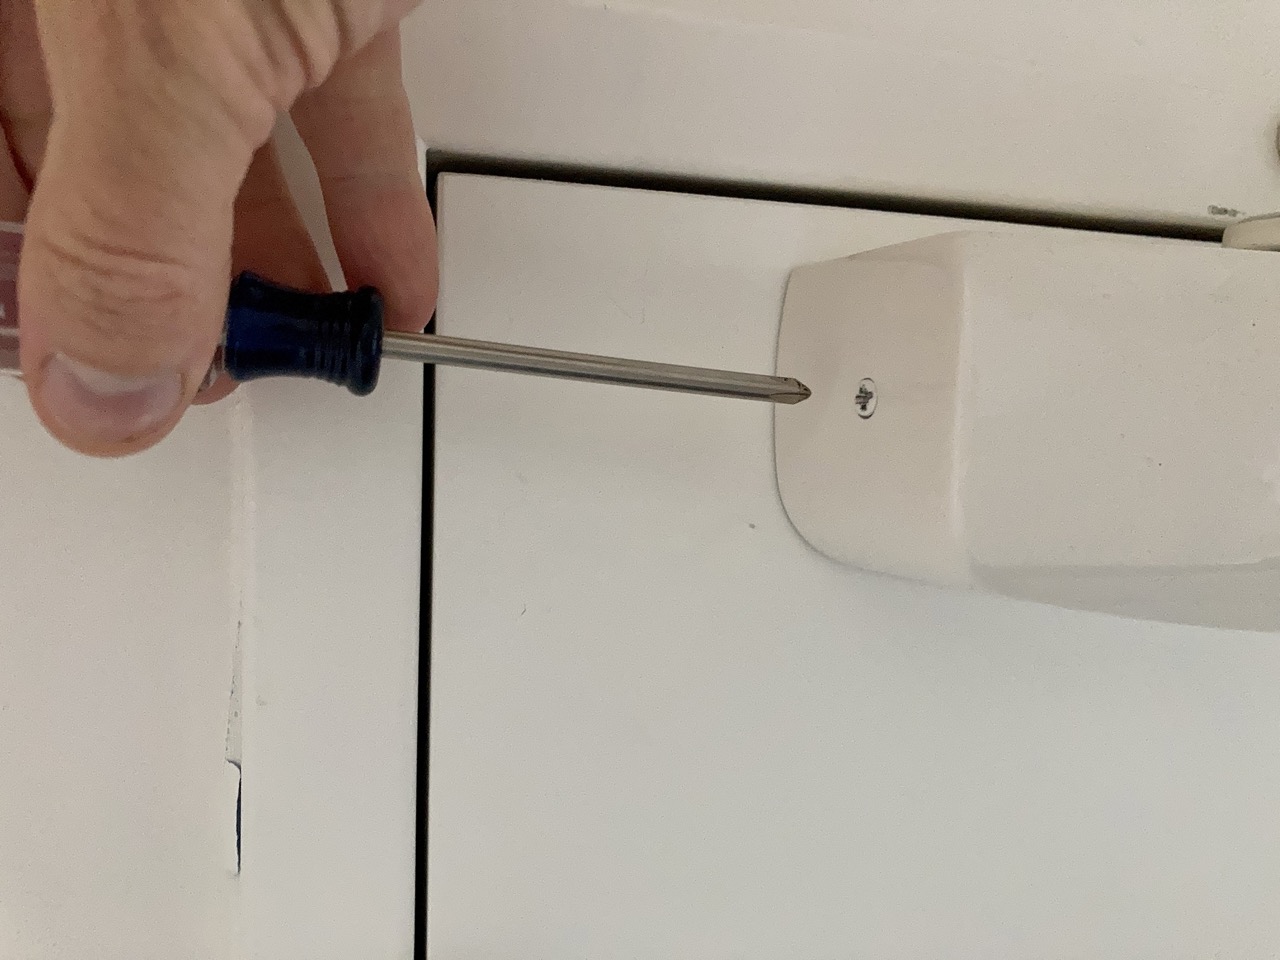
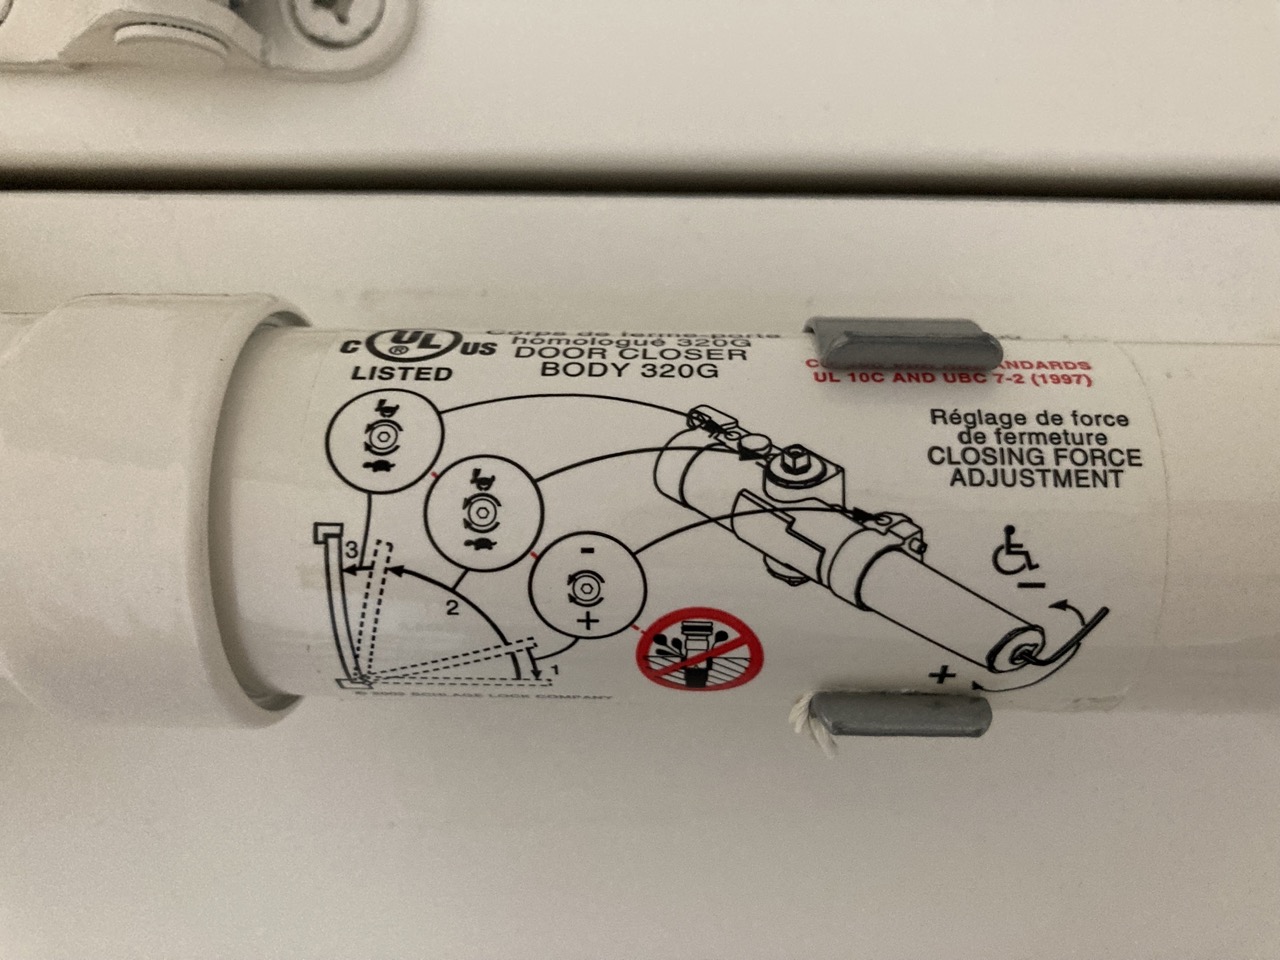
FRONT DOOR CLOSER
Like annoying your neighbours with a big slam… control your slams here…..get your Front Door Closer Adjustment dialed.
You will need a philips head screwdriver and a 3/32nds allen key
video here
I recently had to adjust mine, Here are some simple steps and pictures.
Removing the cover – two screws on the left and the right side, and the cover slips off. Tip, when reinstalling the cover, you will find one side to be fiddly (in my case it was the left hand side when looking at the closer) and difficult to align the screw. Start with this side first and then put the screw in the easy side. This will make it easier to reinstall the cover.
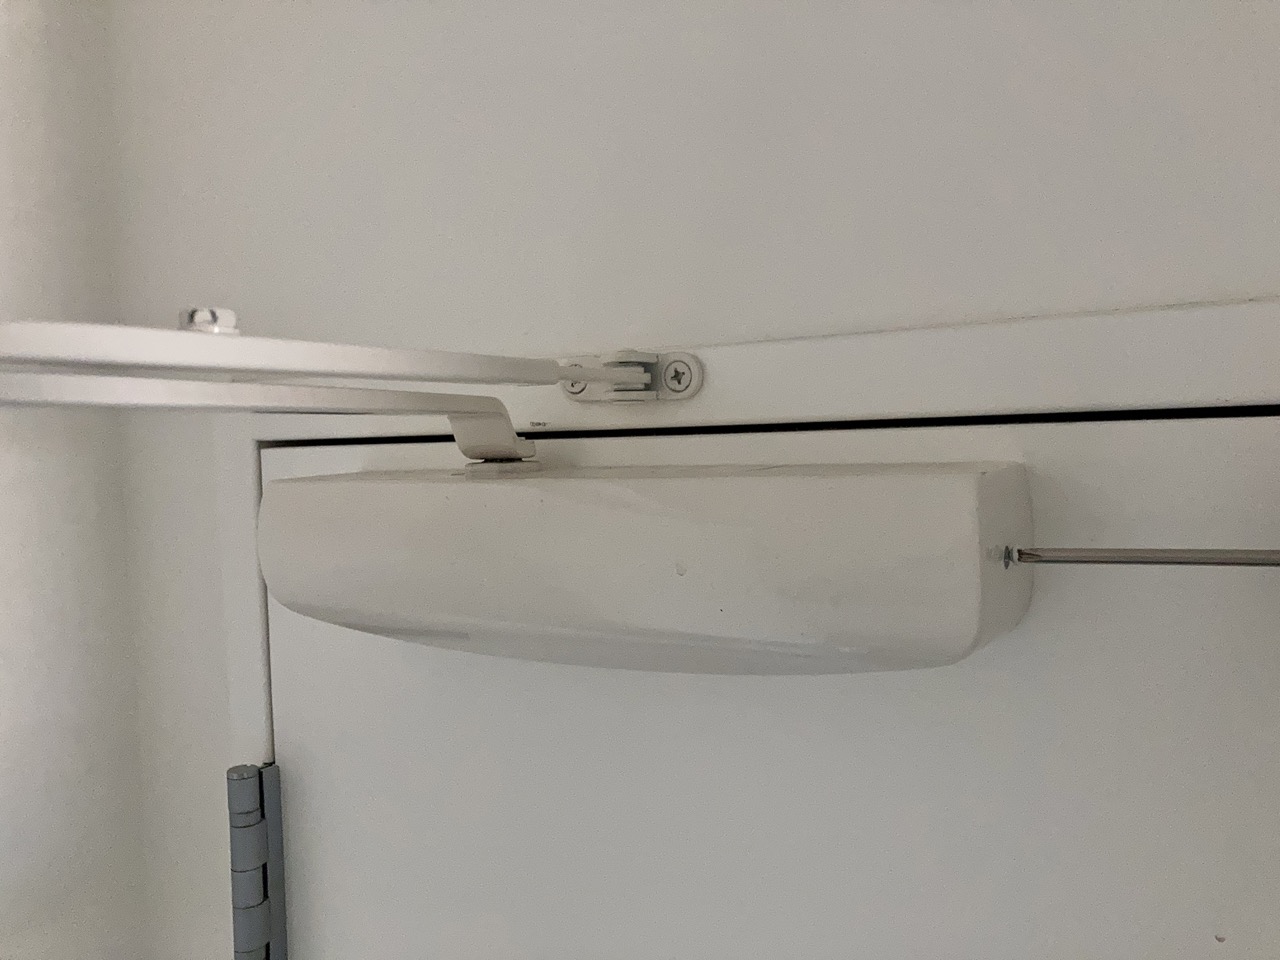
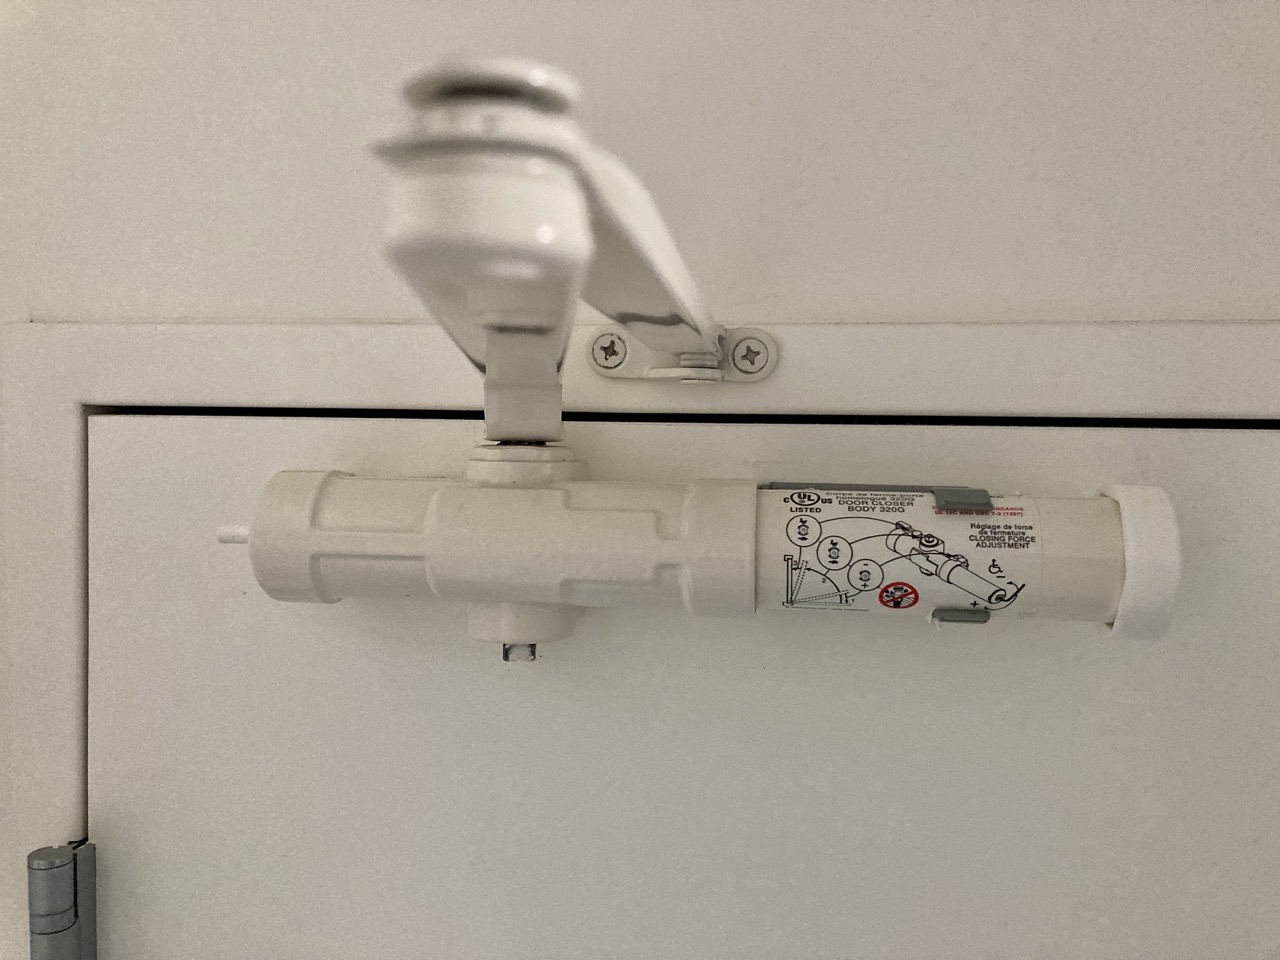
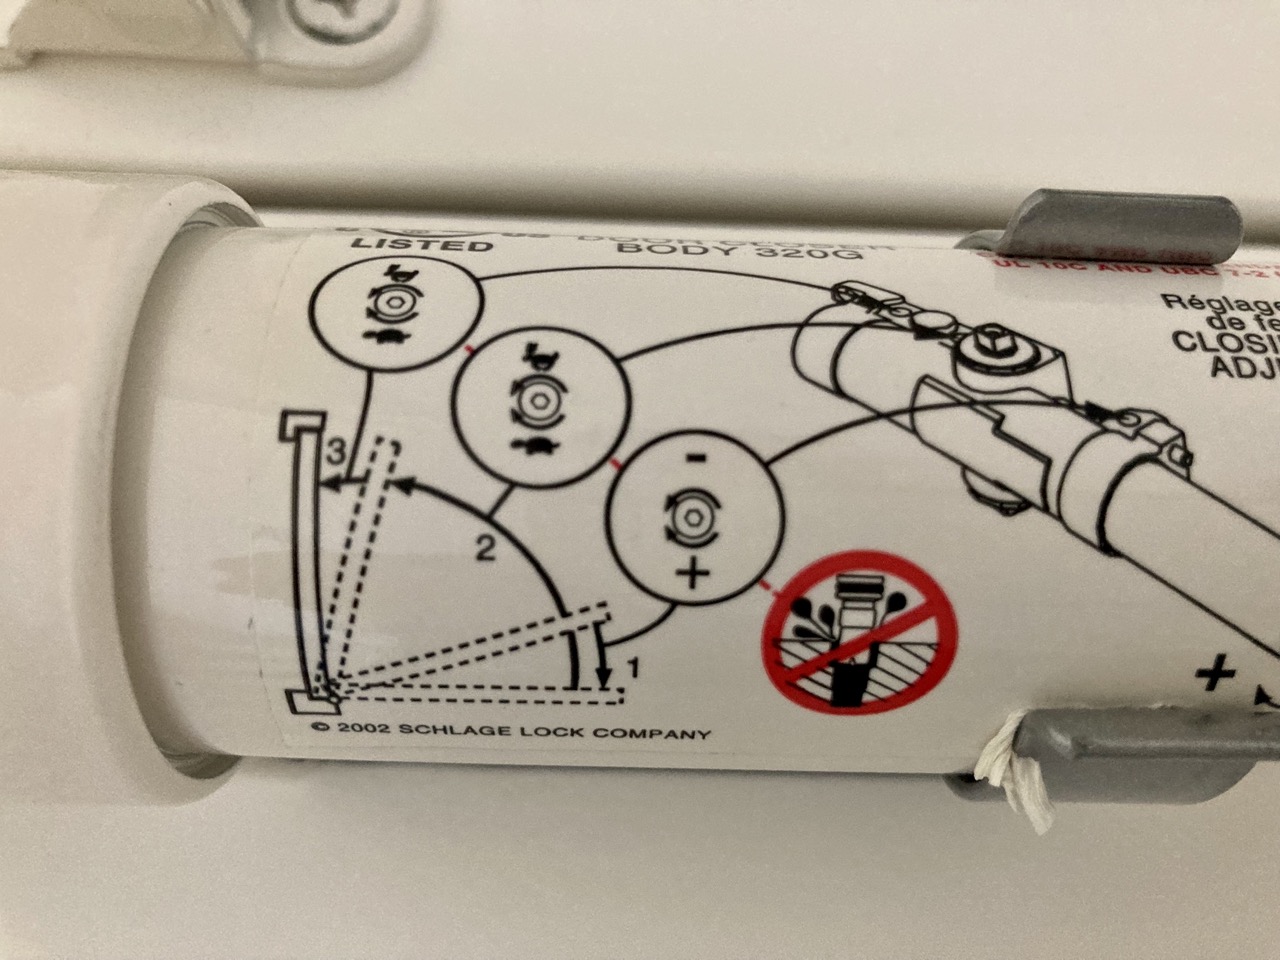
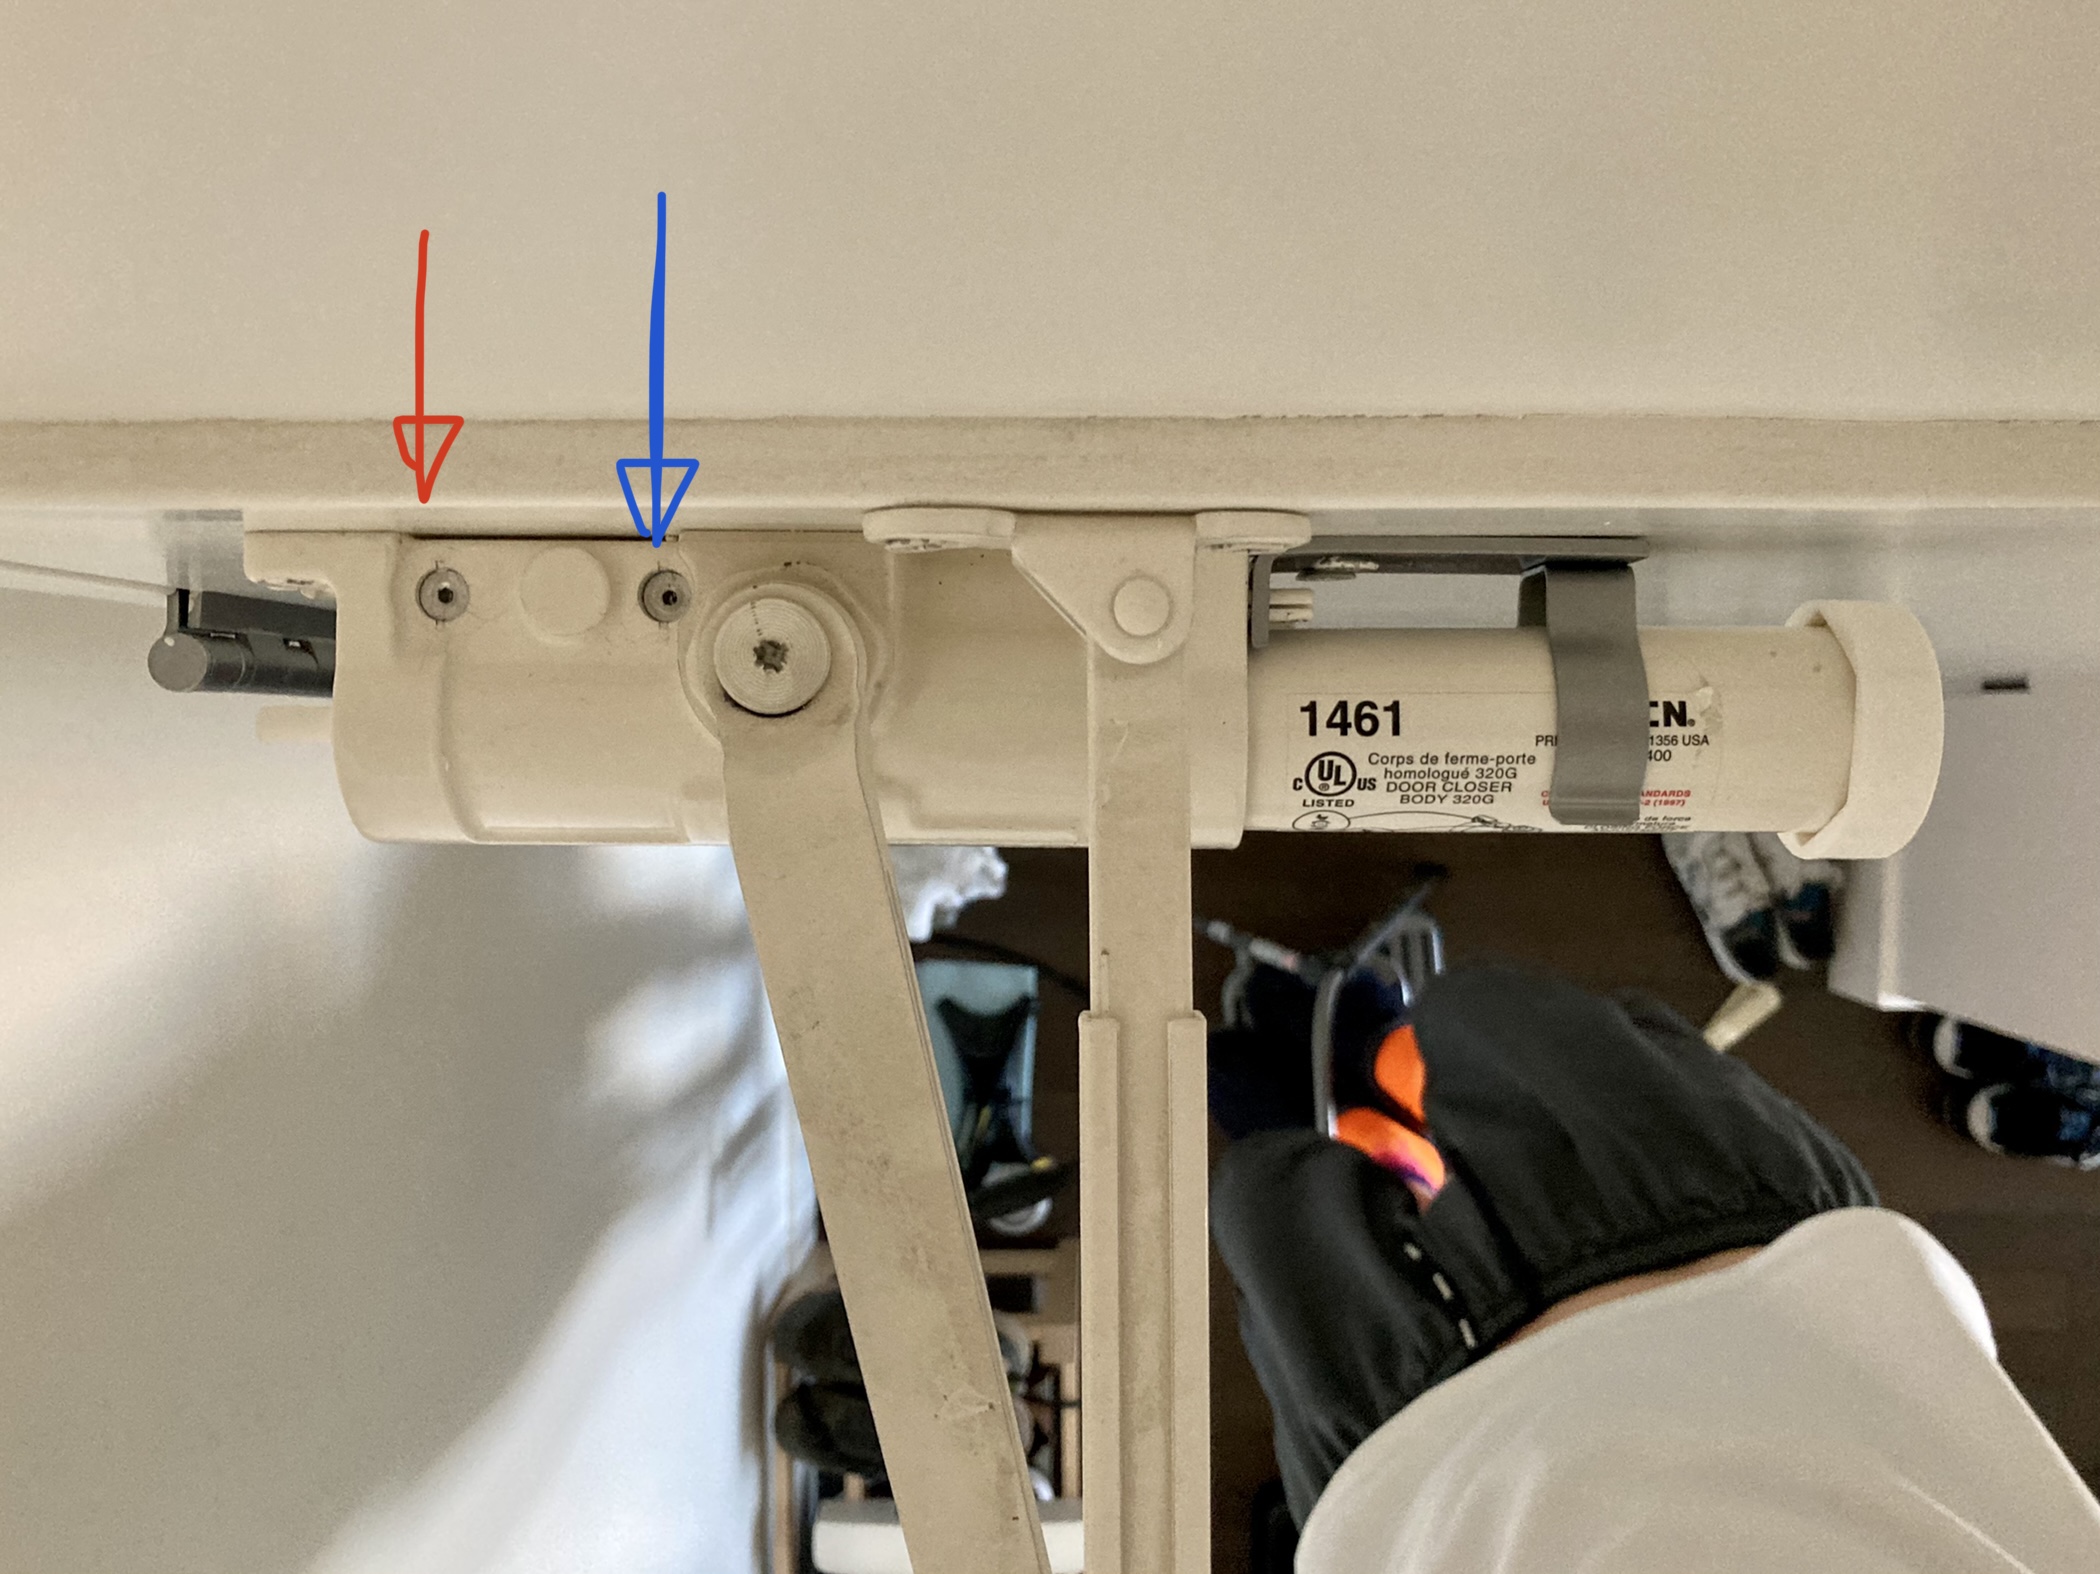
Adjusting the “slam”
After removing the cover you should see something like this below. Theres a diagram where you have to pay attention to the schematic of the door frame in order to understand which setting to adjust. In this instance my door wasn’t quite latching as easily as it should… it needed more “slam” at the final close, therefore I adjusted the RED arrow counter clockwise a small amount. Please note this is on a door with the closer to the left hand side, if your door is the other way around, be sure to check the diagrams to make sure you are adjusting the right setting. If you want further info you can watch the video.
HVAC
(for thermostat specific info, scroll down)
Our units made by Carrier and they are the aquazone heat pump kind which uses water to transfer energy (high efficiency). this means that the unit is plumbed in to the condo water system and relies on the overall building water system to be working.
In the winter time if there is a failure with the whole buildings heated water system then you might find your heat in your unit might not work, (as your hvac transfers heat from the hot water into air heat in your unit) so its worth checking with the concierge and / or your neighbours.
COMMON 937 HVAC FAILURES:
1. The most common failure is not changing filters. They need to be the high flow filters (aka cheap ones, most are about $6) and they need to be changed every six months if you live here full time. If you use more expensive higher rated MERV filters, you will have issues. because they impede air flow and can trigger electronic sensor to retard the system.
2. General leaks in the coolant system can occur leading to the unit closing down and not working. These maybe large or small. small ones can be temporarily fixed by using an inline coolant filler which the repair guy installs, be prepared though, this might not last forever. (see #5)
3. Mainline Water Valve Solenoid. This electronically controls the water coming into and out of the unit – (its a heat pump, don’t think regular A/C…) this valve sometimes fails either causing it to be erratic or causing it to stay stuck open – throws an error code, or stuck closed – causes no heat transfer. Fortunately there are two fixes, the first is manually (mechanically) leave it open all the time. Second is replace, and you don’t need to solder in a new one, its a replaceable core.
4. Failure of thermal expansion and contraction value sometimes called TACO valve. This is not super common but it can fail. It’s a few thousand to replace. They have to order a new one and cut the old one out and solder in a new one.
5. Large leaks tend to form in one of the evaporator coils. On these units a new coil is typically $2500 and 6-8hrs of labor to replace, plus new coolant. Leaving you with a $3500 bill, which is better than a $10,000+ bill for a whole new unit, don’t let them talk you into that. The reason why they want you to do that is because they make more profit on a whole unit, which is basically folded sheet metal plus the evap coil that I prev mentioned..
An uncommon failure but a notable one.
If your HVAC stops working and shows no information on the wall mounted Thermostat ie it’s blank. Your 12v transformer may have blown. The Thermostat is powered by the HVAC, the batteries in the thermostat keep the settings in case of power failure, This is about a $400 job
AIR FILTER SIZES
this depends on your unit number…. x= floor
x30: 2nd bath ceiling, 2 – 18×18
x31: Closet in 2nd bath, 1- 28×30
x32: hall closet, 1-24×24
x33: master bath ceiling, 2 – 18×18
x34: bath ceiling, 2 – 18×18
x35: master bath ceiling, 2- 18×18
(1135: master bath ceiling, (1) 18x24x1-installed new HVAC system-2021)
x36:2nd bath ceiling, 2 – 18×18,
x37: 2nd bedroom closet. 1- 28×30,
Penthouse Units:
31 & 33: 2 – 18×18, /$10 each,
30, 34 & 32: 2-18×18 in laundry room unit: plus
2-20×20 in master bedroom unit:
(1534: laundry room unit (1) 18x24x1 – master bedroom closet (2) 14x20x1-installed new HVAC system-2021)
LIGHTING and BULBS
Most bulbs you can just take out and off to the shops, but sometimes it’s nice to know what you are talking about before you get there.
HALLWAY BULBS
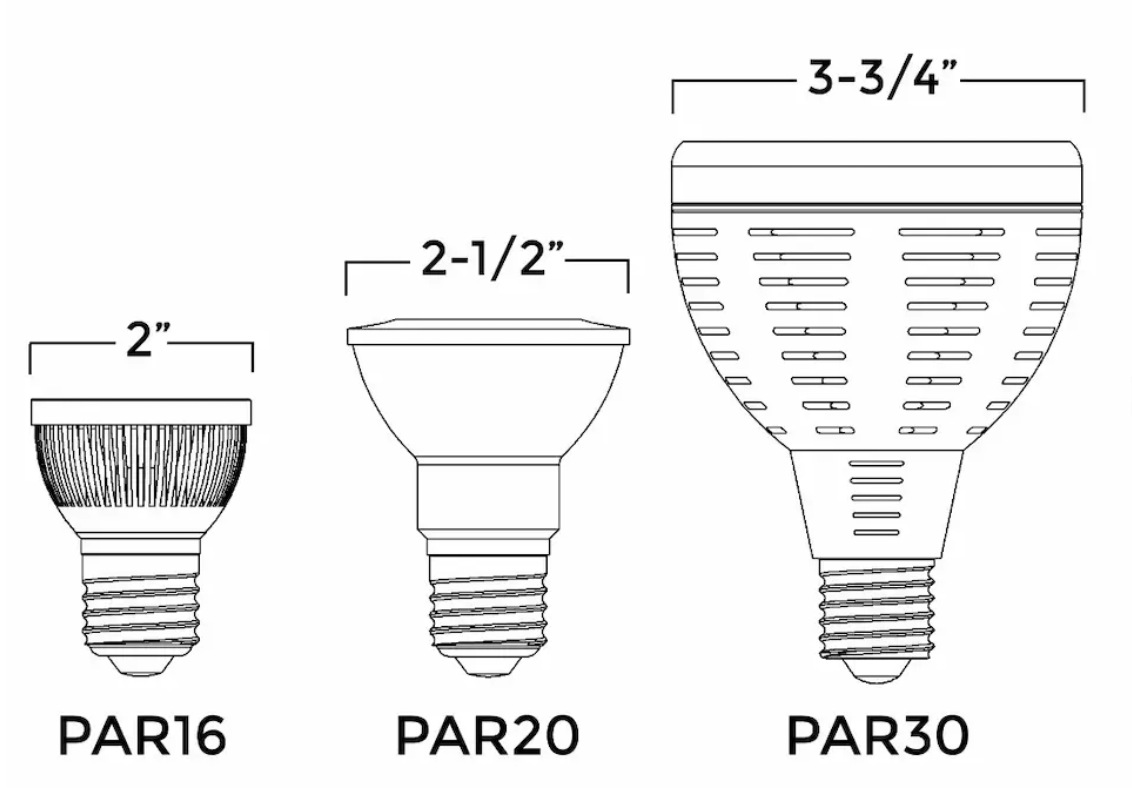
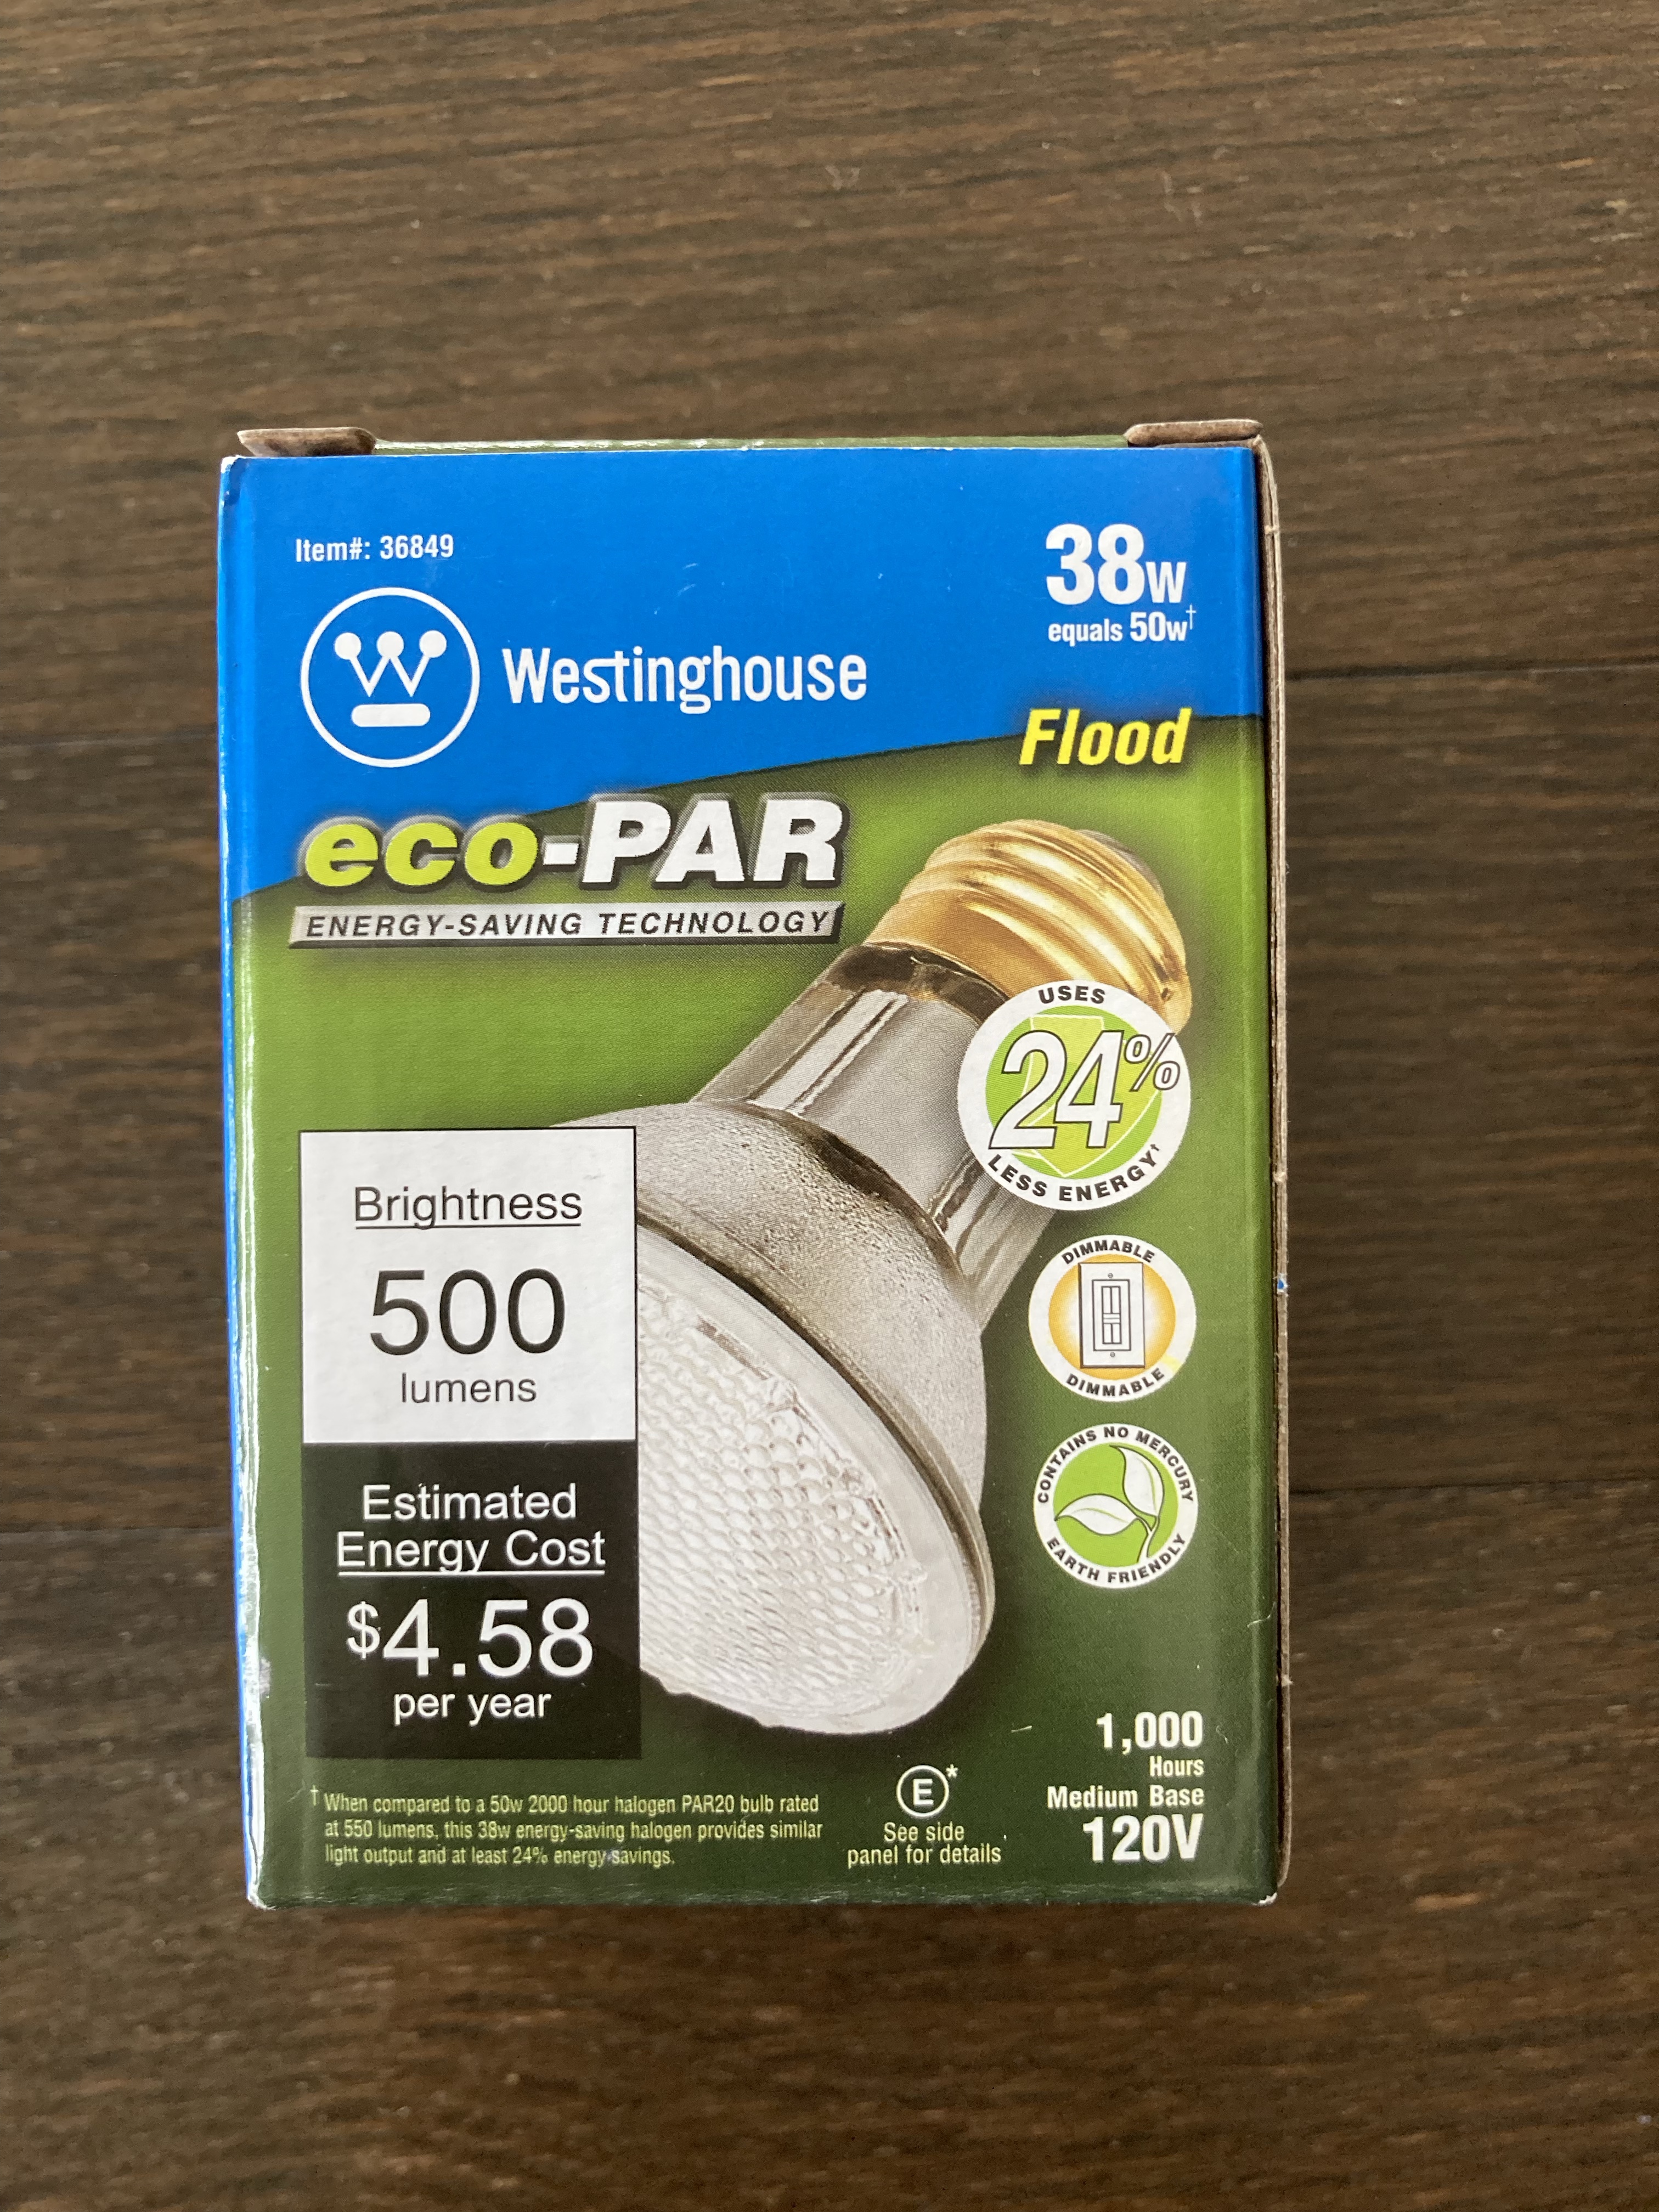
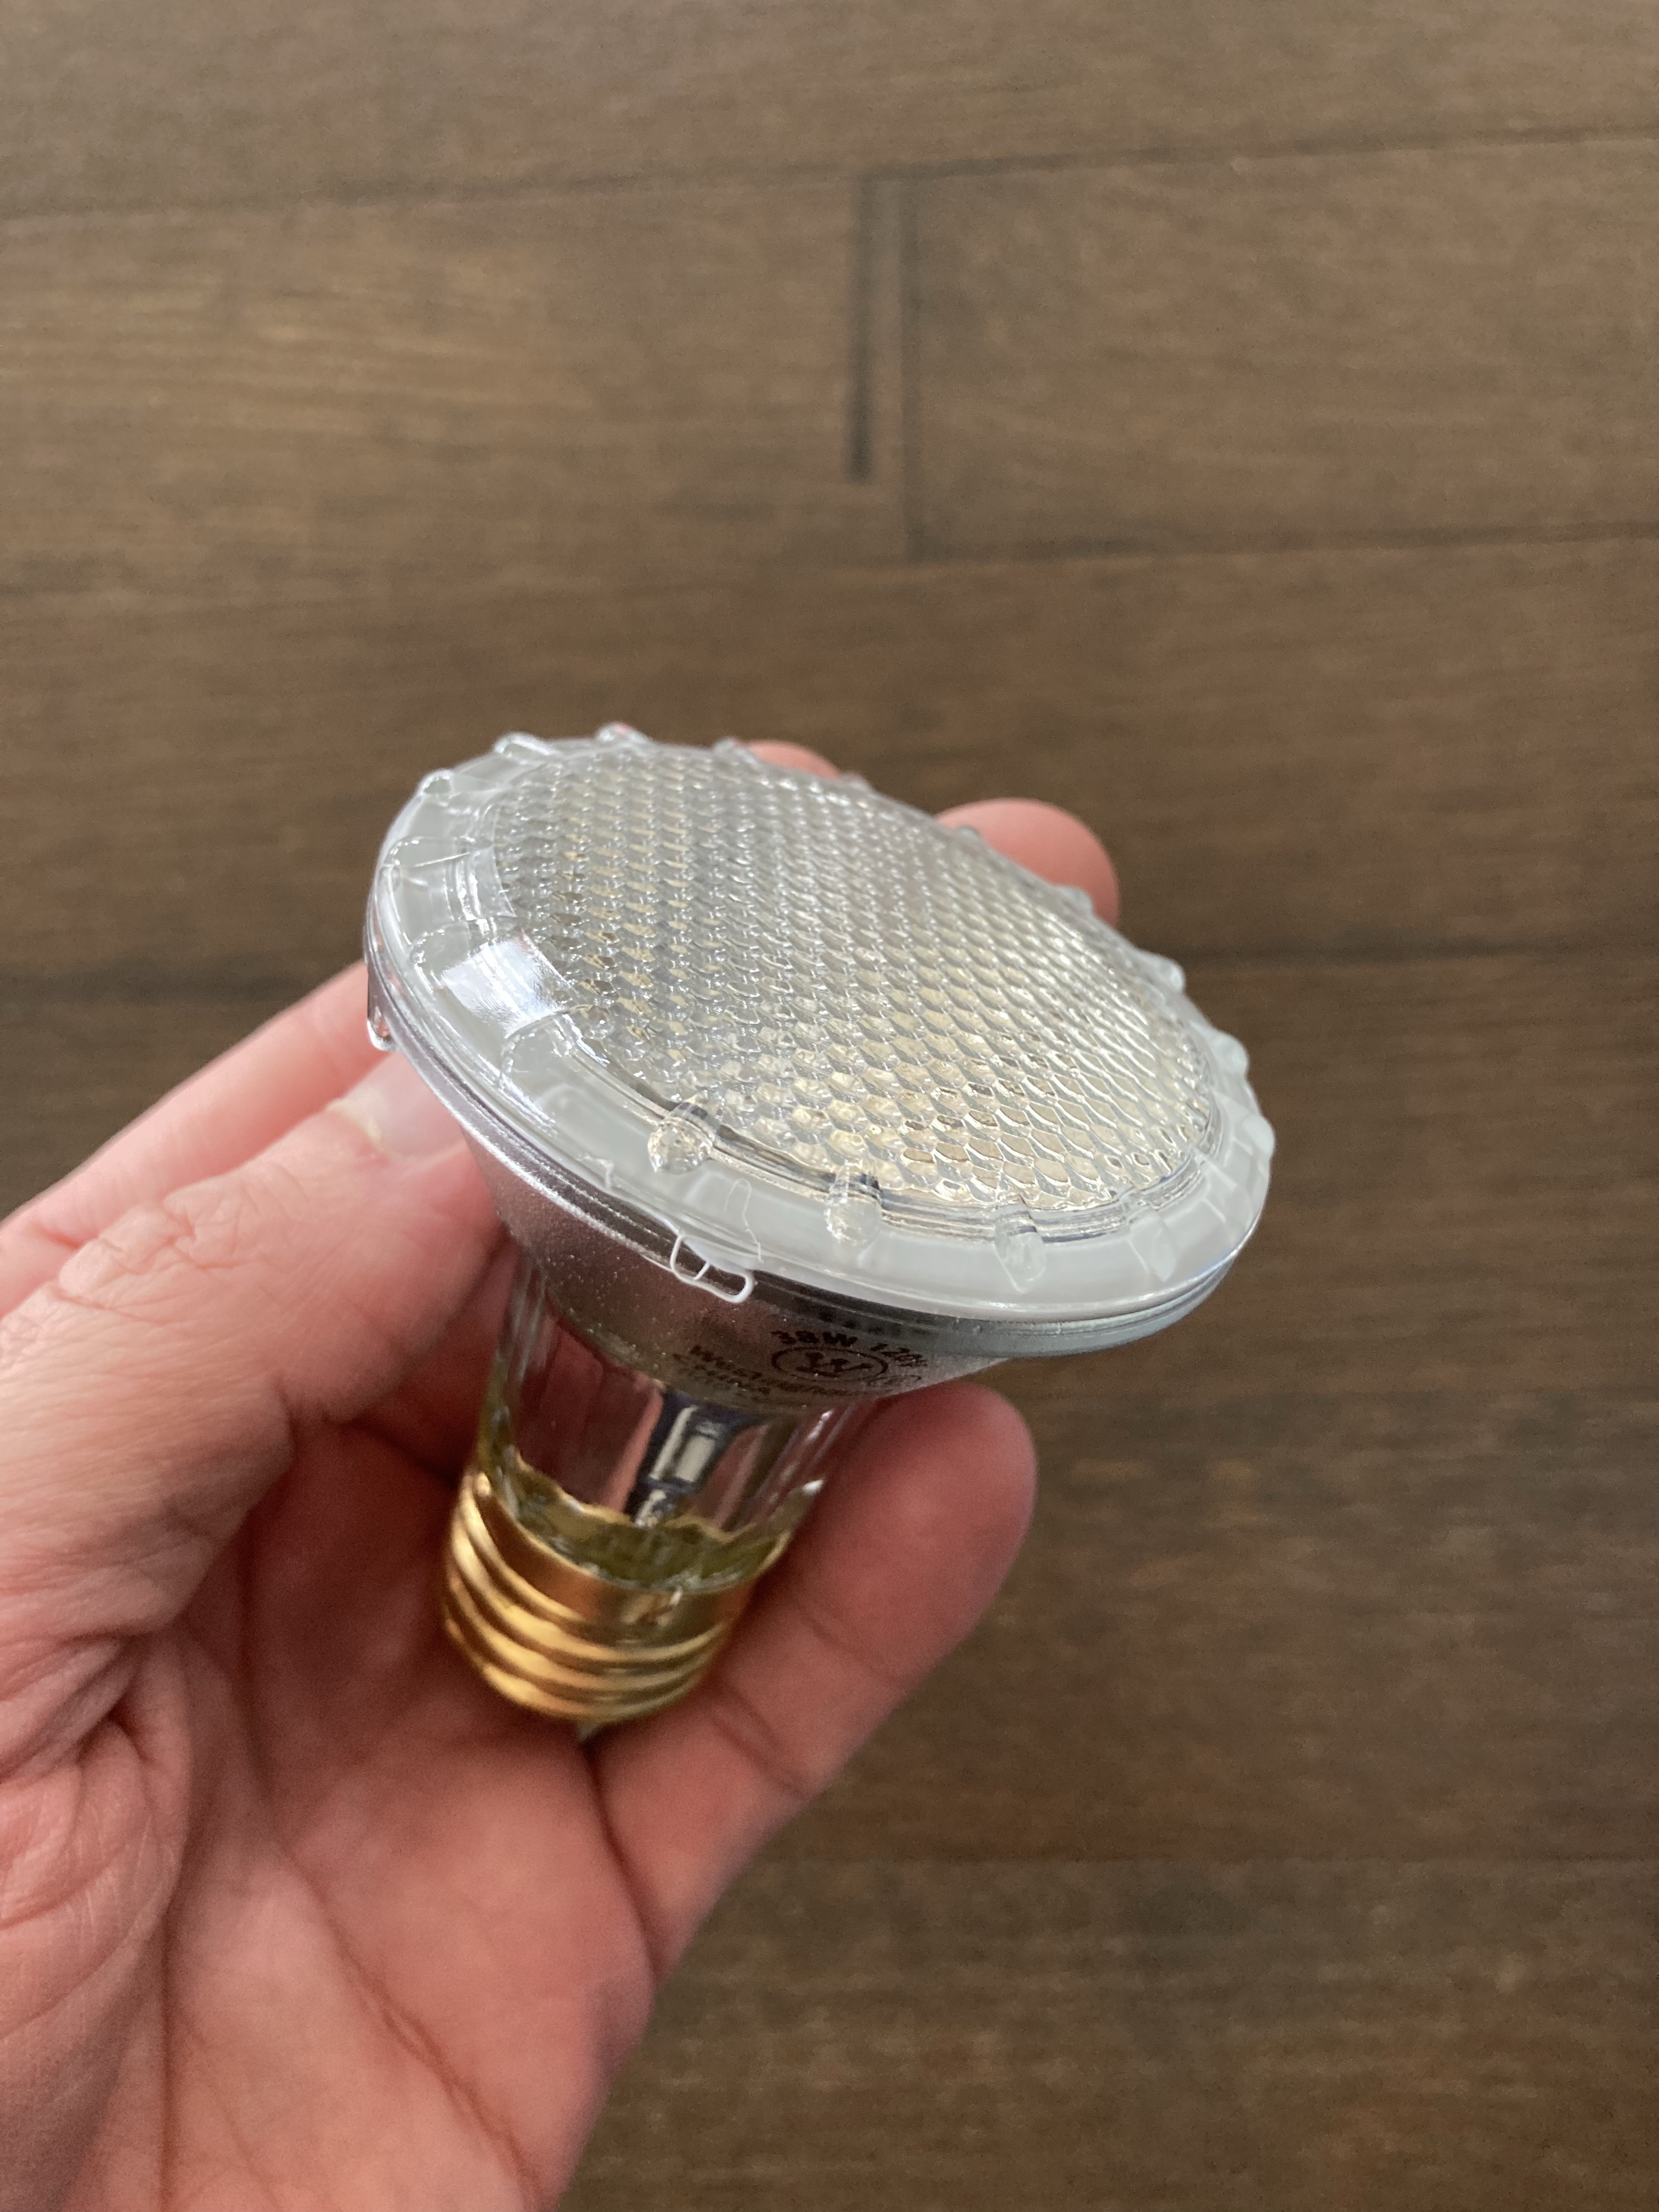
These are 120v 50W halogen PAR20 with an E26base Floodlight bulbs, generally last about a year.
You can choose a PAR16 or PAR20 but a PAR30 won’t fit in the hallway. the ones I show in photos are PAR20 but PAR16 will work also. (PAR30’s are used in the bathroom vent fans, see below)
The new more energy efficient models models are marked as 38Watts vs 50watts and have the same light output. Westinghouse Eco Par – they are marked as “eco” but thats some solid greenwashing
There is an LED version and its about the same price, but lasts a lot longer and uses less electricity.
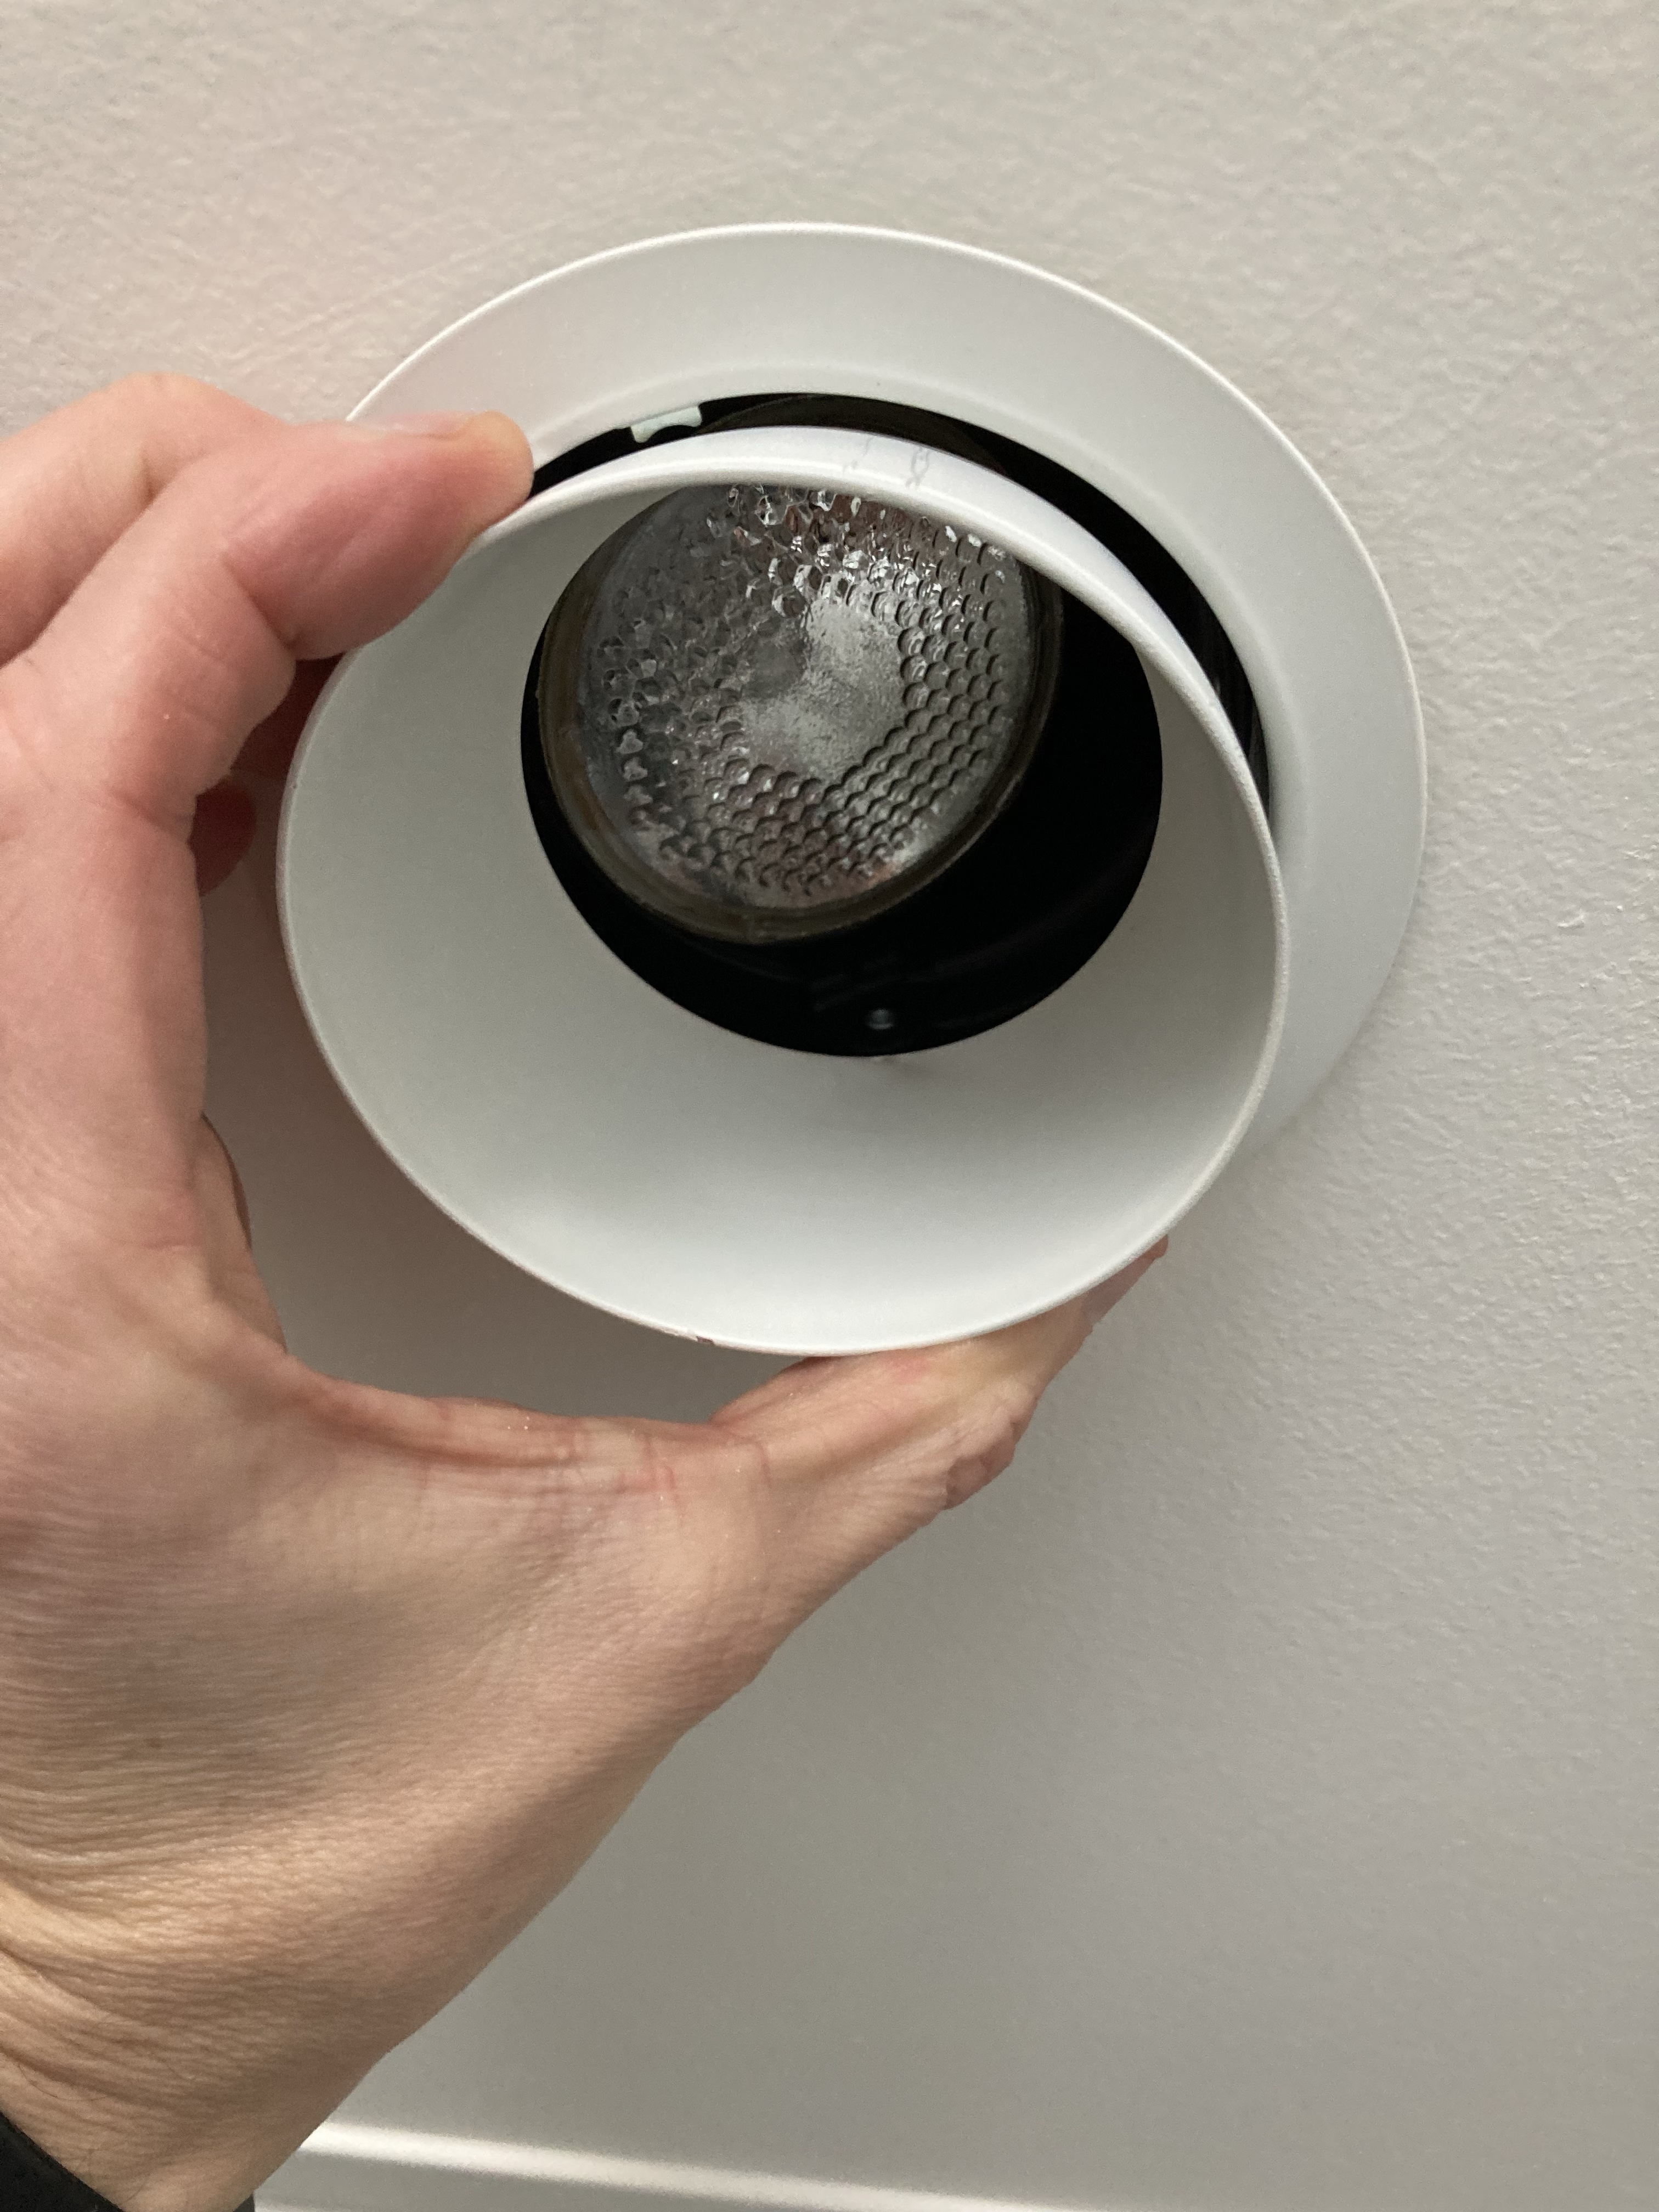
The bulbs unscrew from the receptacle in the recessed cans.
To make it easier, there is a sleeve inside the can that pulls down and snaps off, allowing access to the bulb.
Change the bulb and snap the inner sleeve back in, it’s easy.
This is very different than the kitchen, see below.
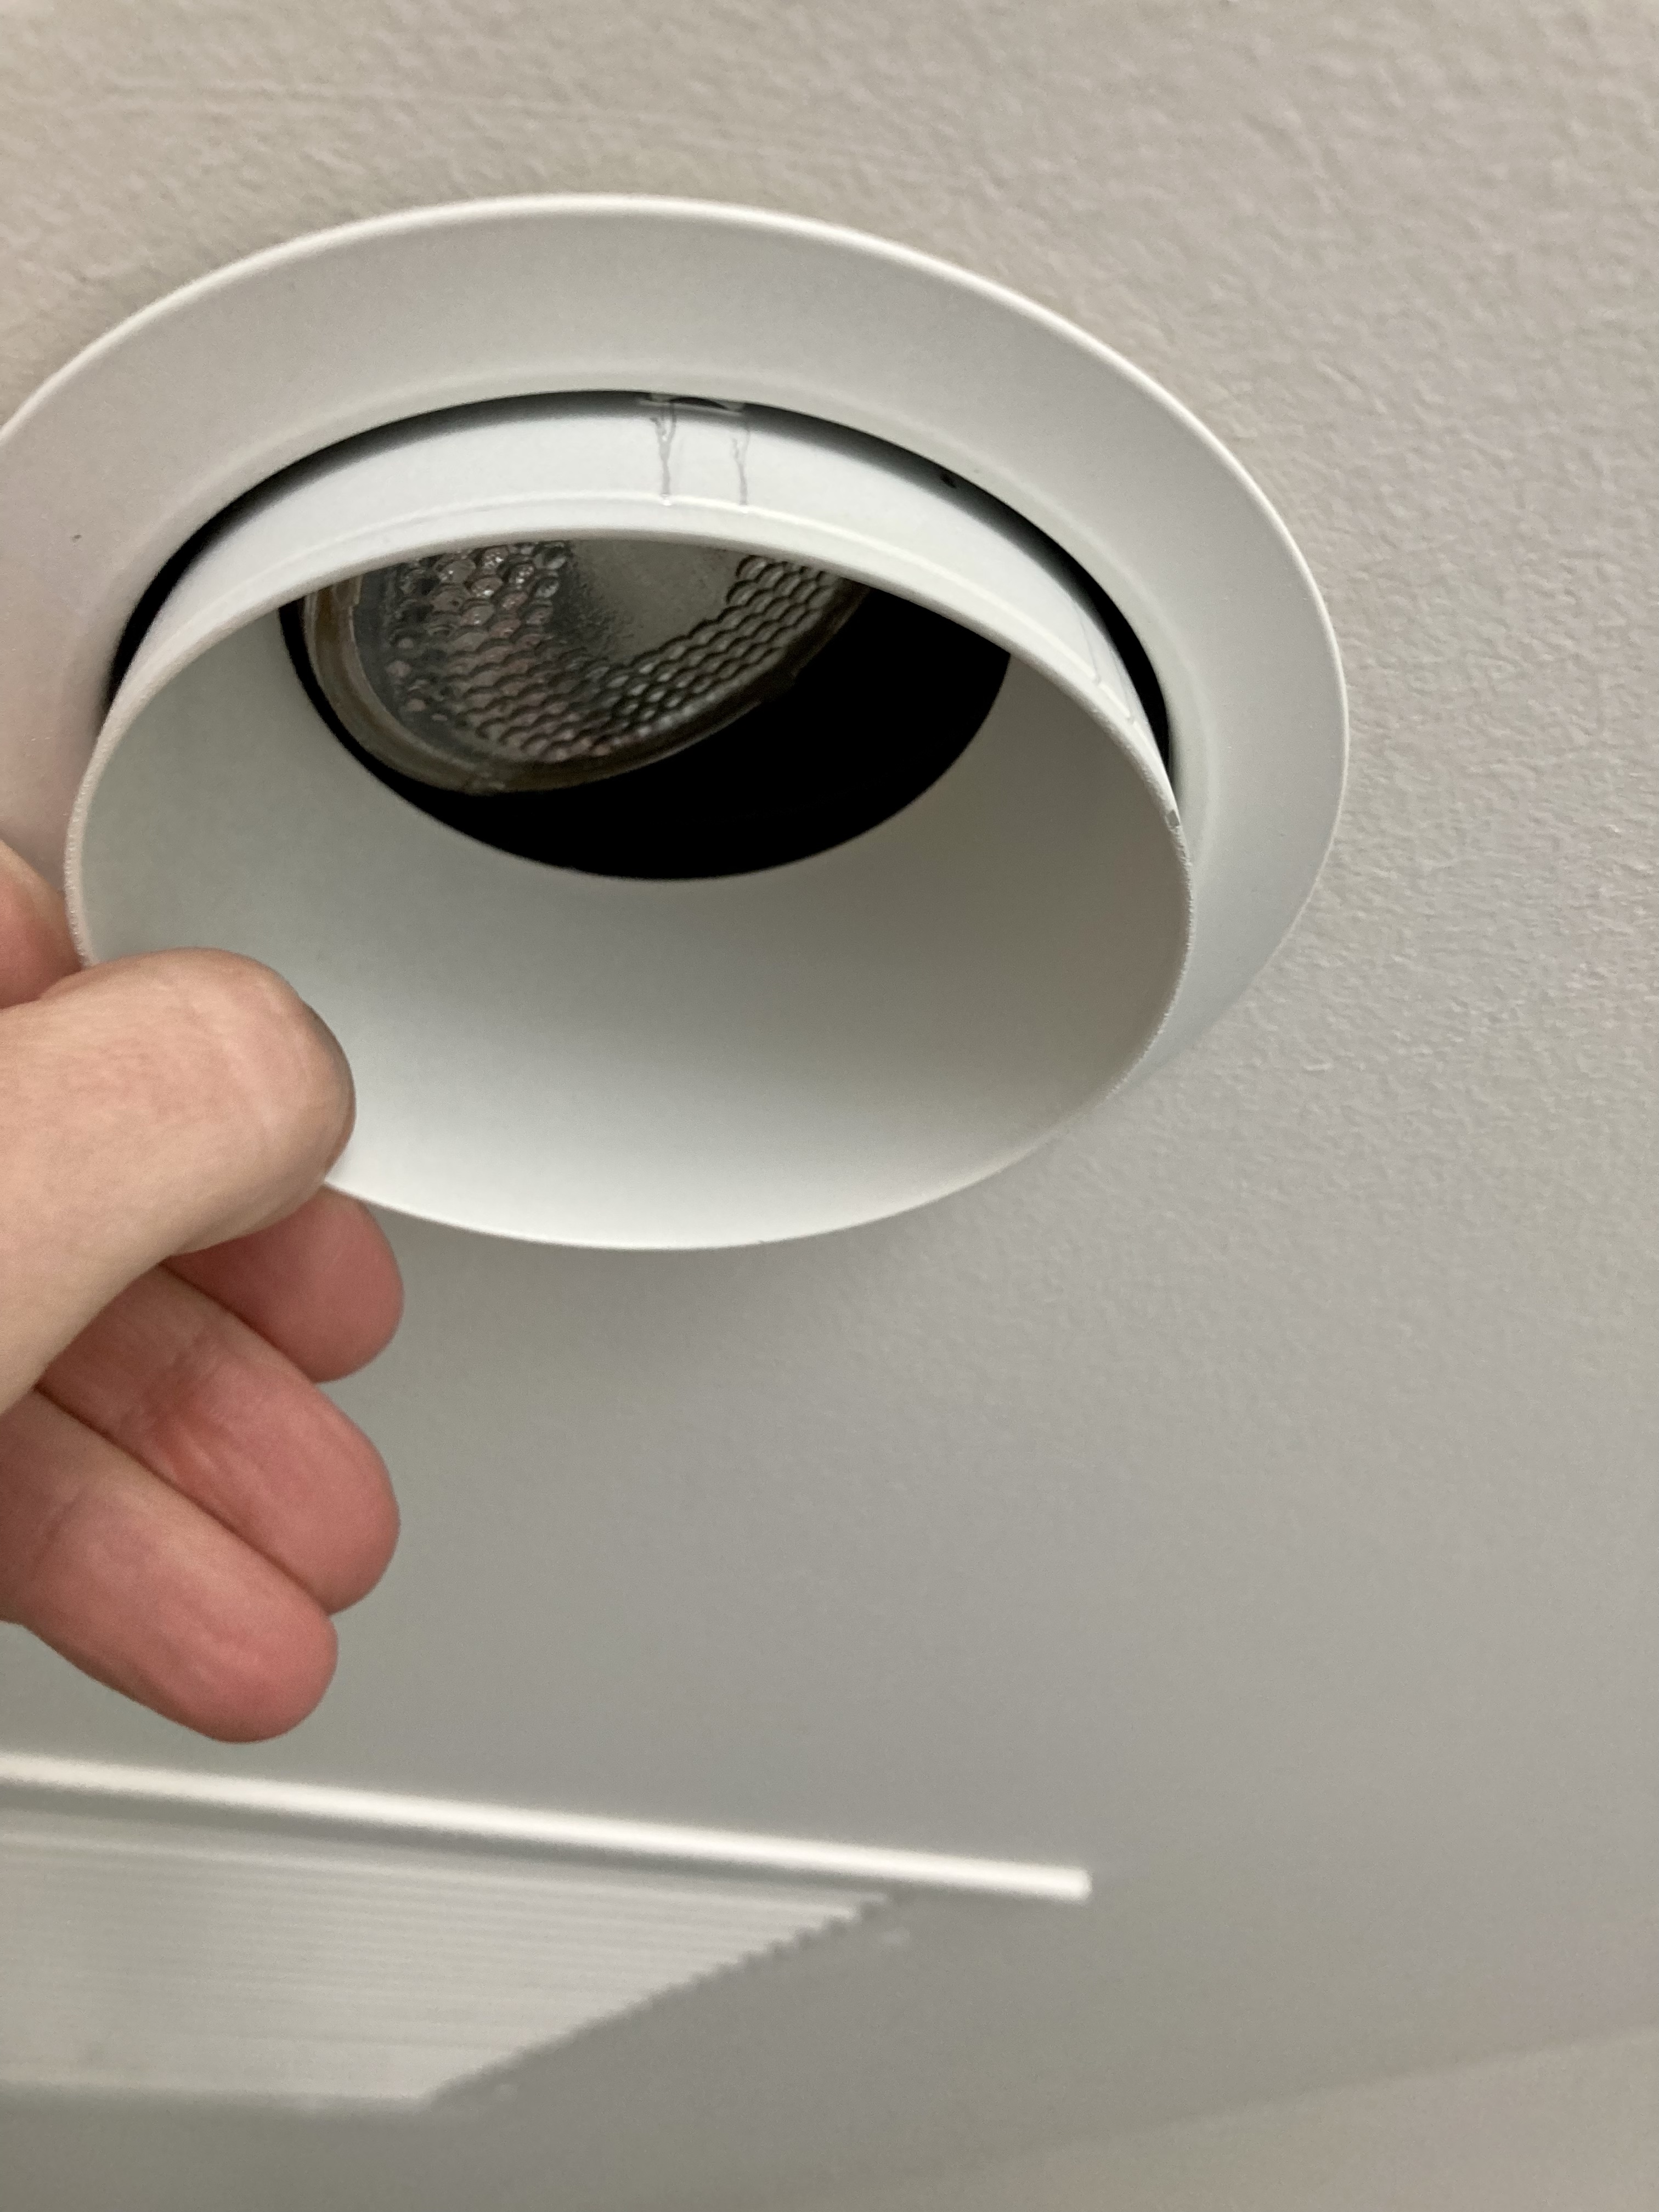
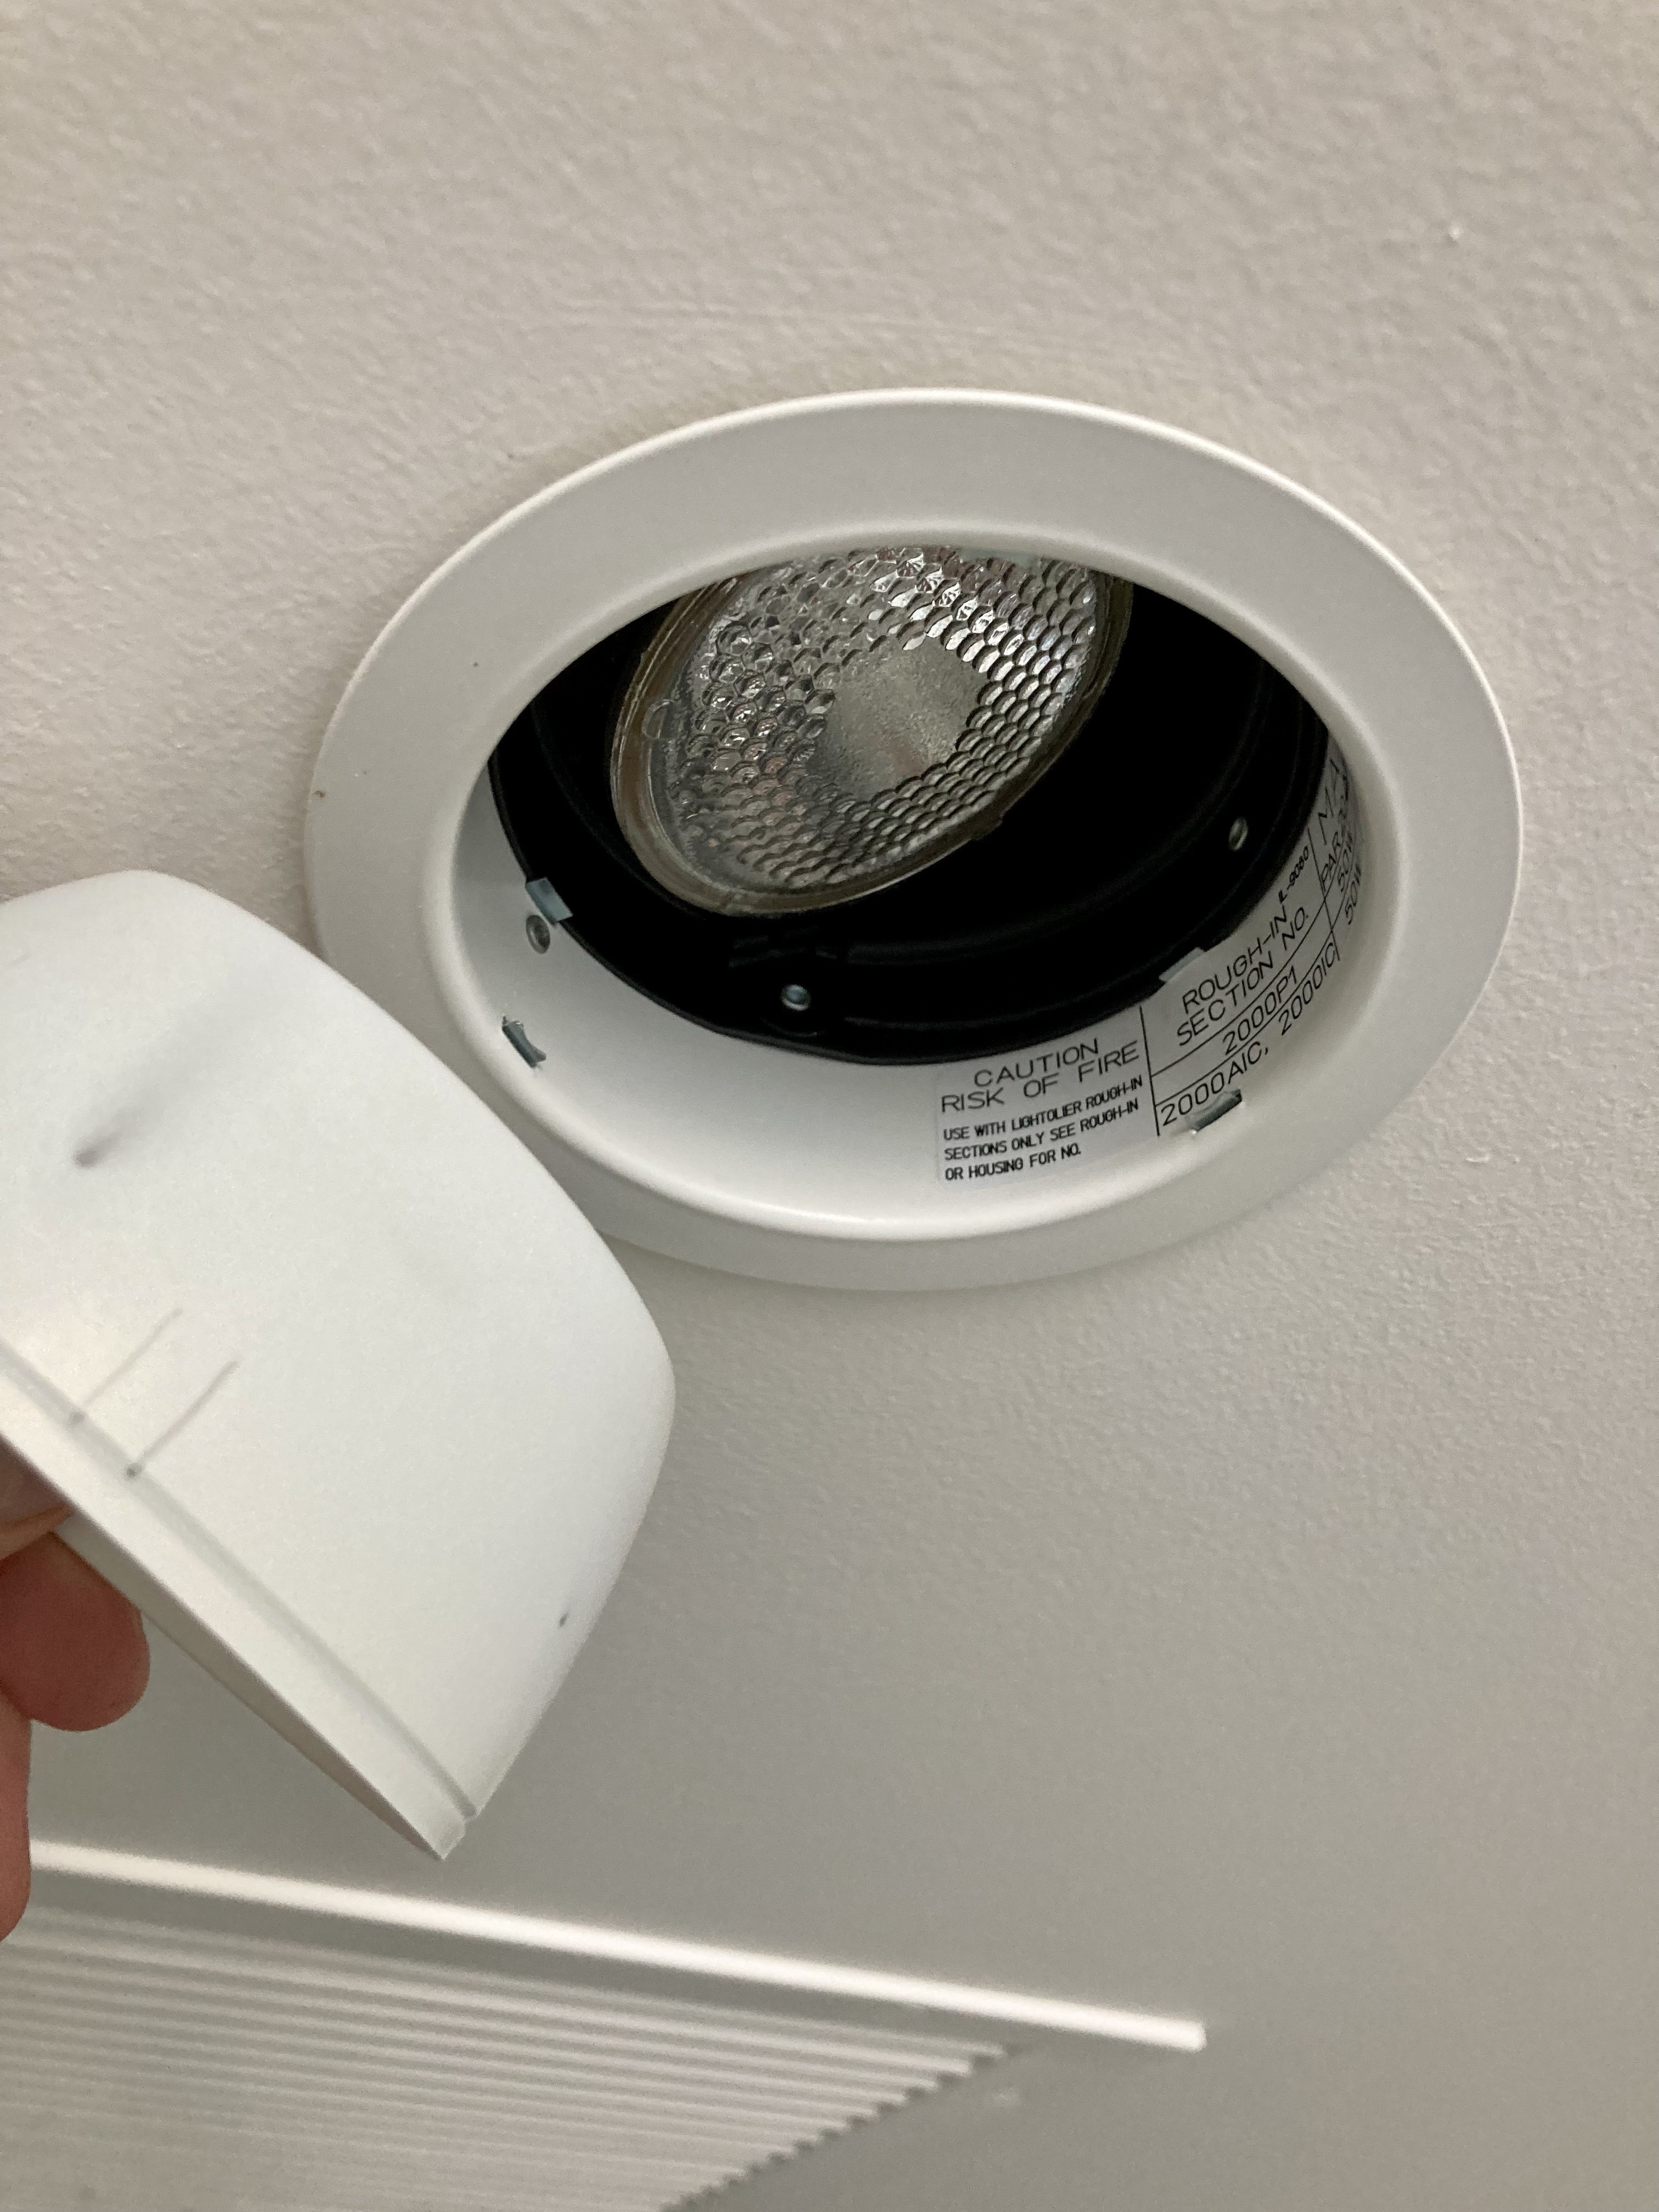
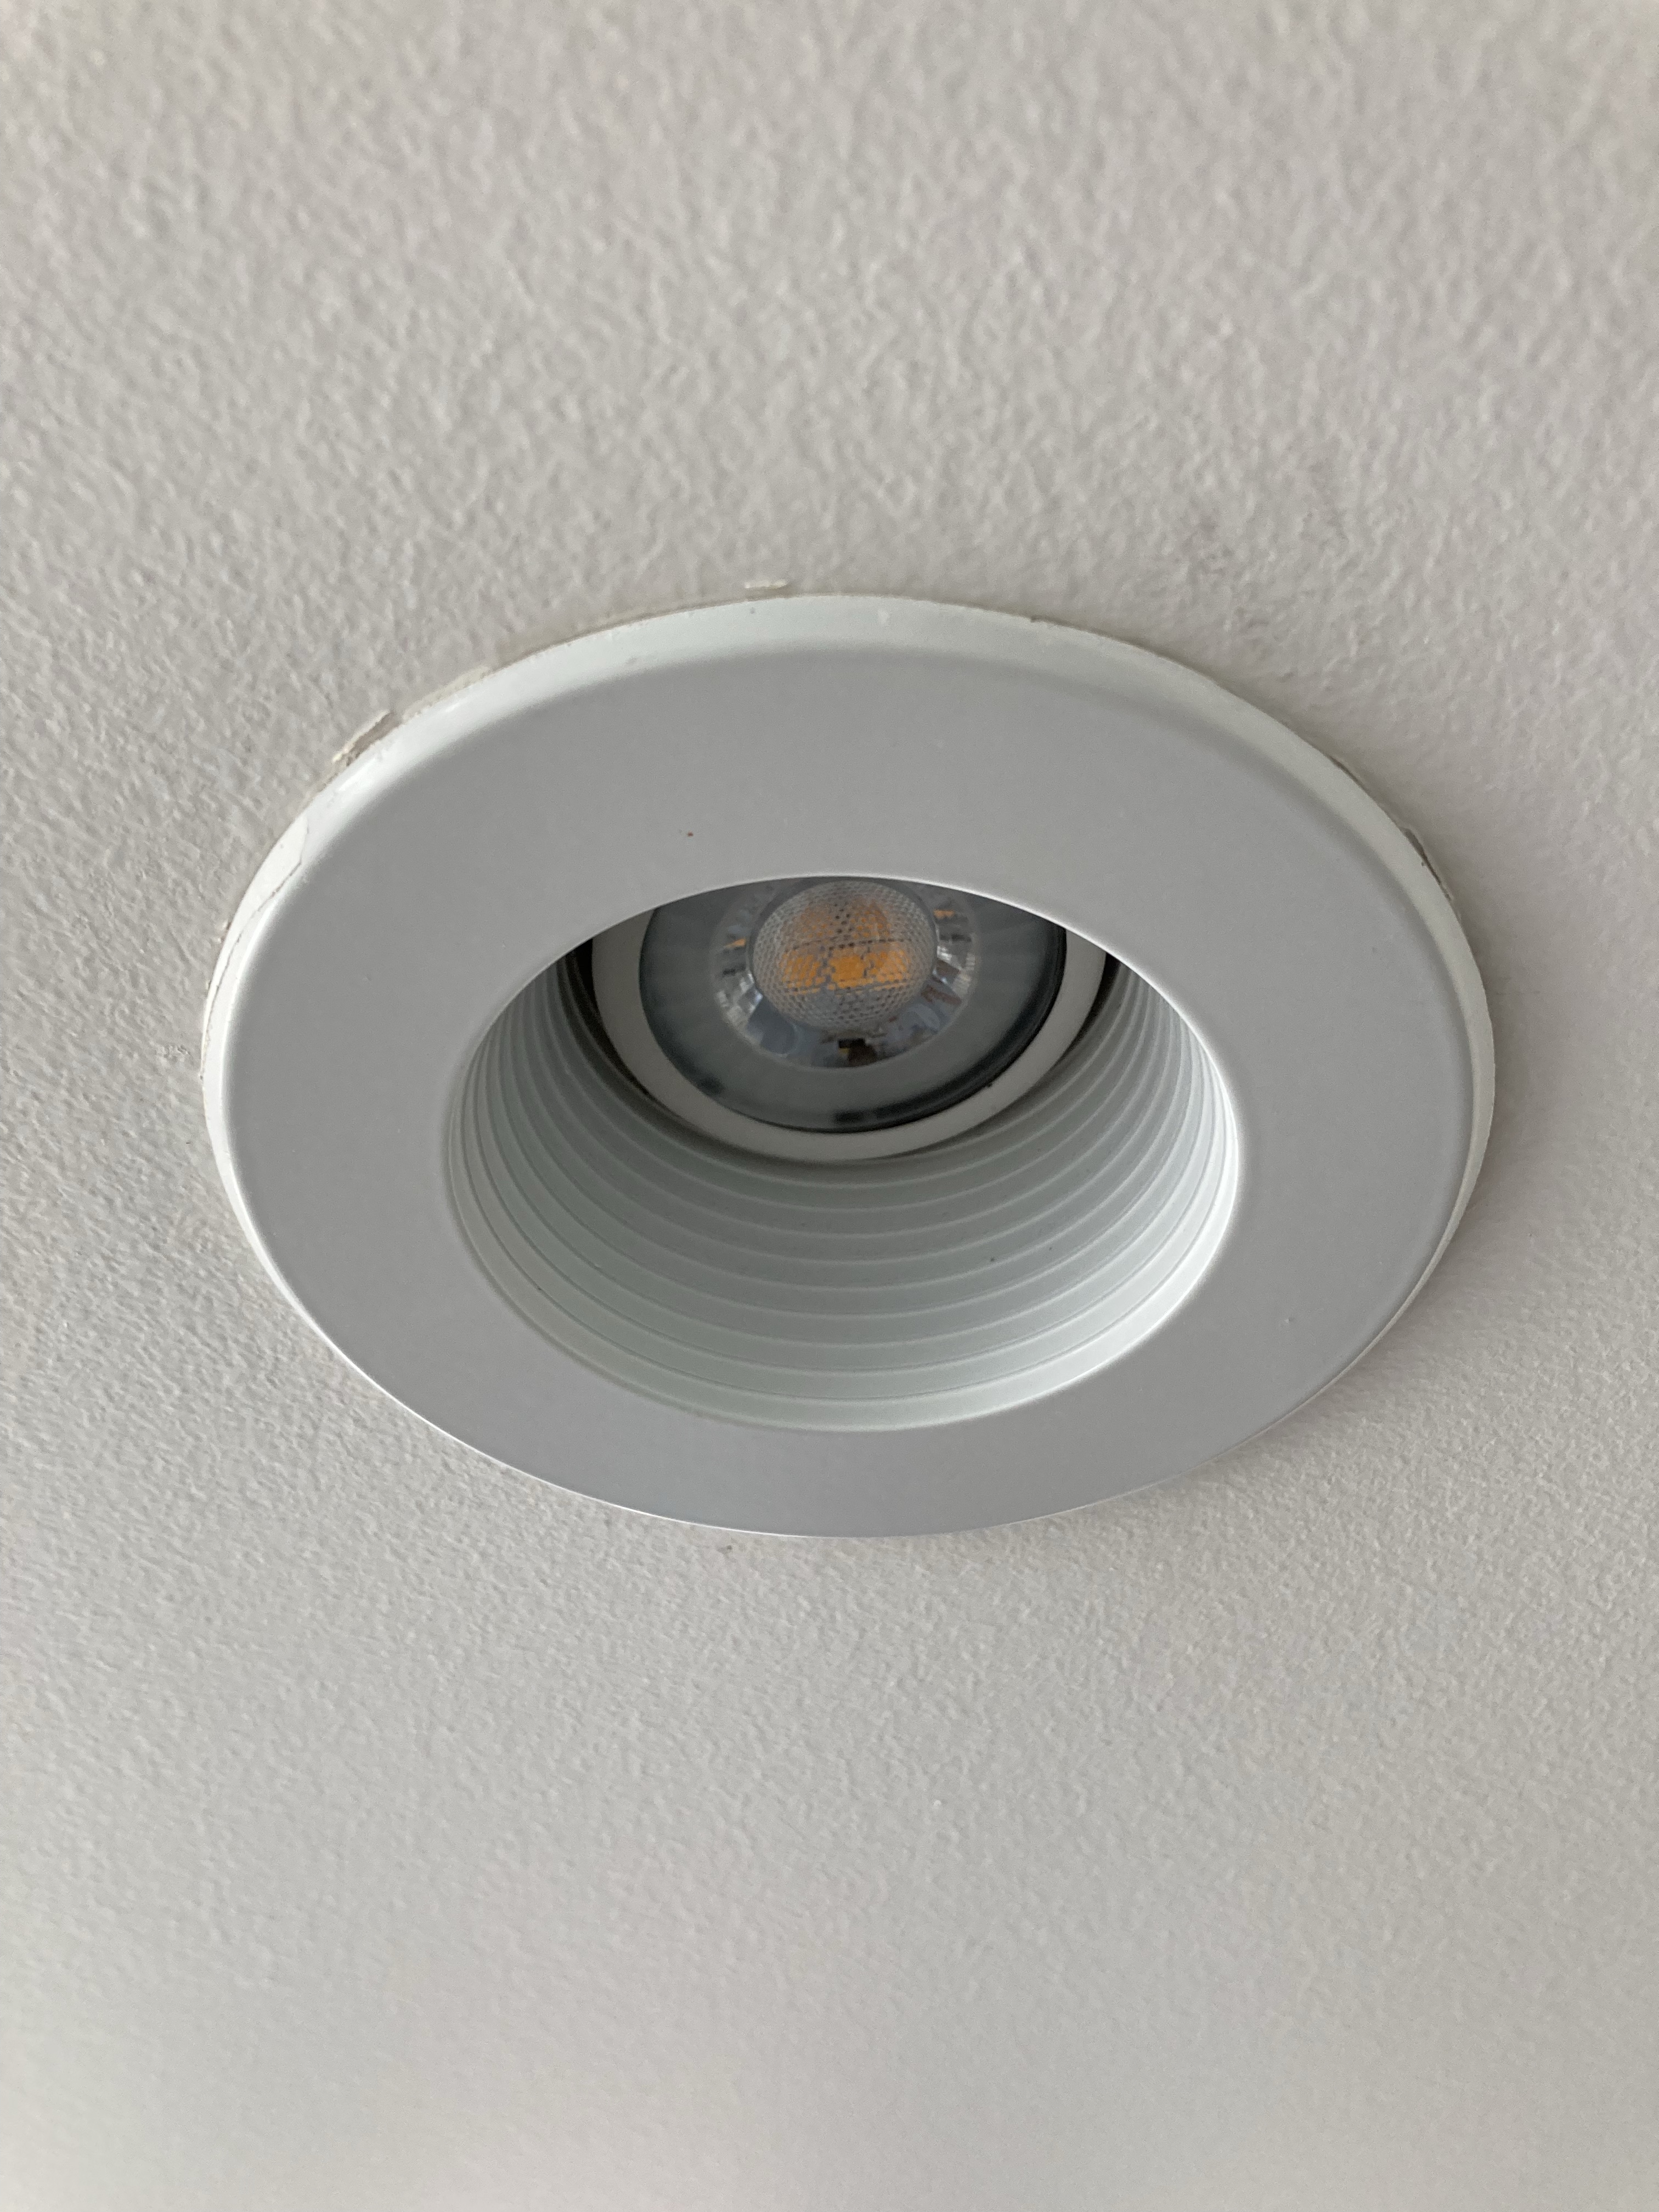
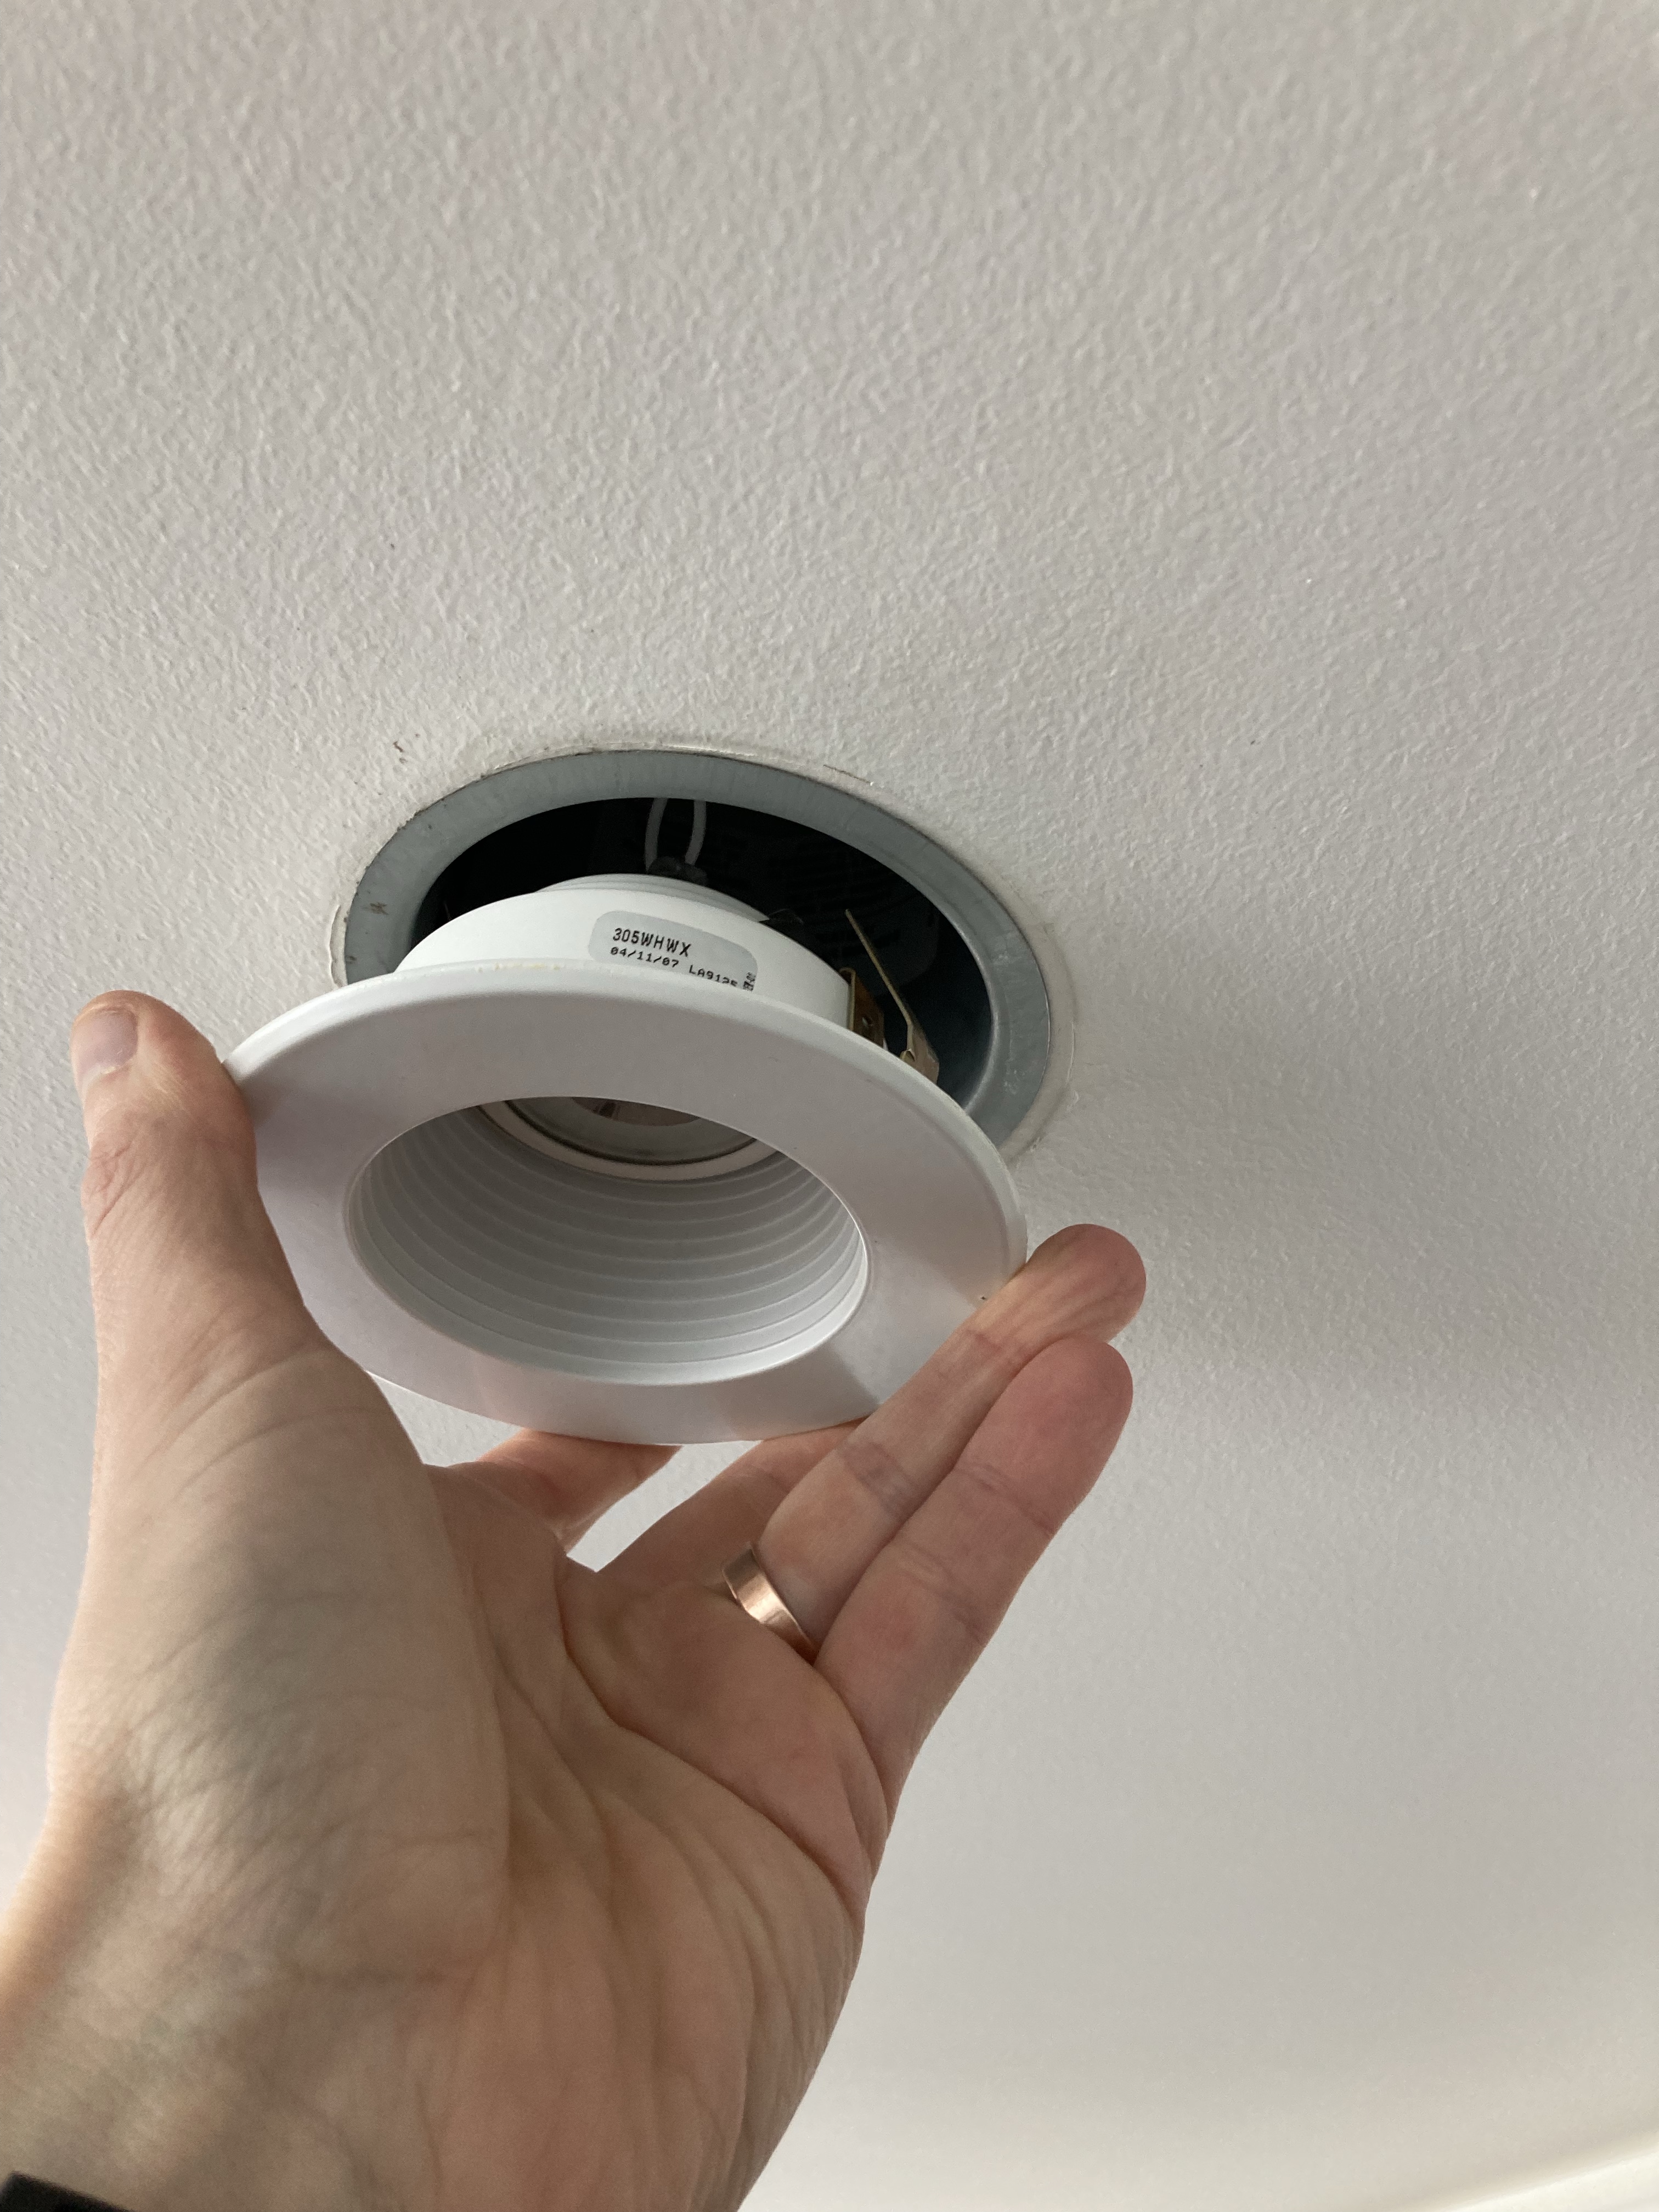
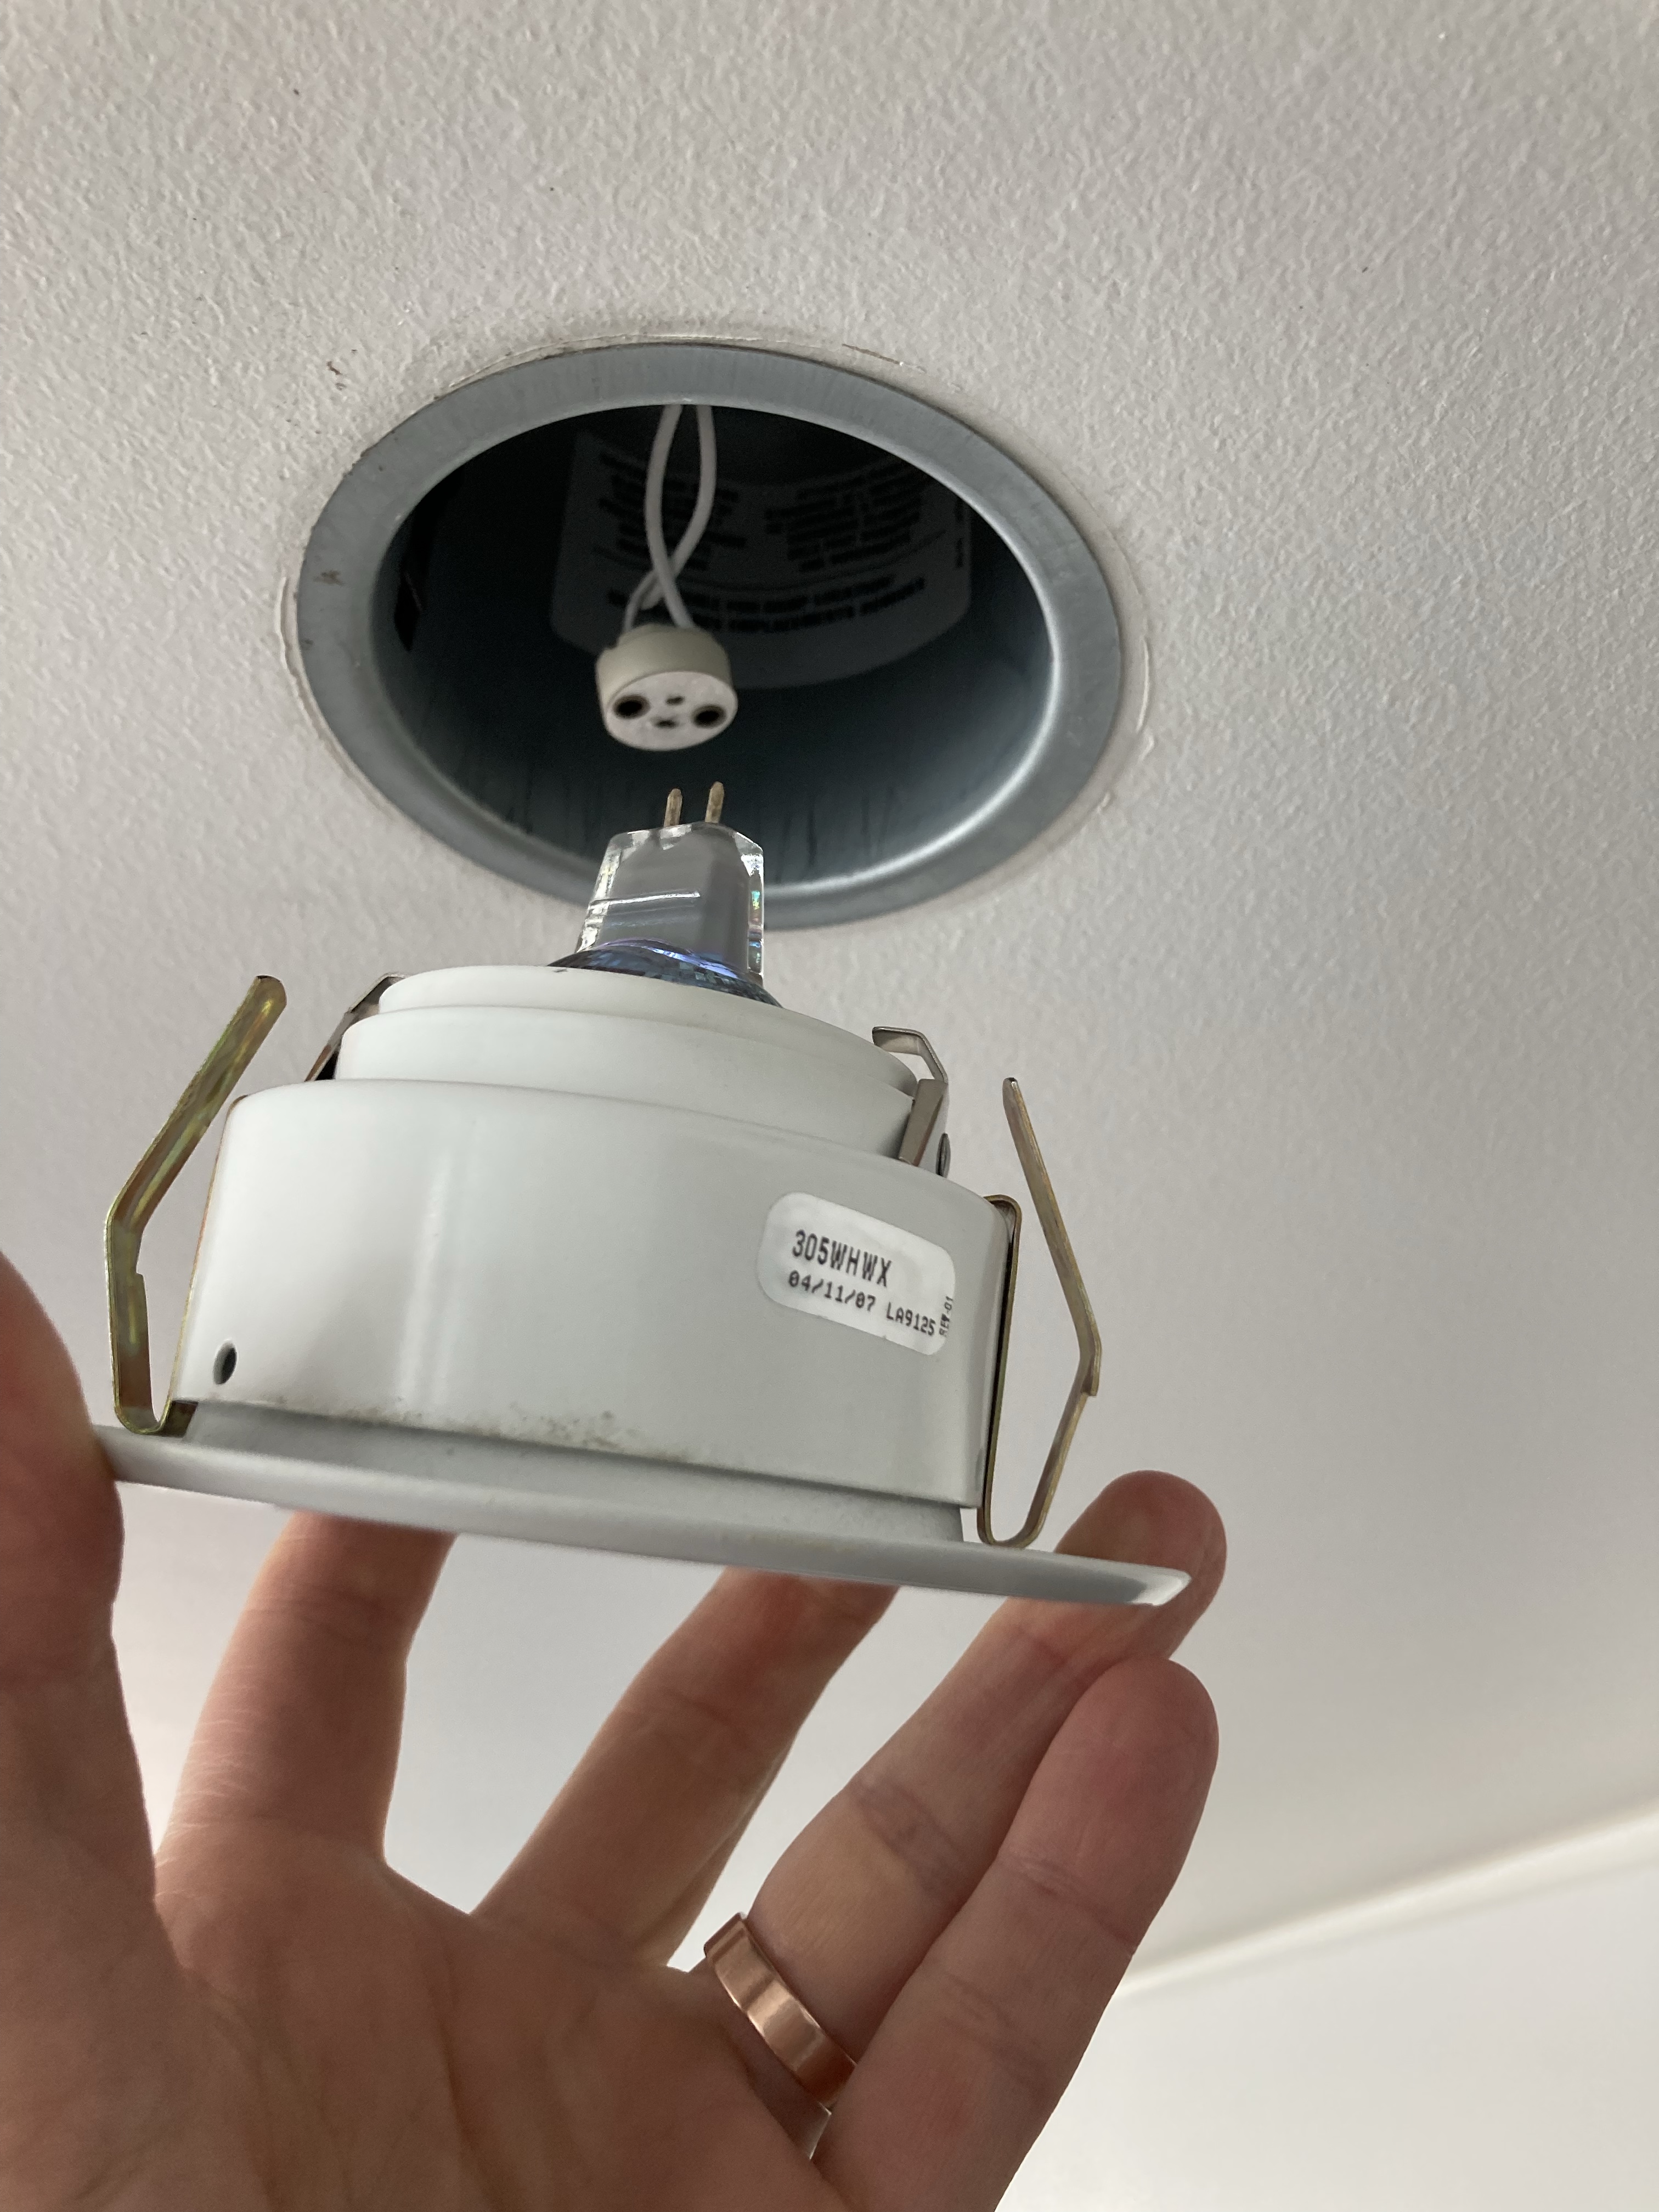
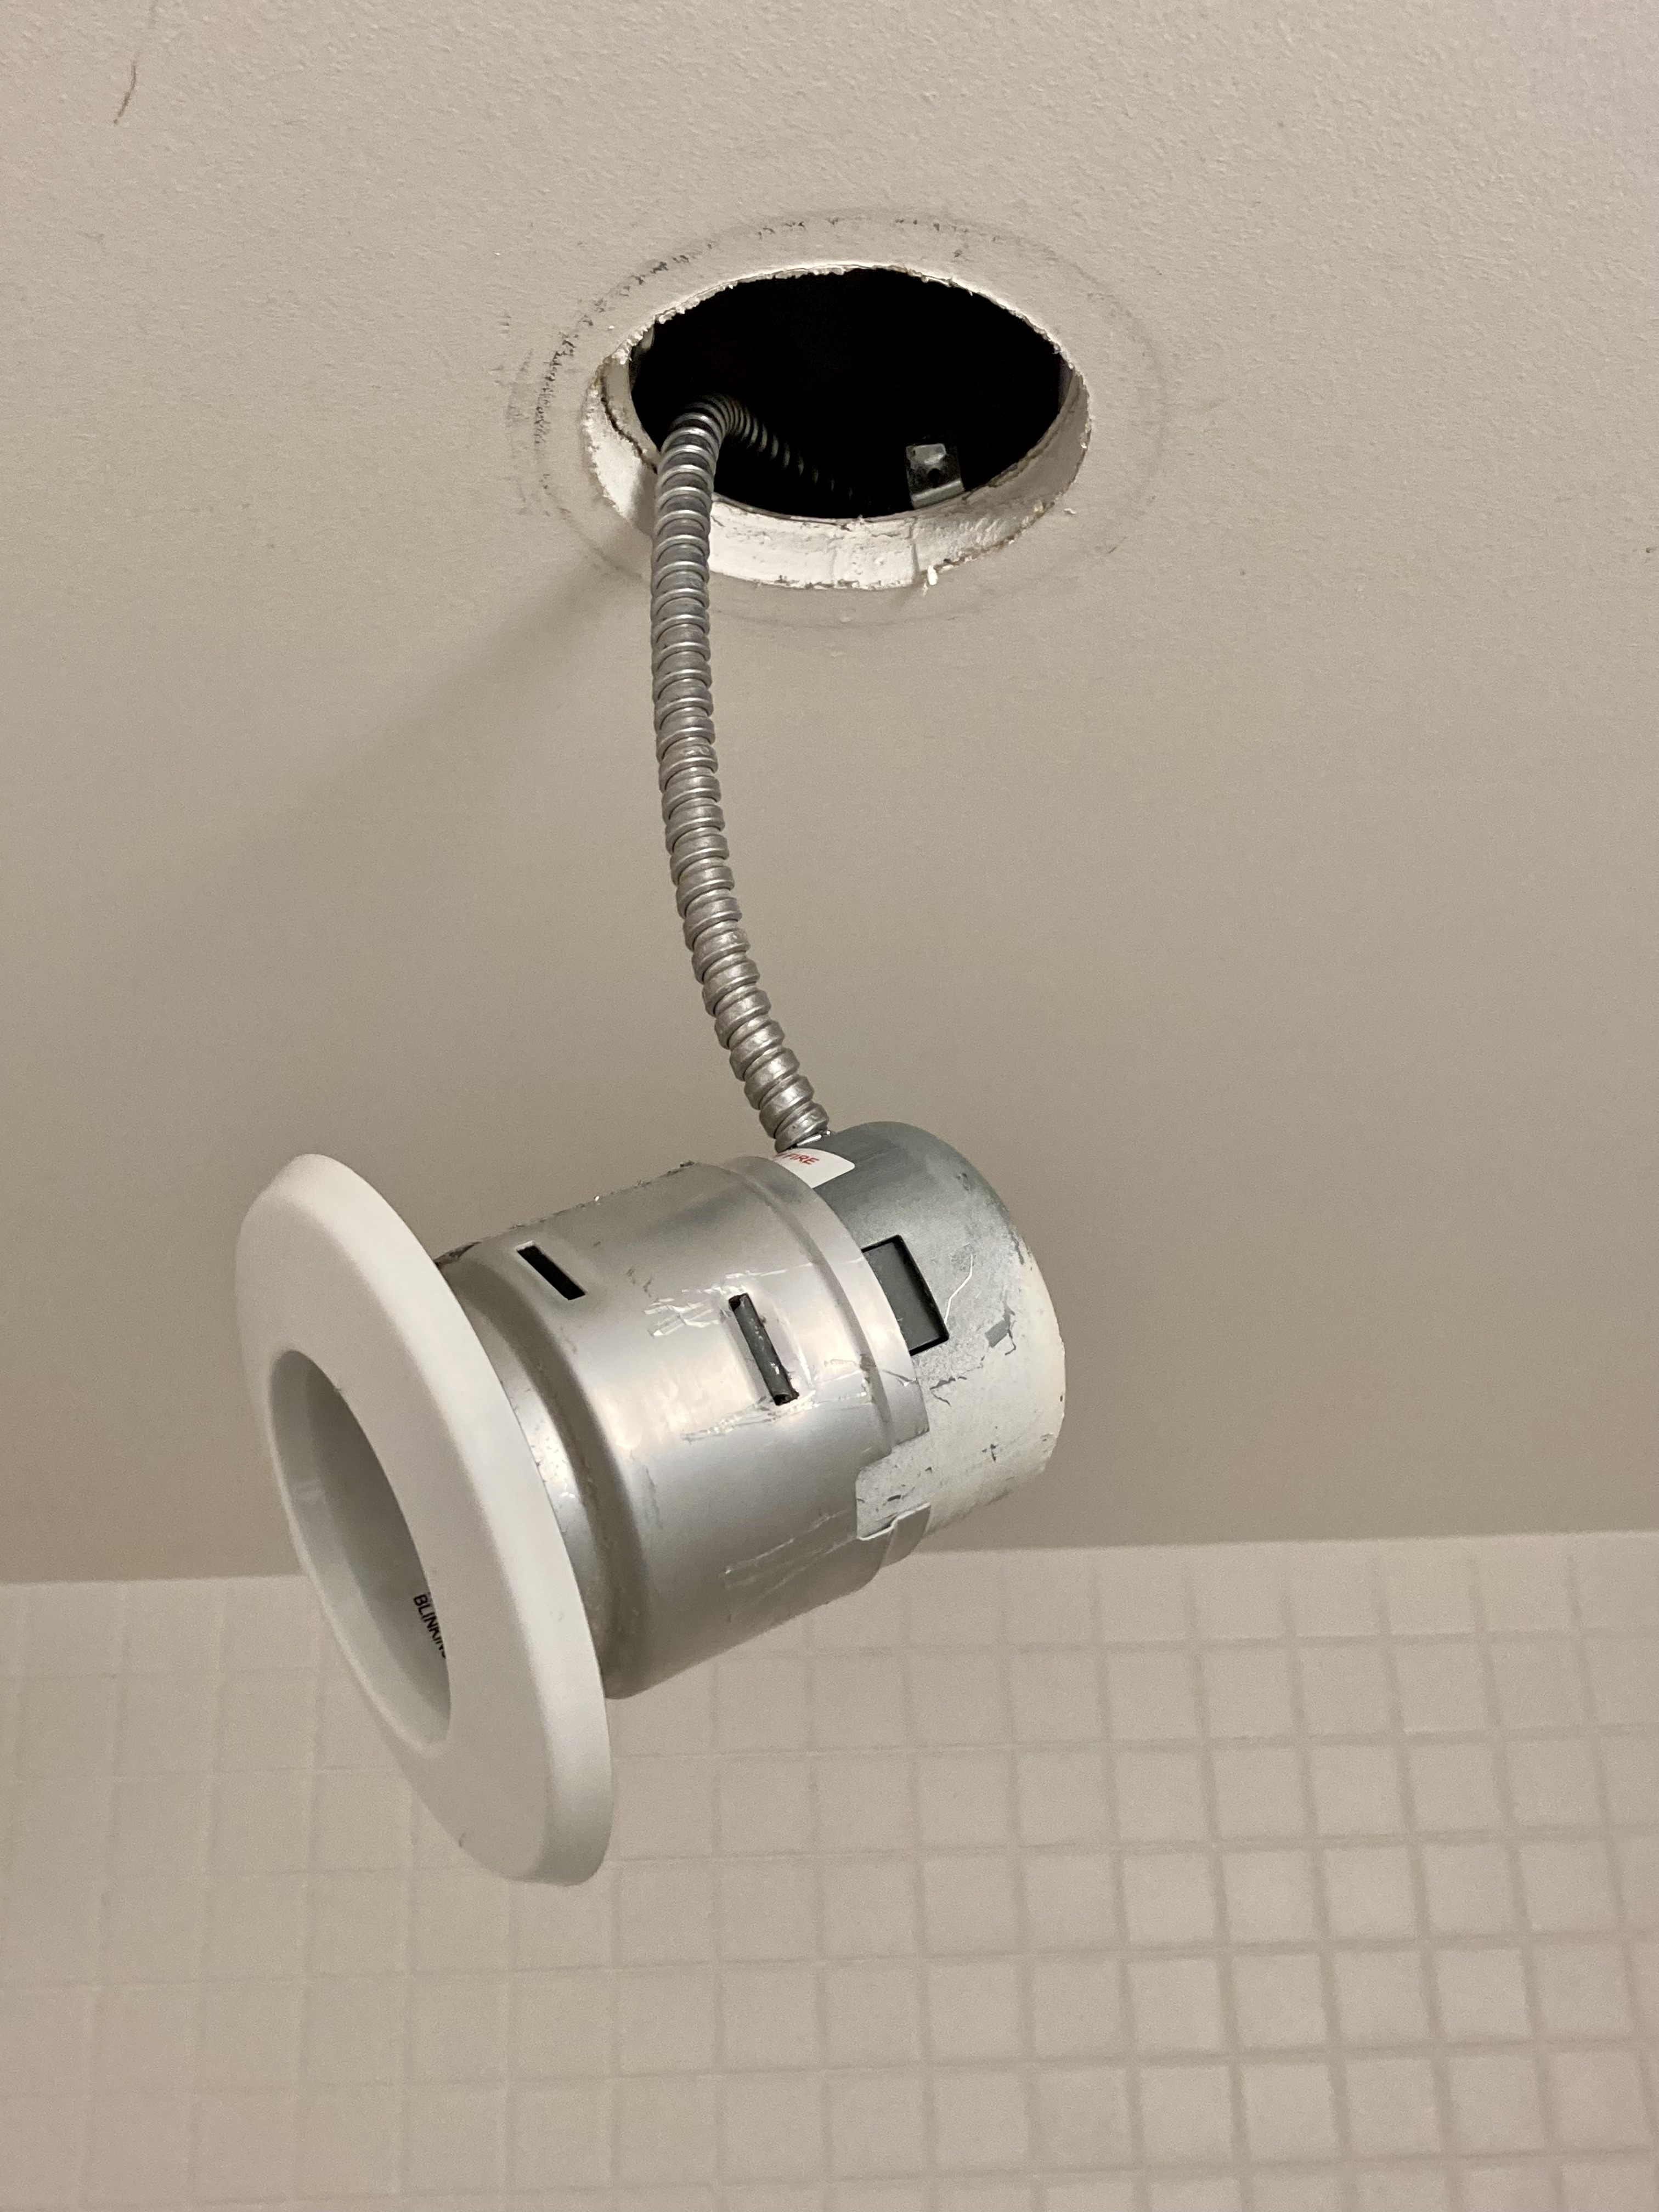
KITCHEN IN CEILING BULBS
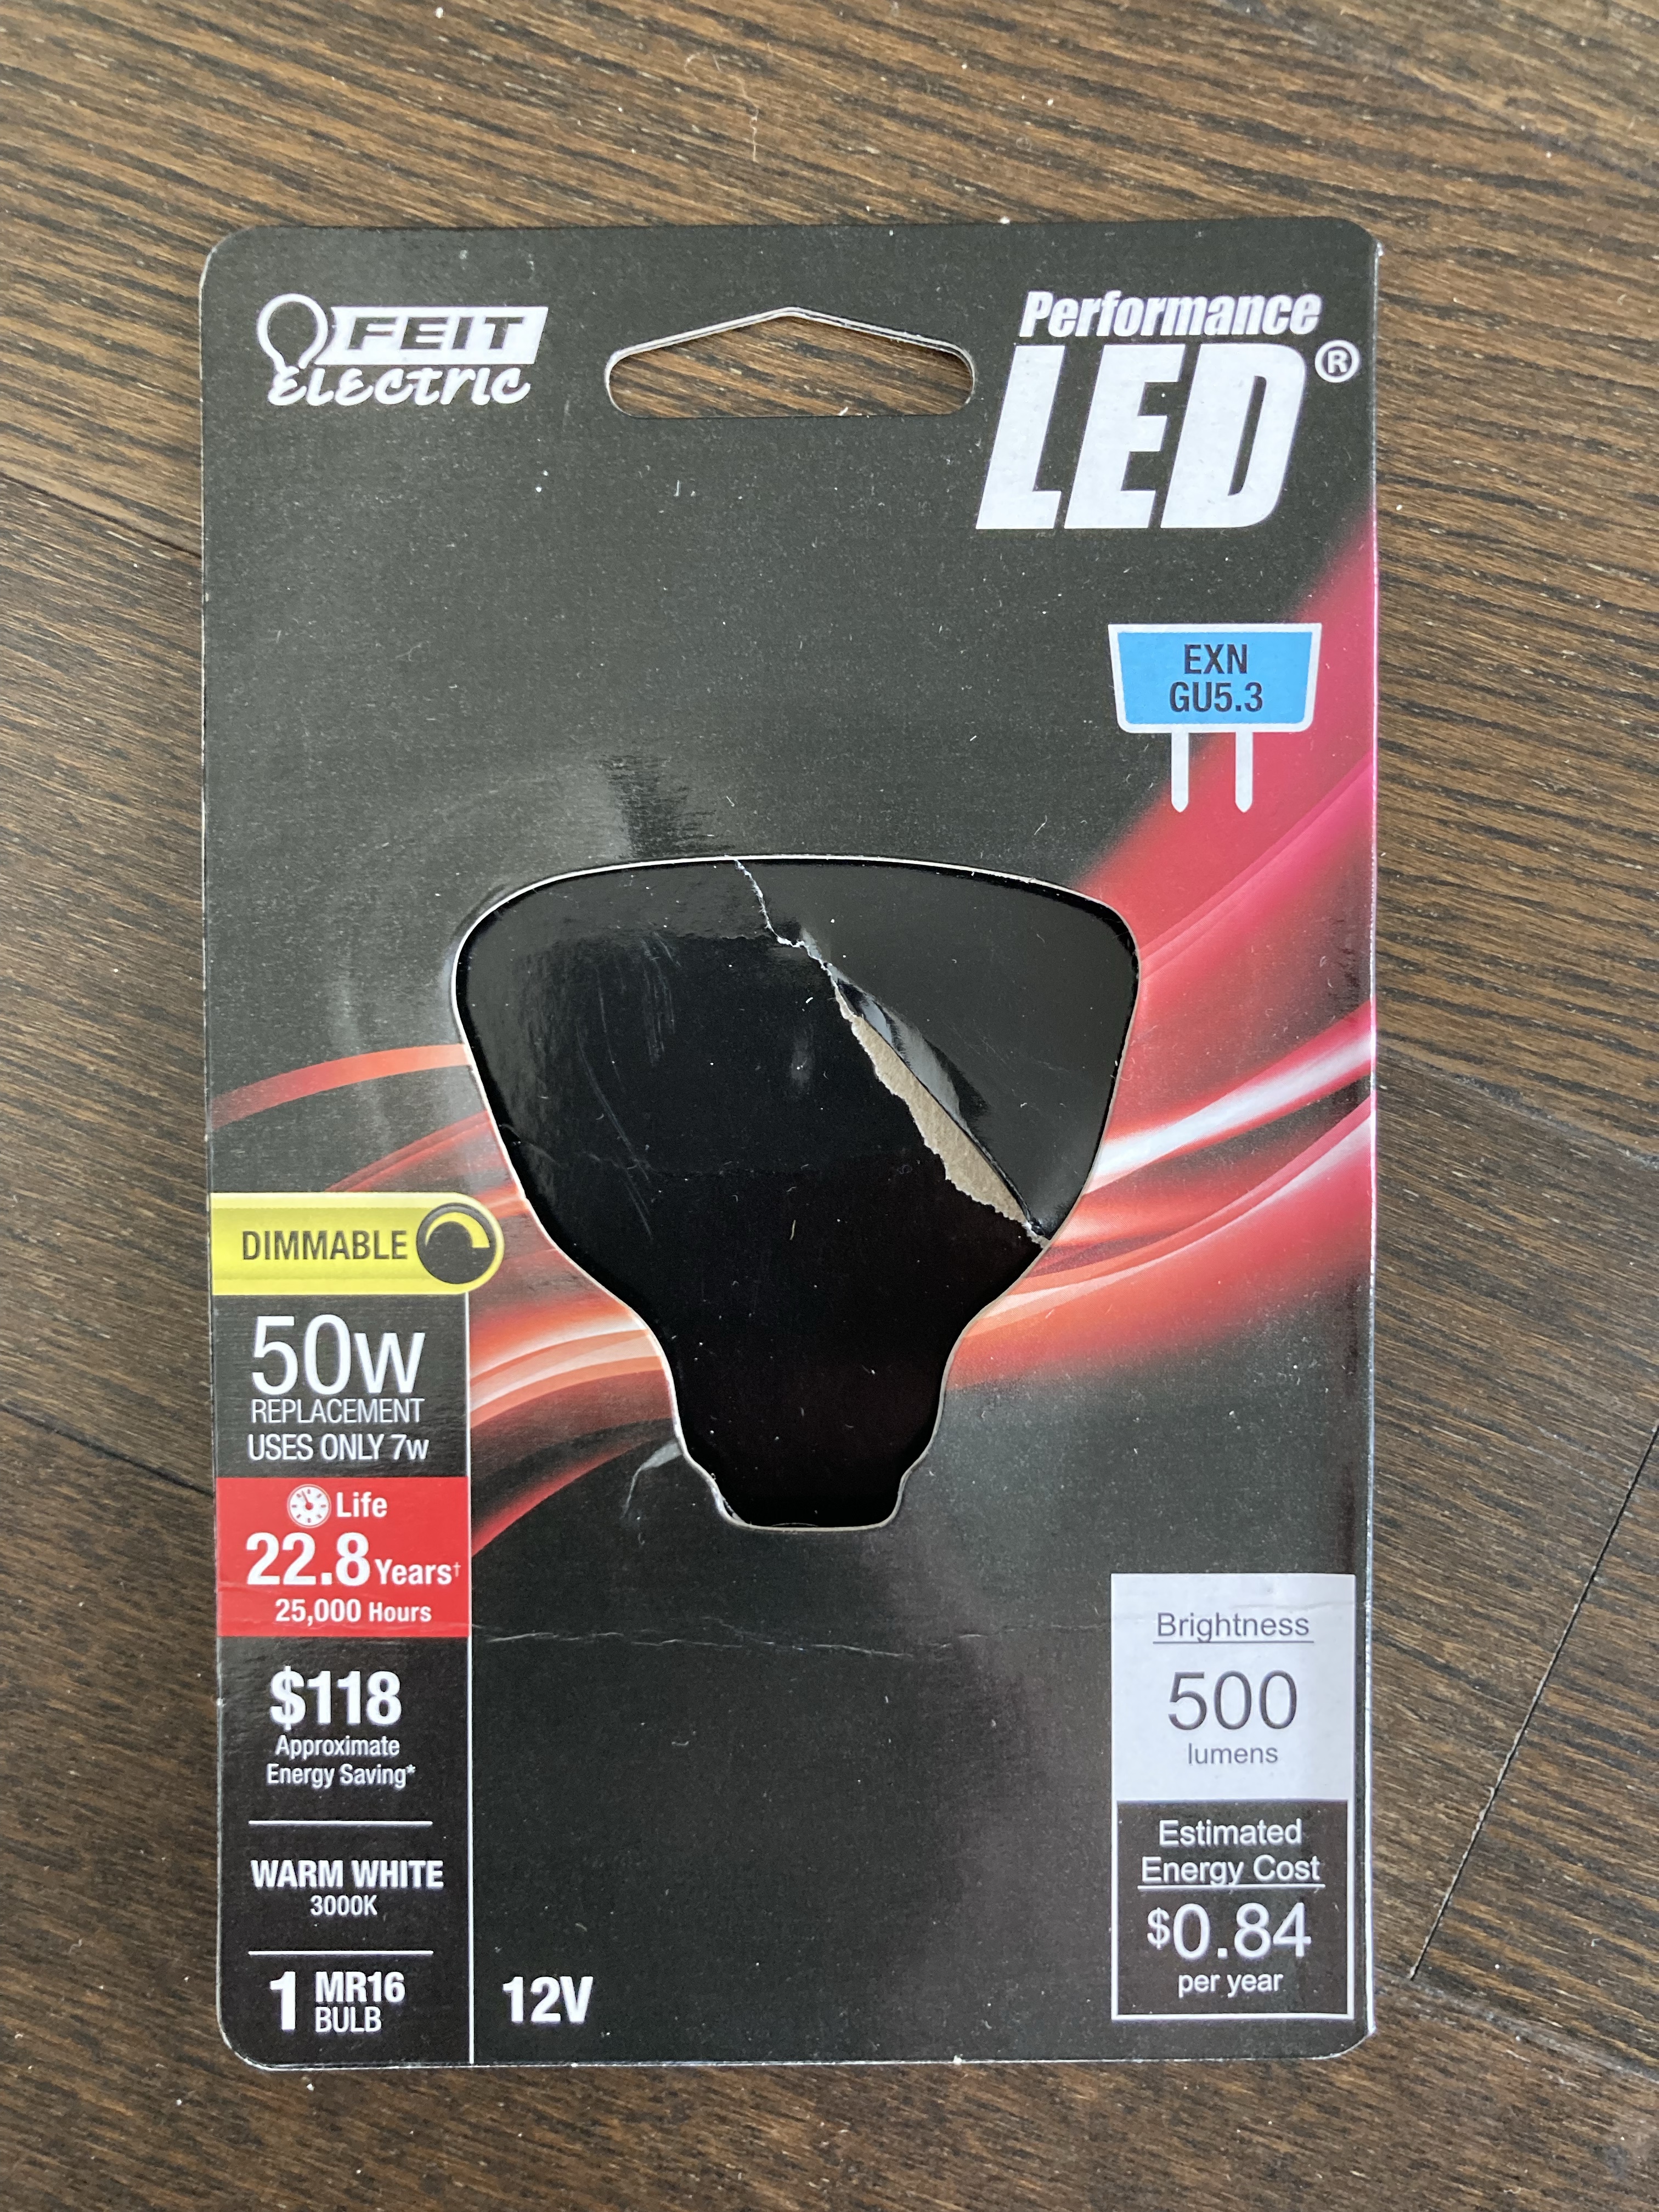
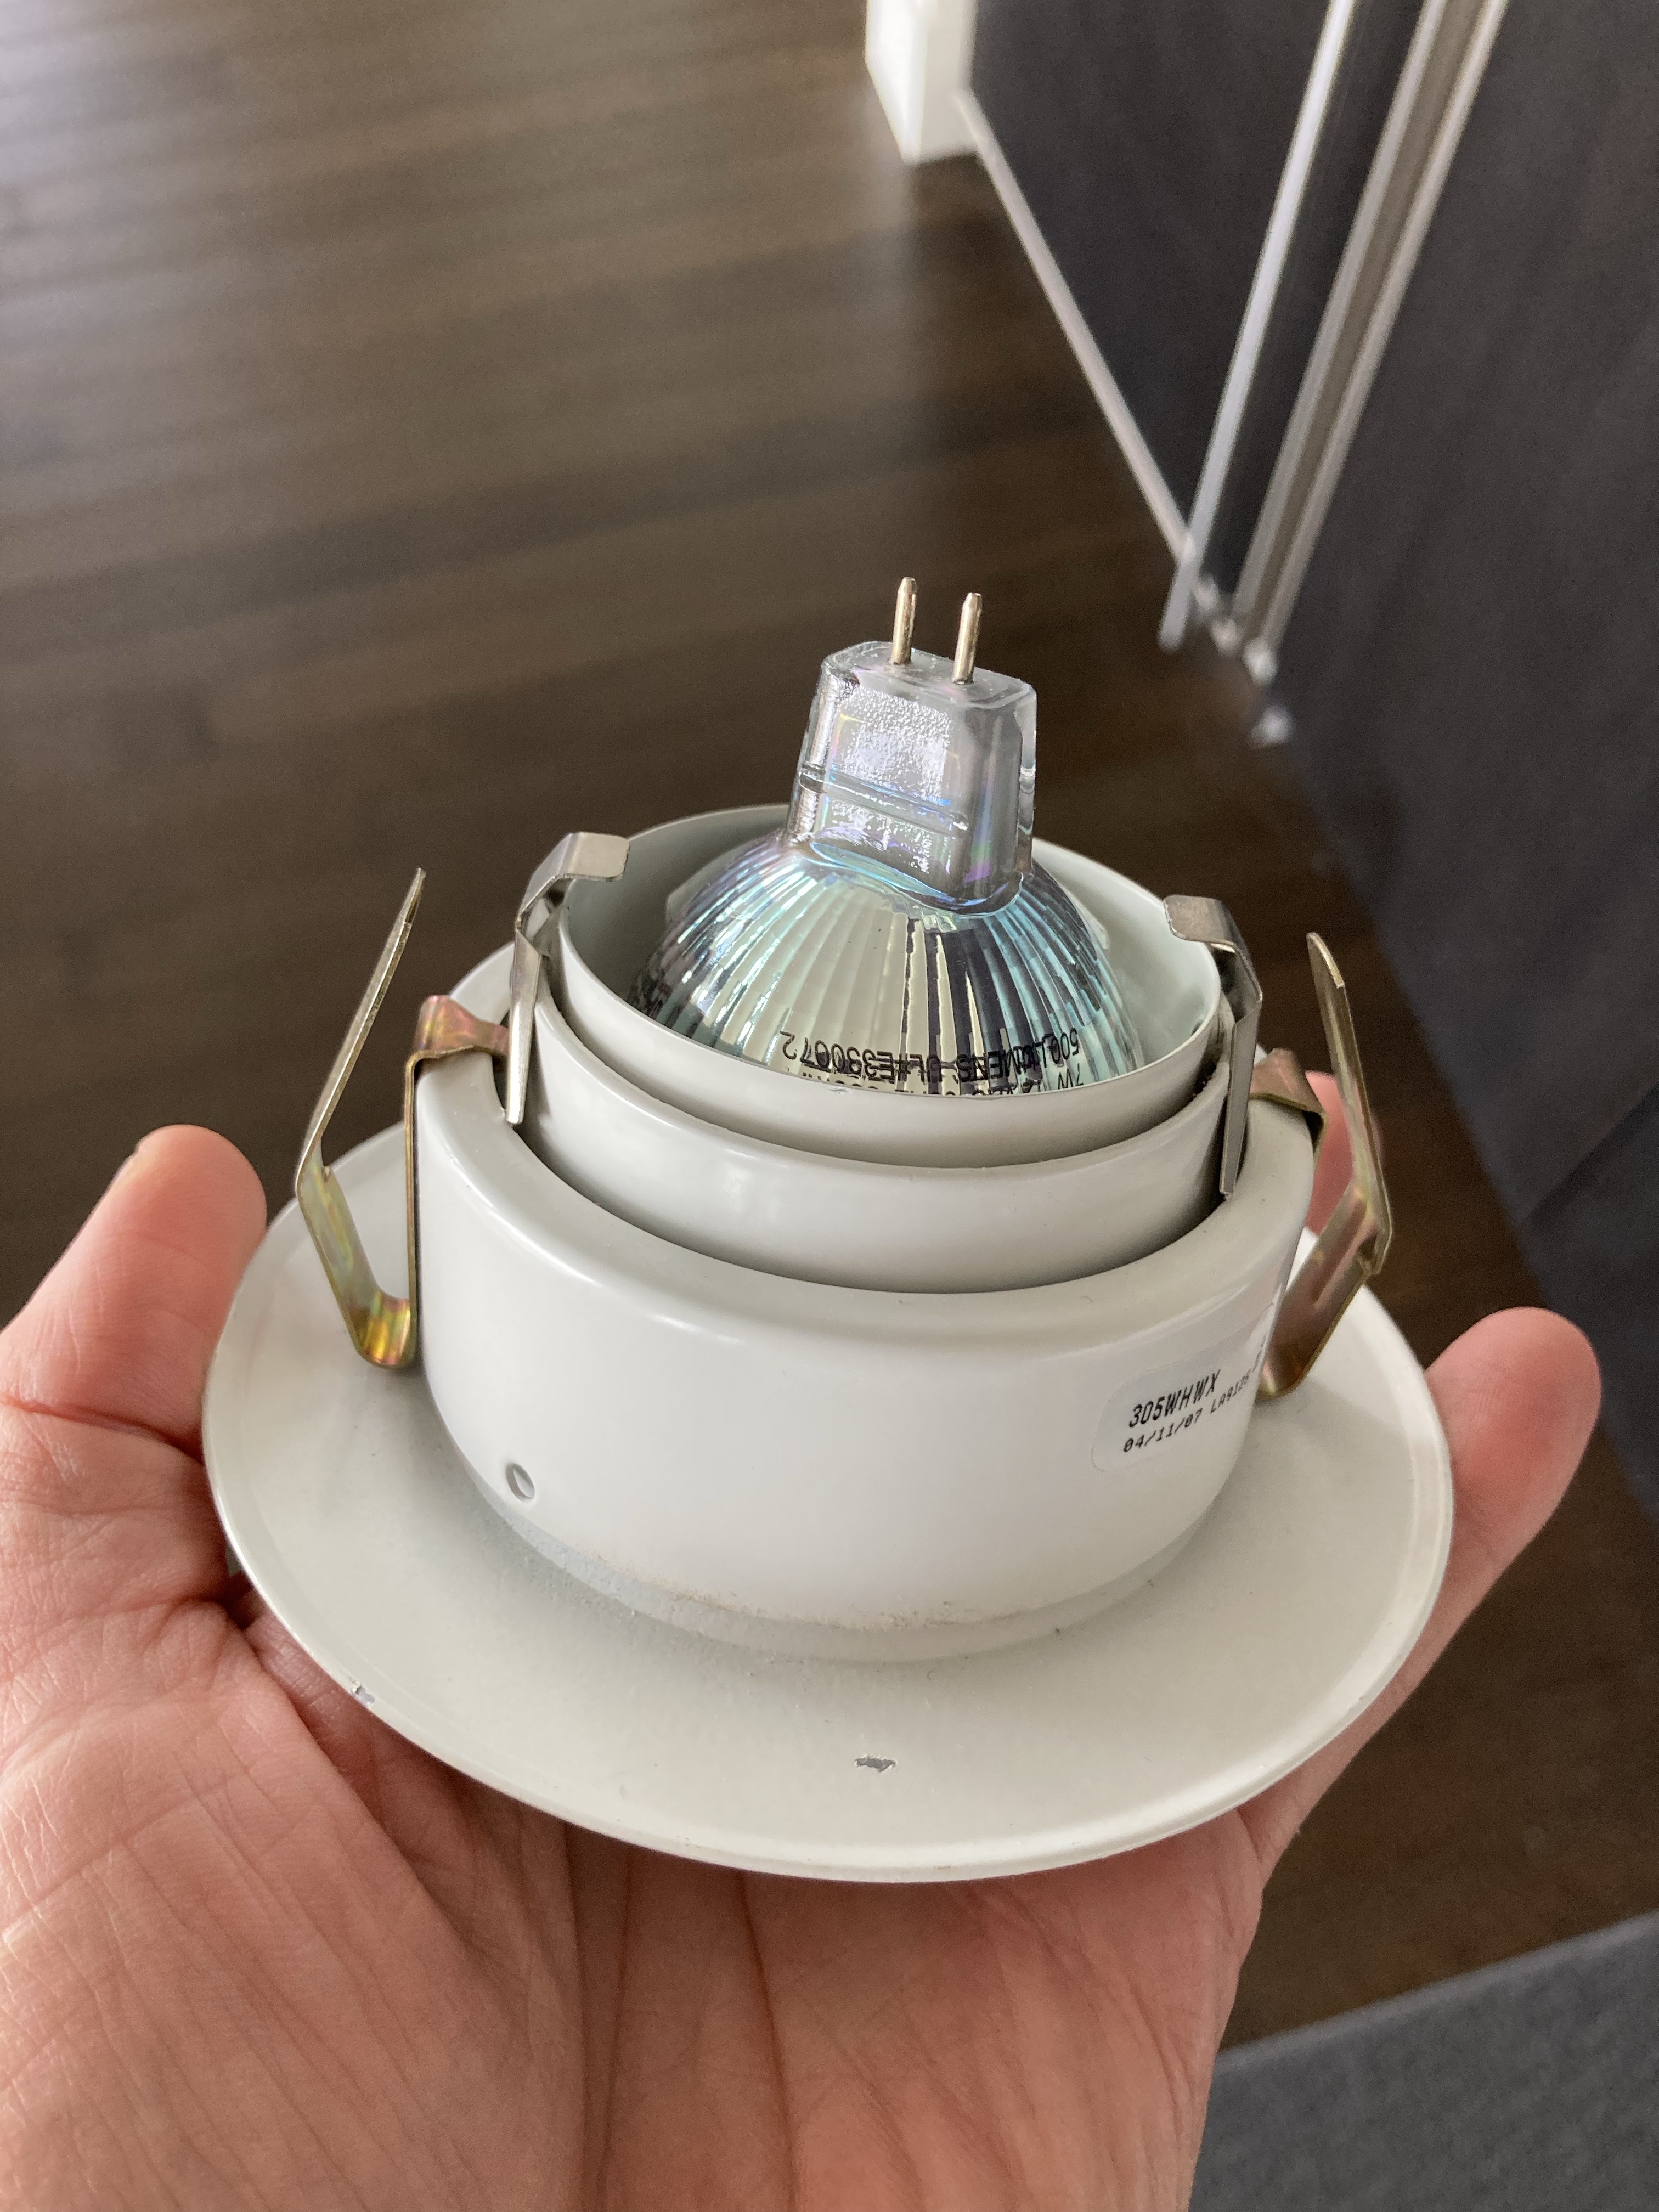
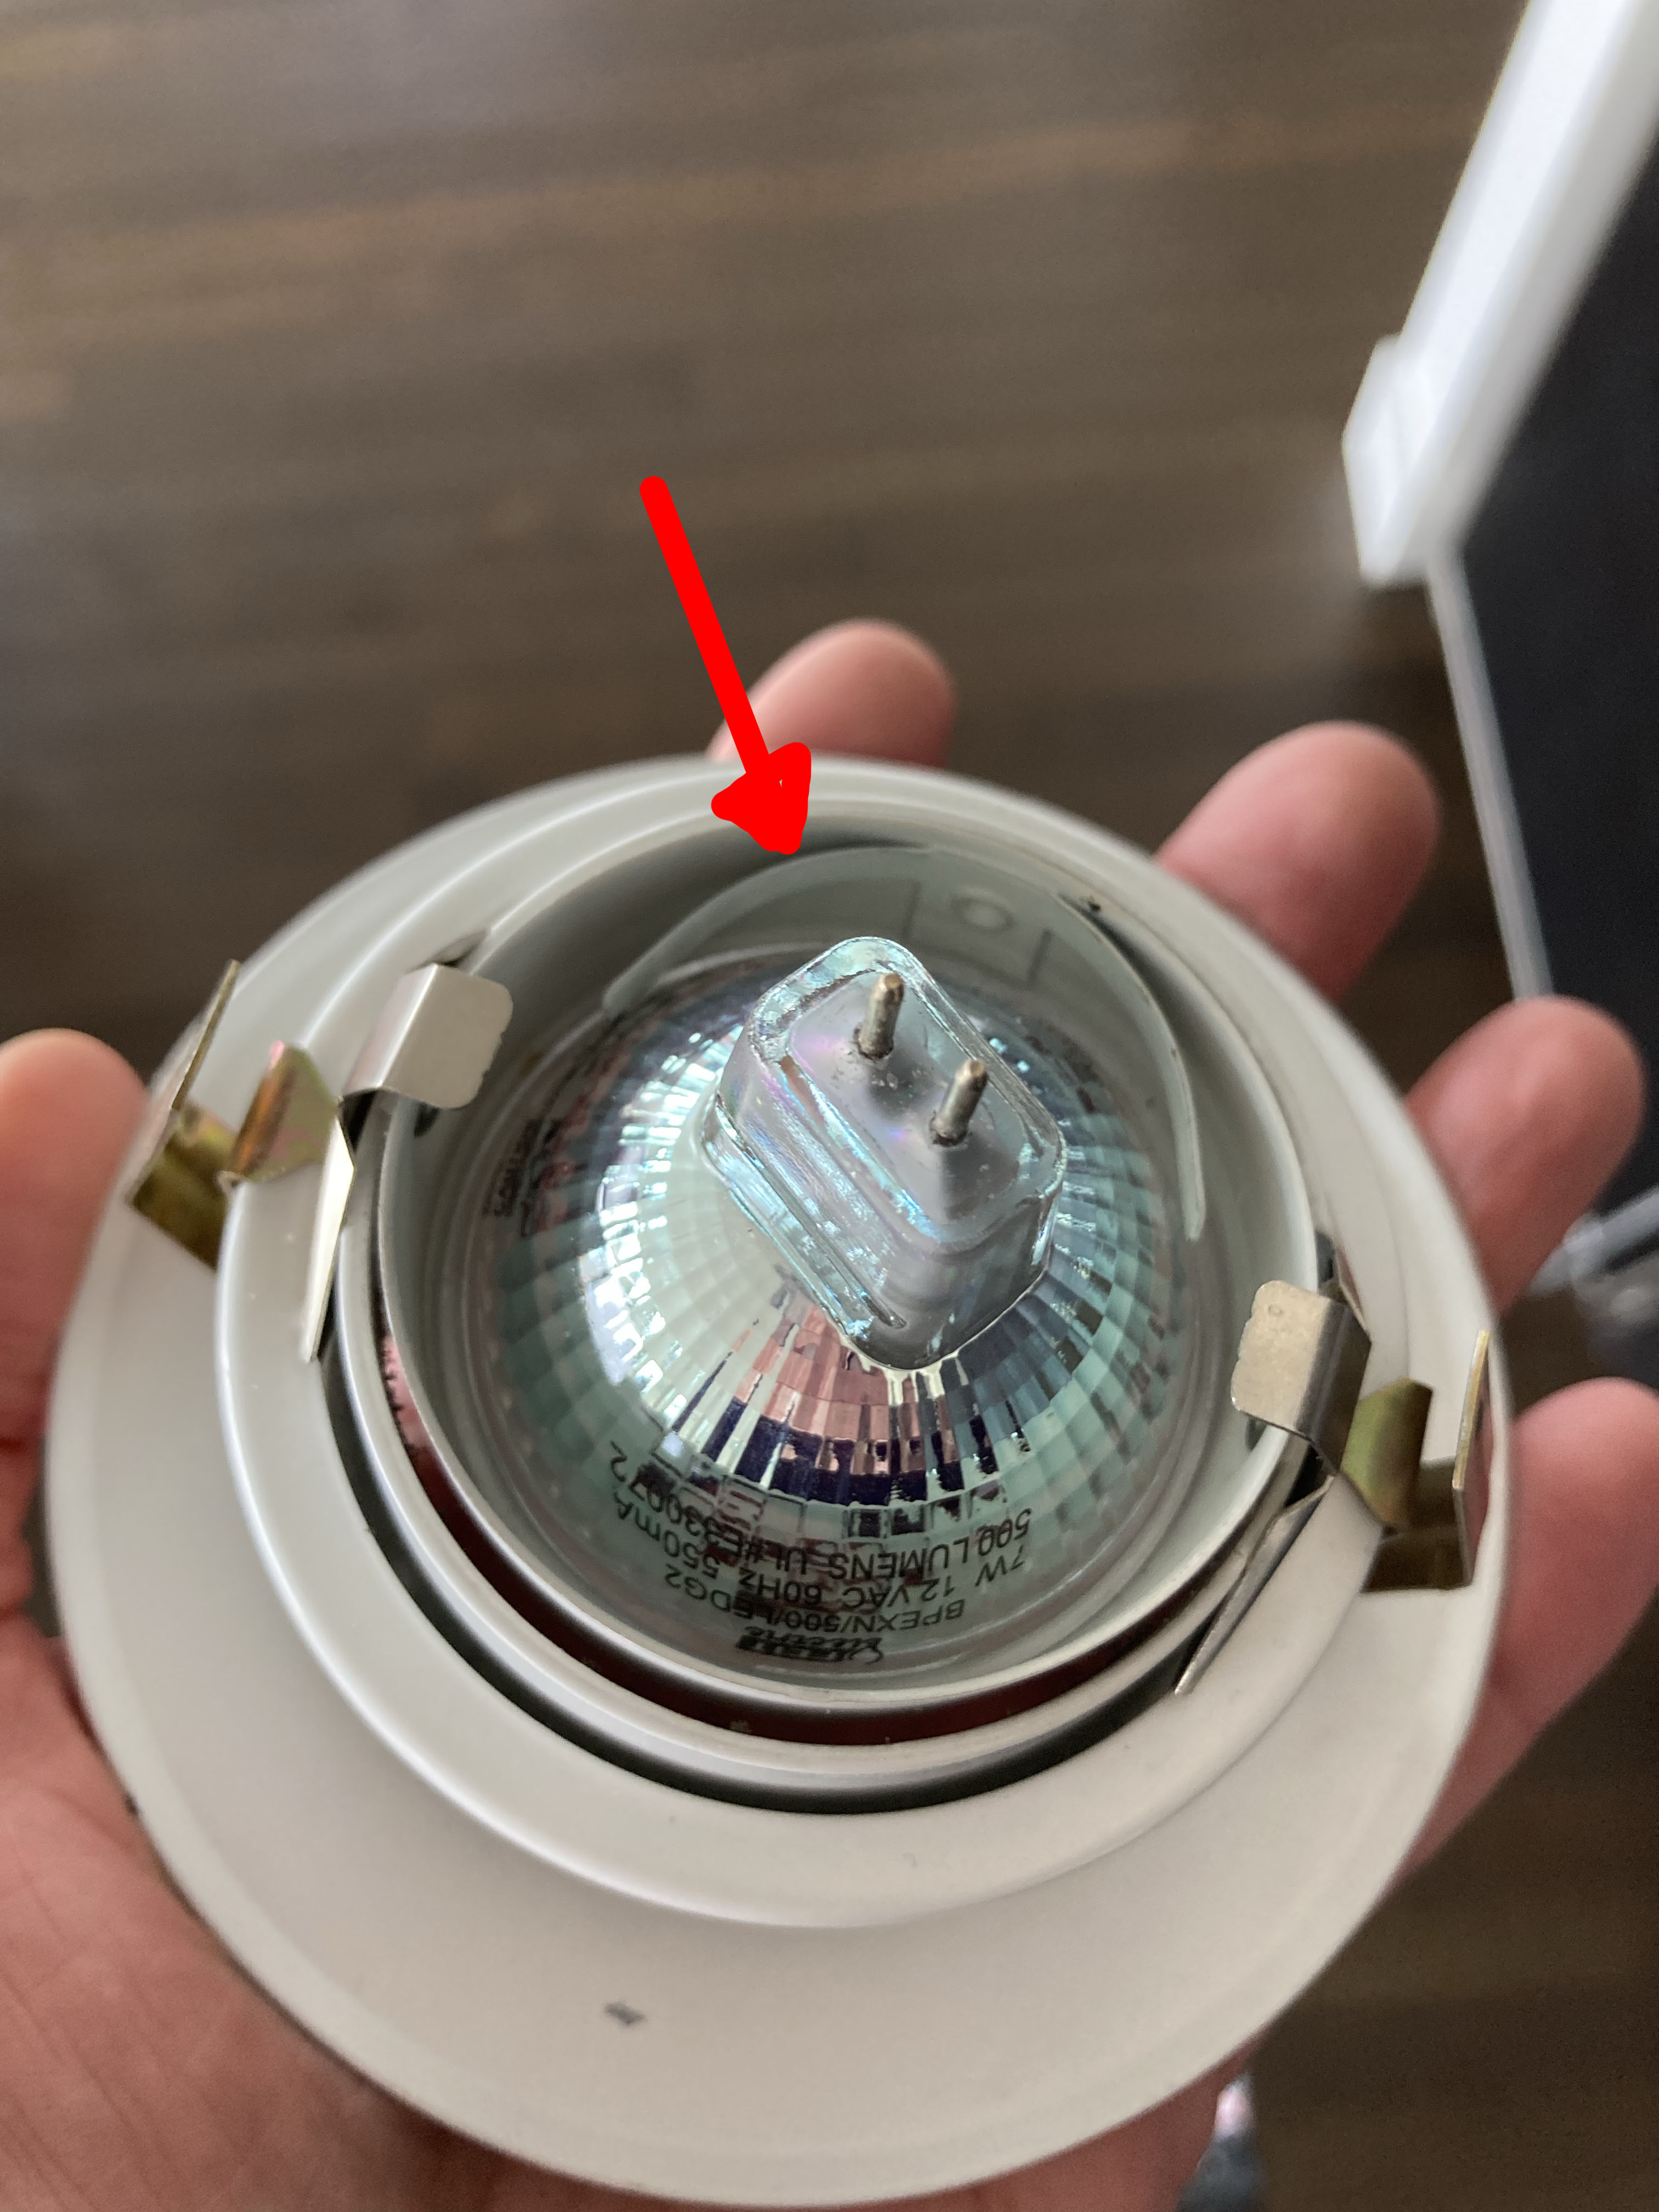
These are 12volt 50W two pin halogen bulbs. They are classed as a MR16 bulb.
The base on these bulbs is called a GU5.3 and is two slim pins.
An LED version is 7W with equiv of the 50W halogen version. I will add a picture of the package below.
These are different than the hallway fixture cans.
They pull straight out, they don’t unscrew.
These bulbs take a little more work to replace as you have to pull the can out of the ceiling. It’s not that difficult, but needs explaining.
I will add some photos but basically you pull down on the fixure and the whole thing drops out on a wire then you unplug the bulb, then you remove the old bulb from the part that dropped down, replace, connect back to wire and push back into the ceiling.
Link for buying LED bulb them on Amazon here , but also at Pearl Ace
Worth noting. Try not to touch the bulb too much. Maybe wear gloves, or use a little cloth. These bulbs get hot and the grease from your fingers can affect the life, especially the halogen ones, less so the LED ones which tend to run cooler.

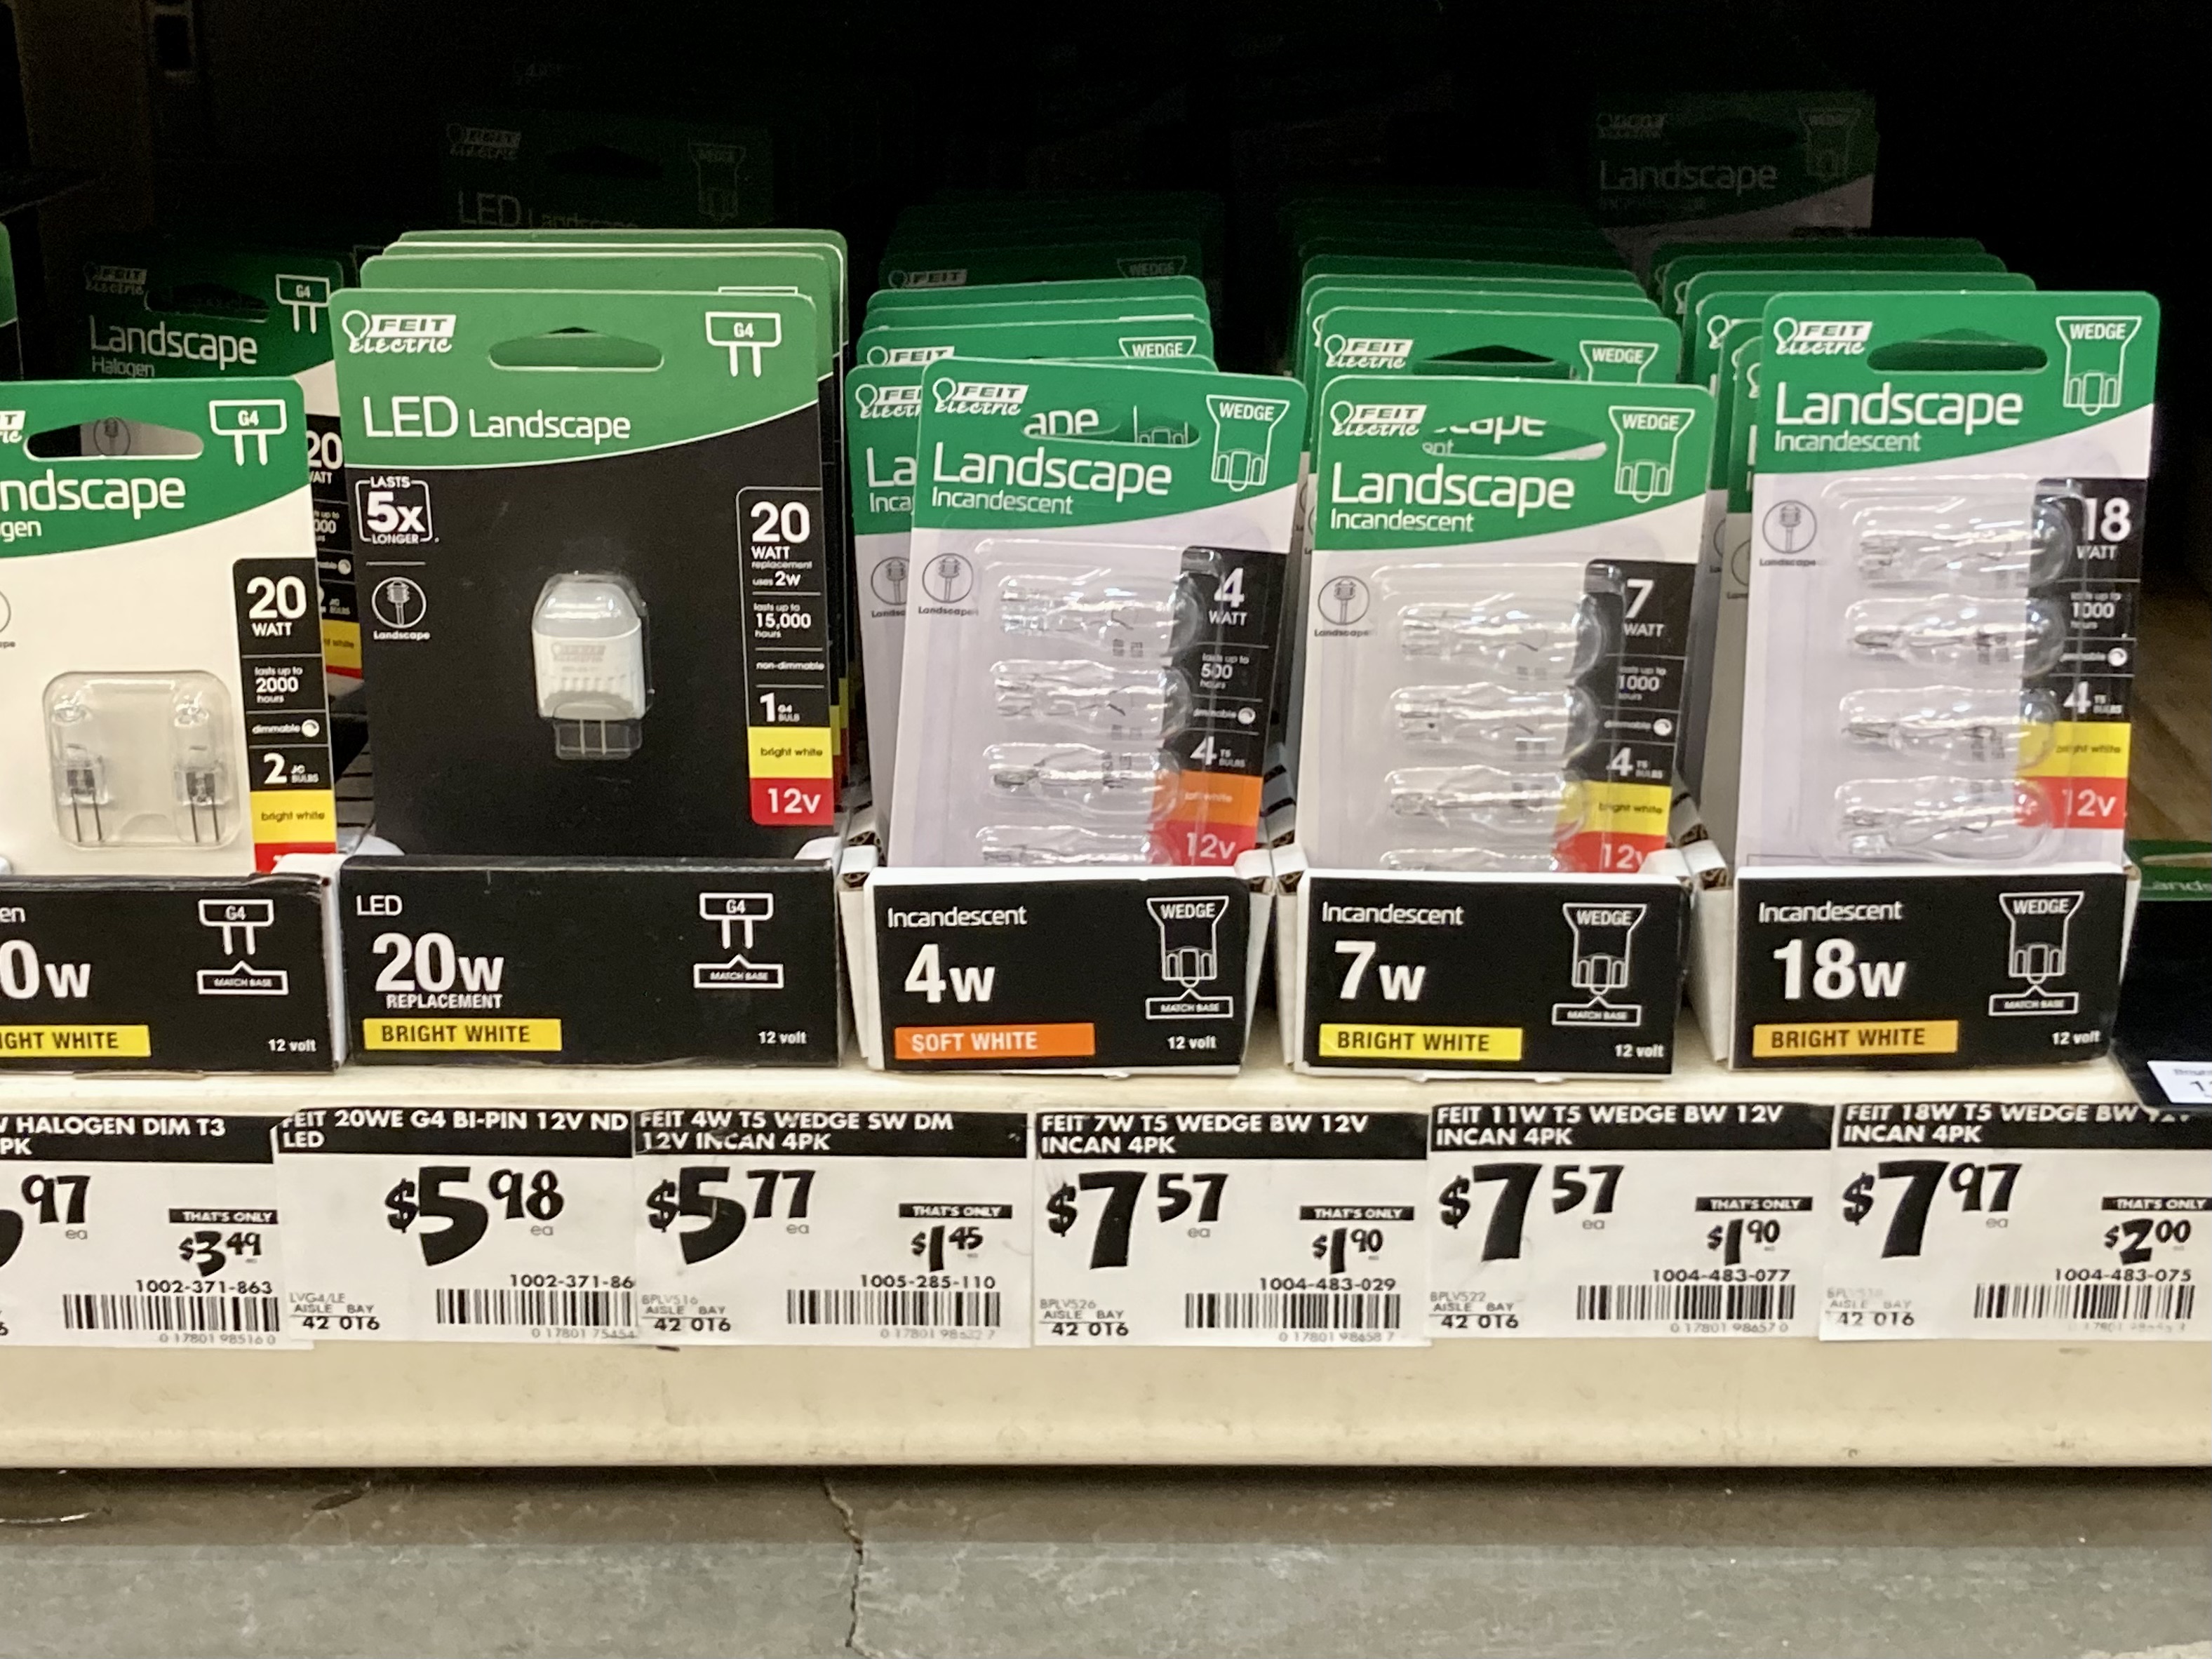
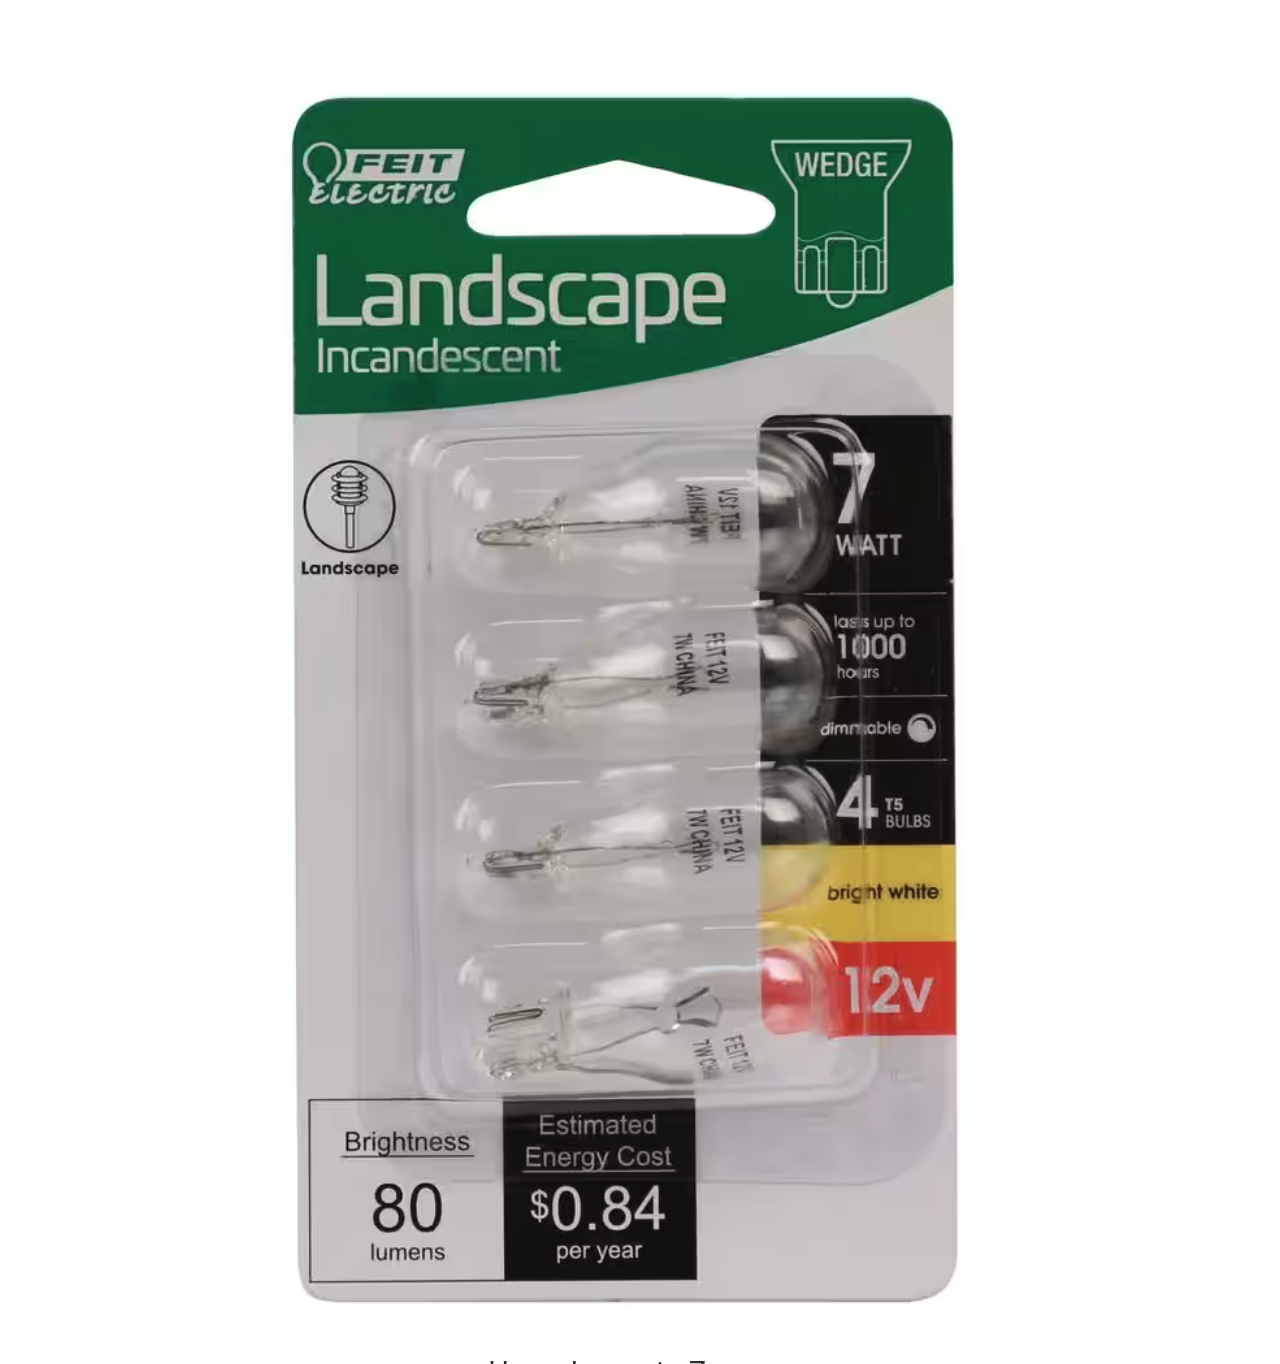
KITCHEN UNDER COUNTER BULBS
These are a 12v T5 Wedge Bulb format, (common in automotive and landscape) i’m unsure of the original wattage, but hey seem to come in various wattages in Tungsten filaments
LED Replacement: Here is an LED Equivalent by Feit LINK , It looks like the LED might be a smidge wider , 0.2″ . I haven’t tried yet. On their website Feit also have the tungsten versions. Update, this LED bulb will fit, but it doesn’t look like the light distribution is great as its somewhat encased in opaque plastic and wouldn’t seem to work good with the reflectors in our bases, so I passed on buying this one.
Here is a link to some LED bulbs recommended by another resident. Amazon , please note these LED bulbs are 240Lumens pretty bright.
I went to Home Depot and they have LED and Tungsten bulbs for this application. The Tungsten bulbs come in several wattages. 4W, 7W and 18W.
The 4W is a “soft white” and the 7W and 18W is a “bright white”.
The 18W’s are too much and may blow your transformer if you use too many, so I would suggest the 4W or the 7W. The tungsten T5 Wedge bulbs fit perfect.
the 7W are a “whiter white” 80 Lumens
the 4W are a “warmer yellower white” 40 Lumens
I suspect if you have the original bulbs they are about 5W
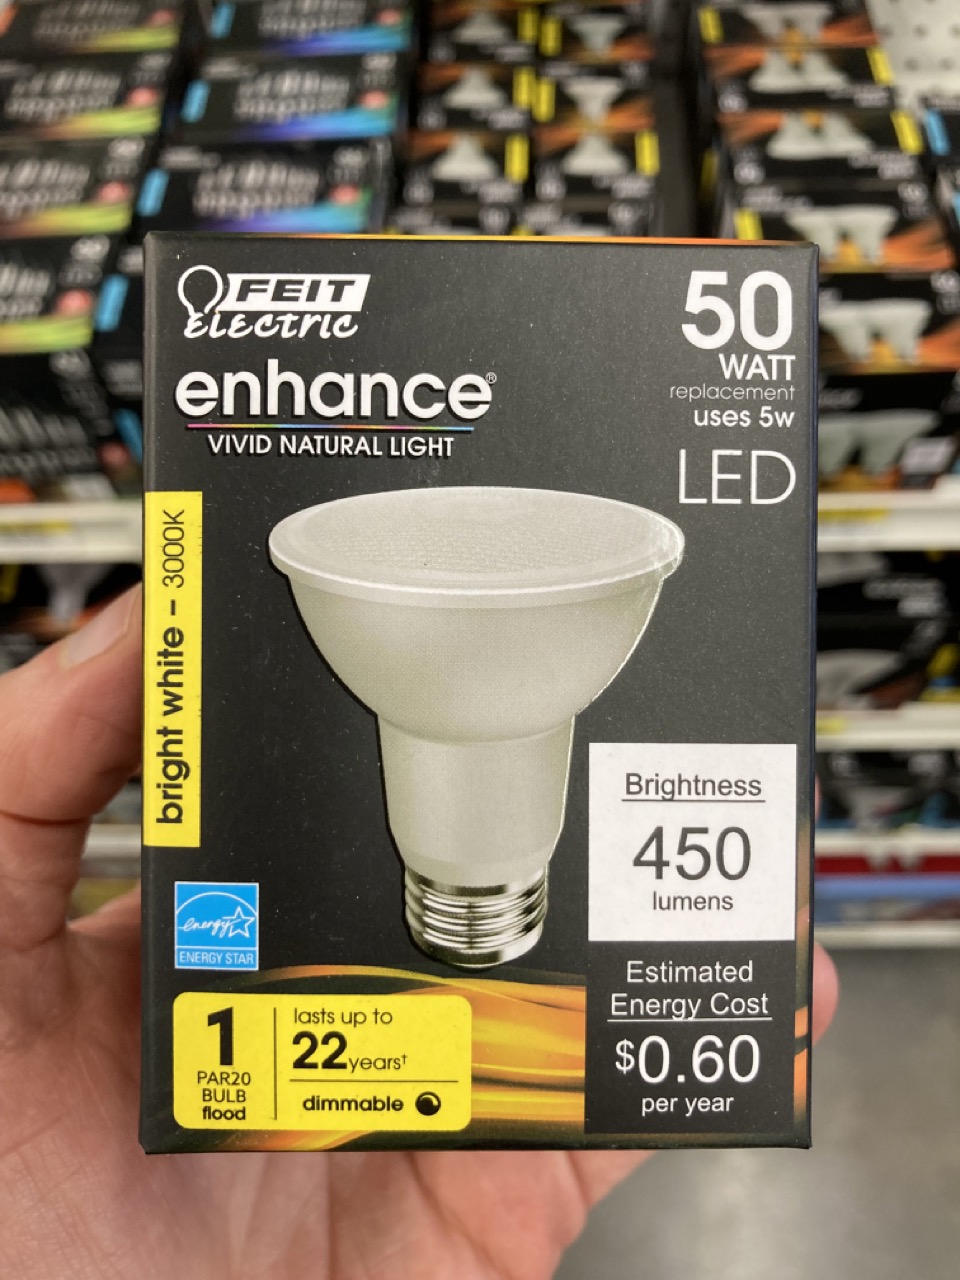
BATHROOM BULBS – SHOWER
The shower bulbs are smaller than the fan bulbs (in some units like the x32 units, you have a fan over teh shower, so refer to those bulb sizes) These are by default a Halogen bulb – 120V 50W PAR20 Bulbs, you could use a PAR16 if you liked but no bigger than 20. This is the same as a hallway bulb, but I did find an FEIT LED replacement link here
If you are to look at your lighting fixture in the bathroom, you will see this as follows, but the bulb should unscrew as normal without removing the fixture.
I had to remove the fixture due some shenanigans the previous dillbat owners had left behind for me. God bless their little cotton socks.
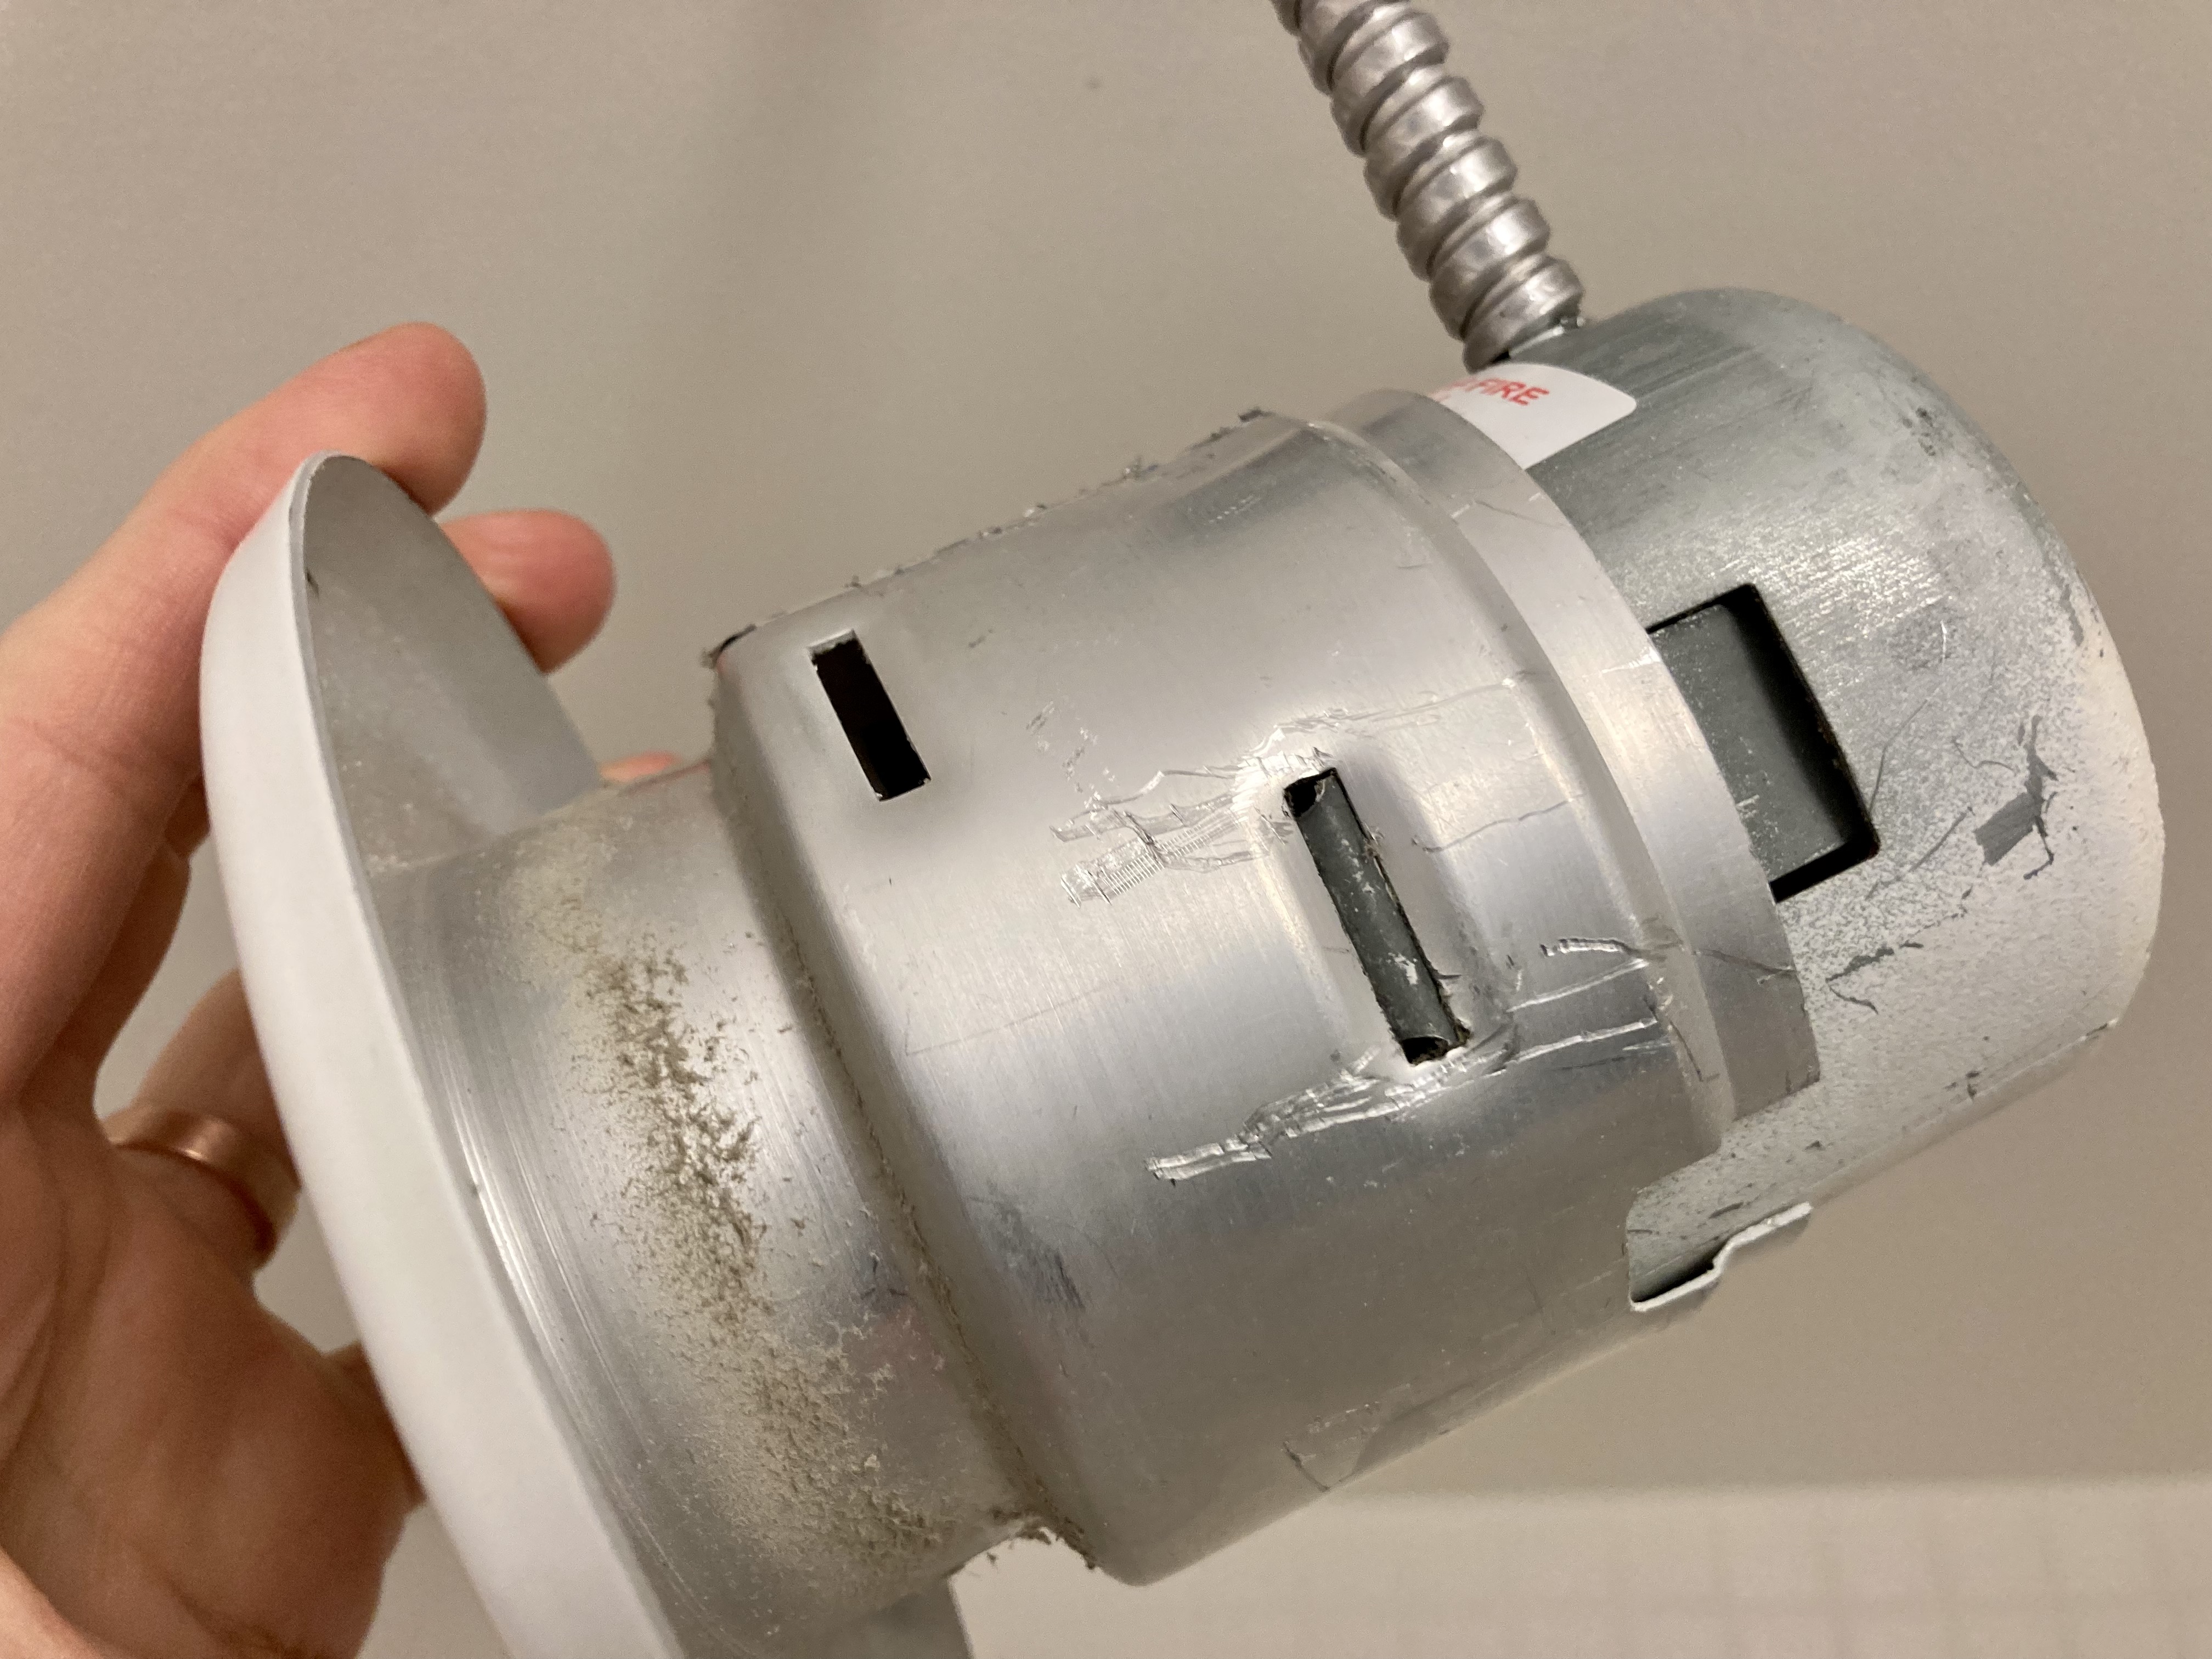
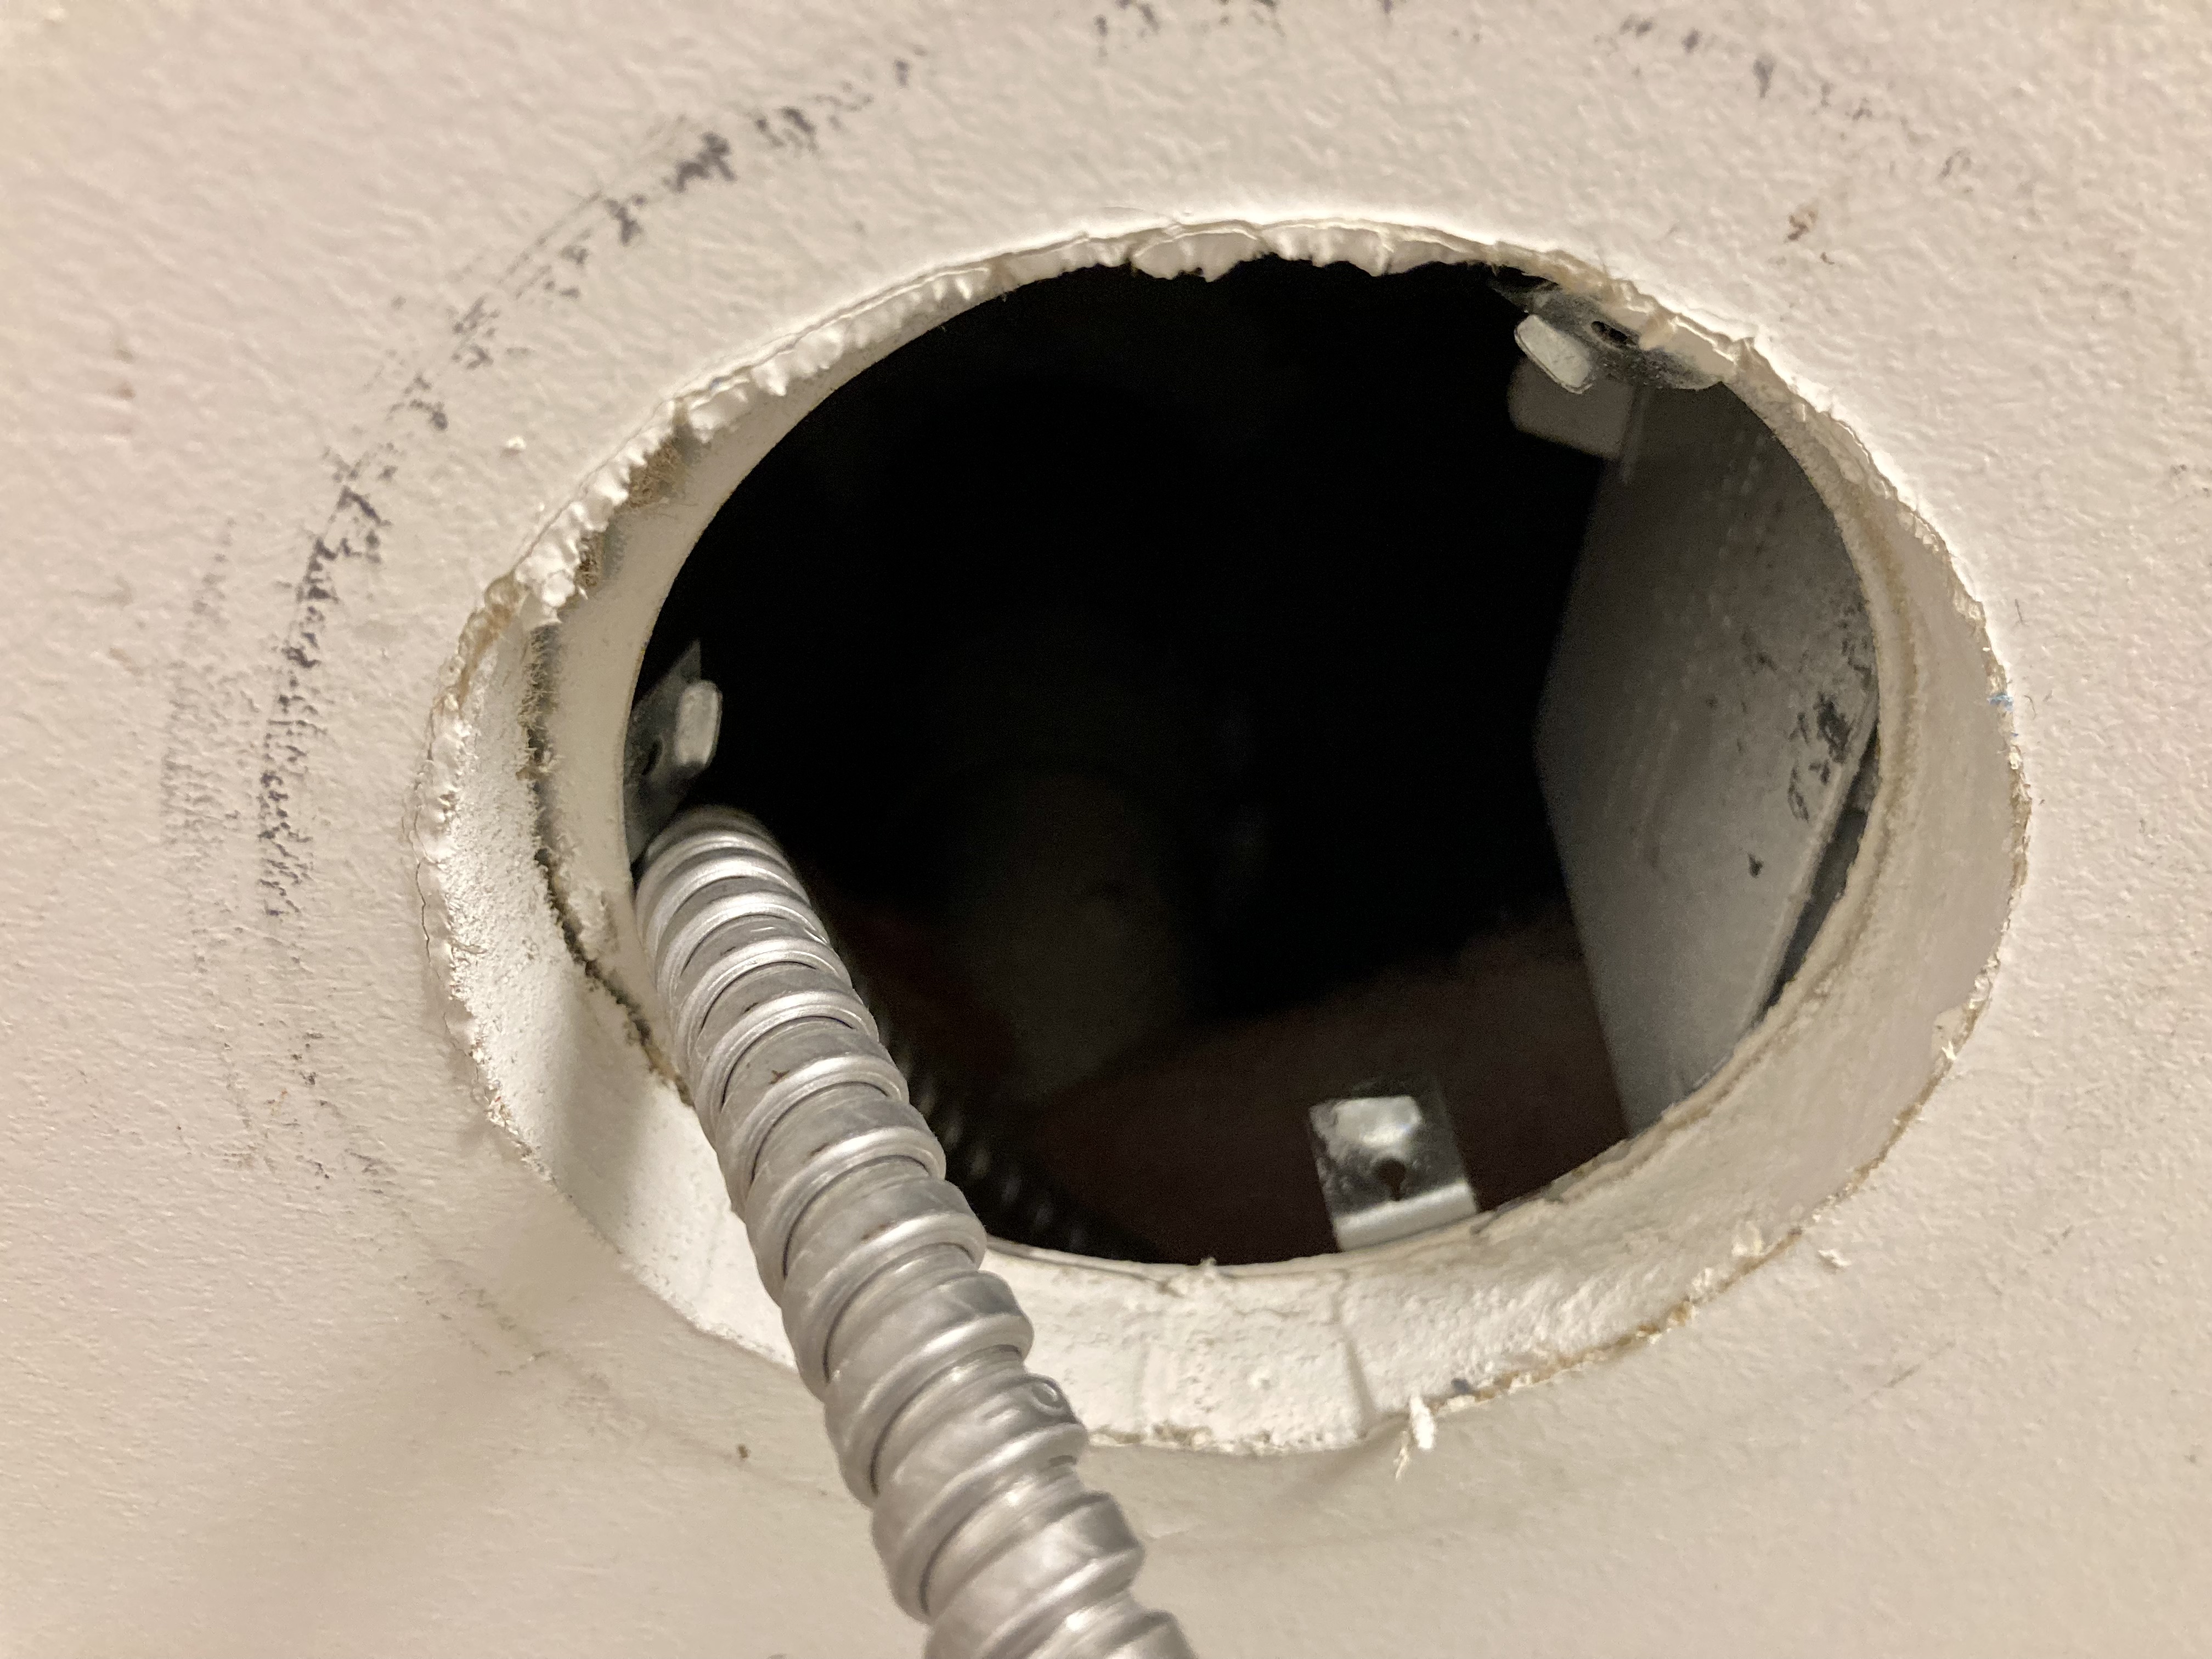
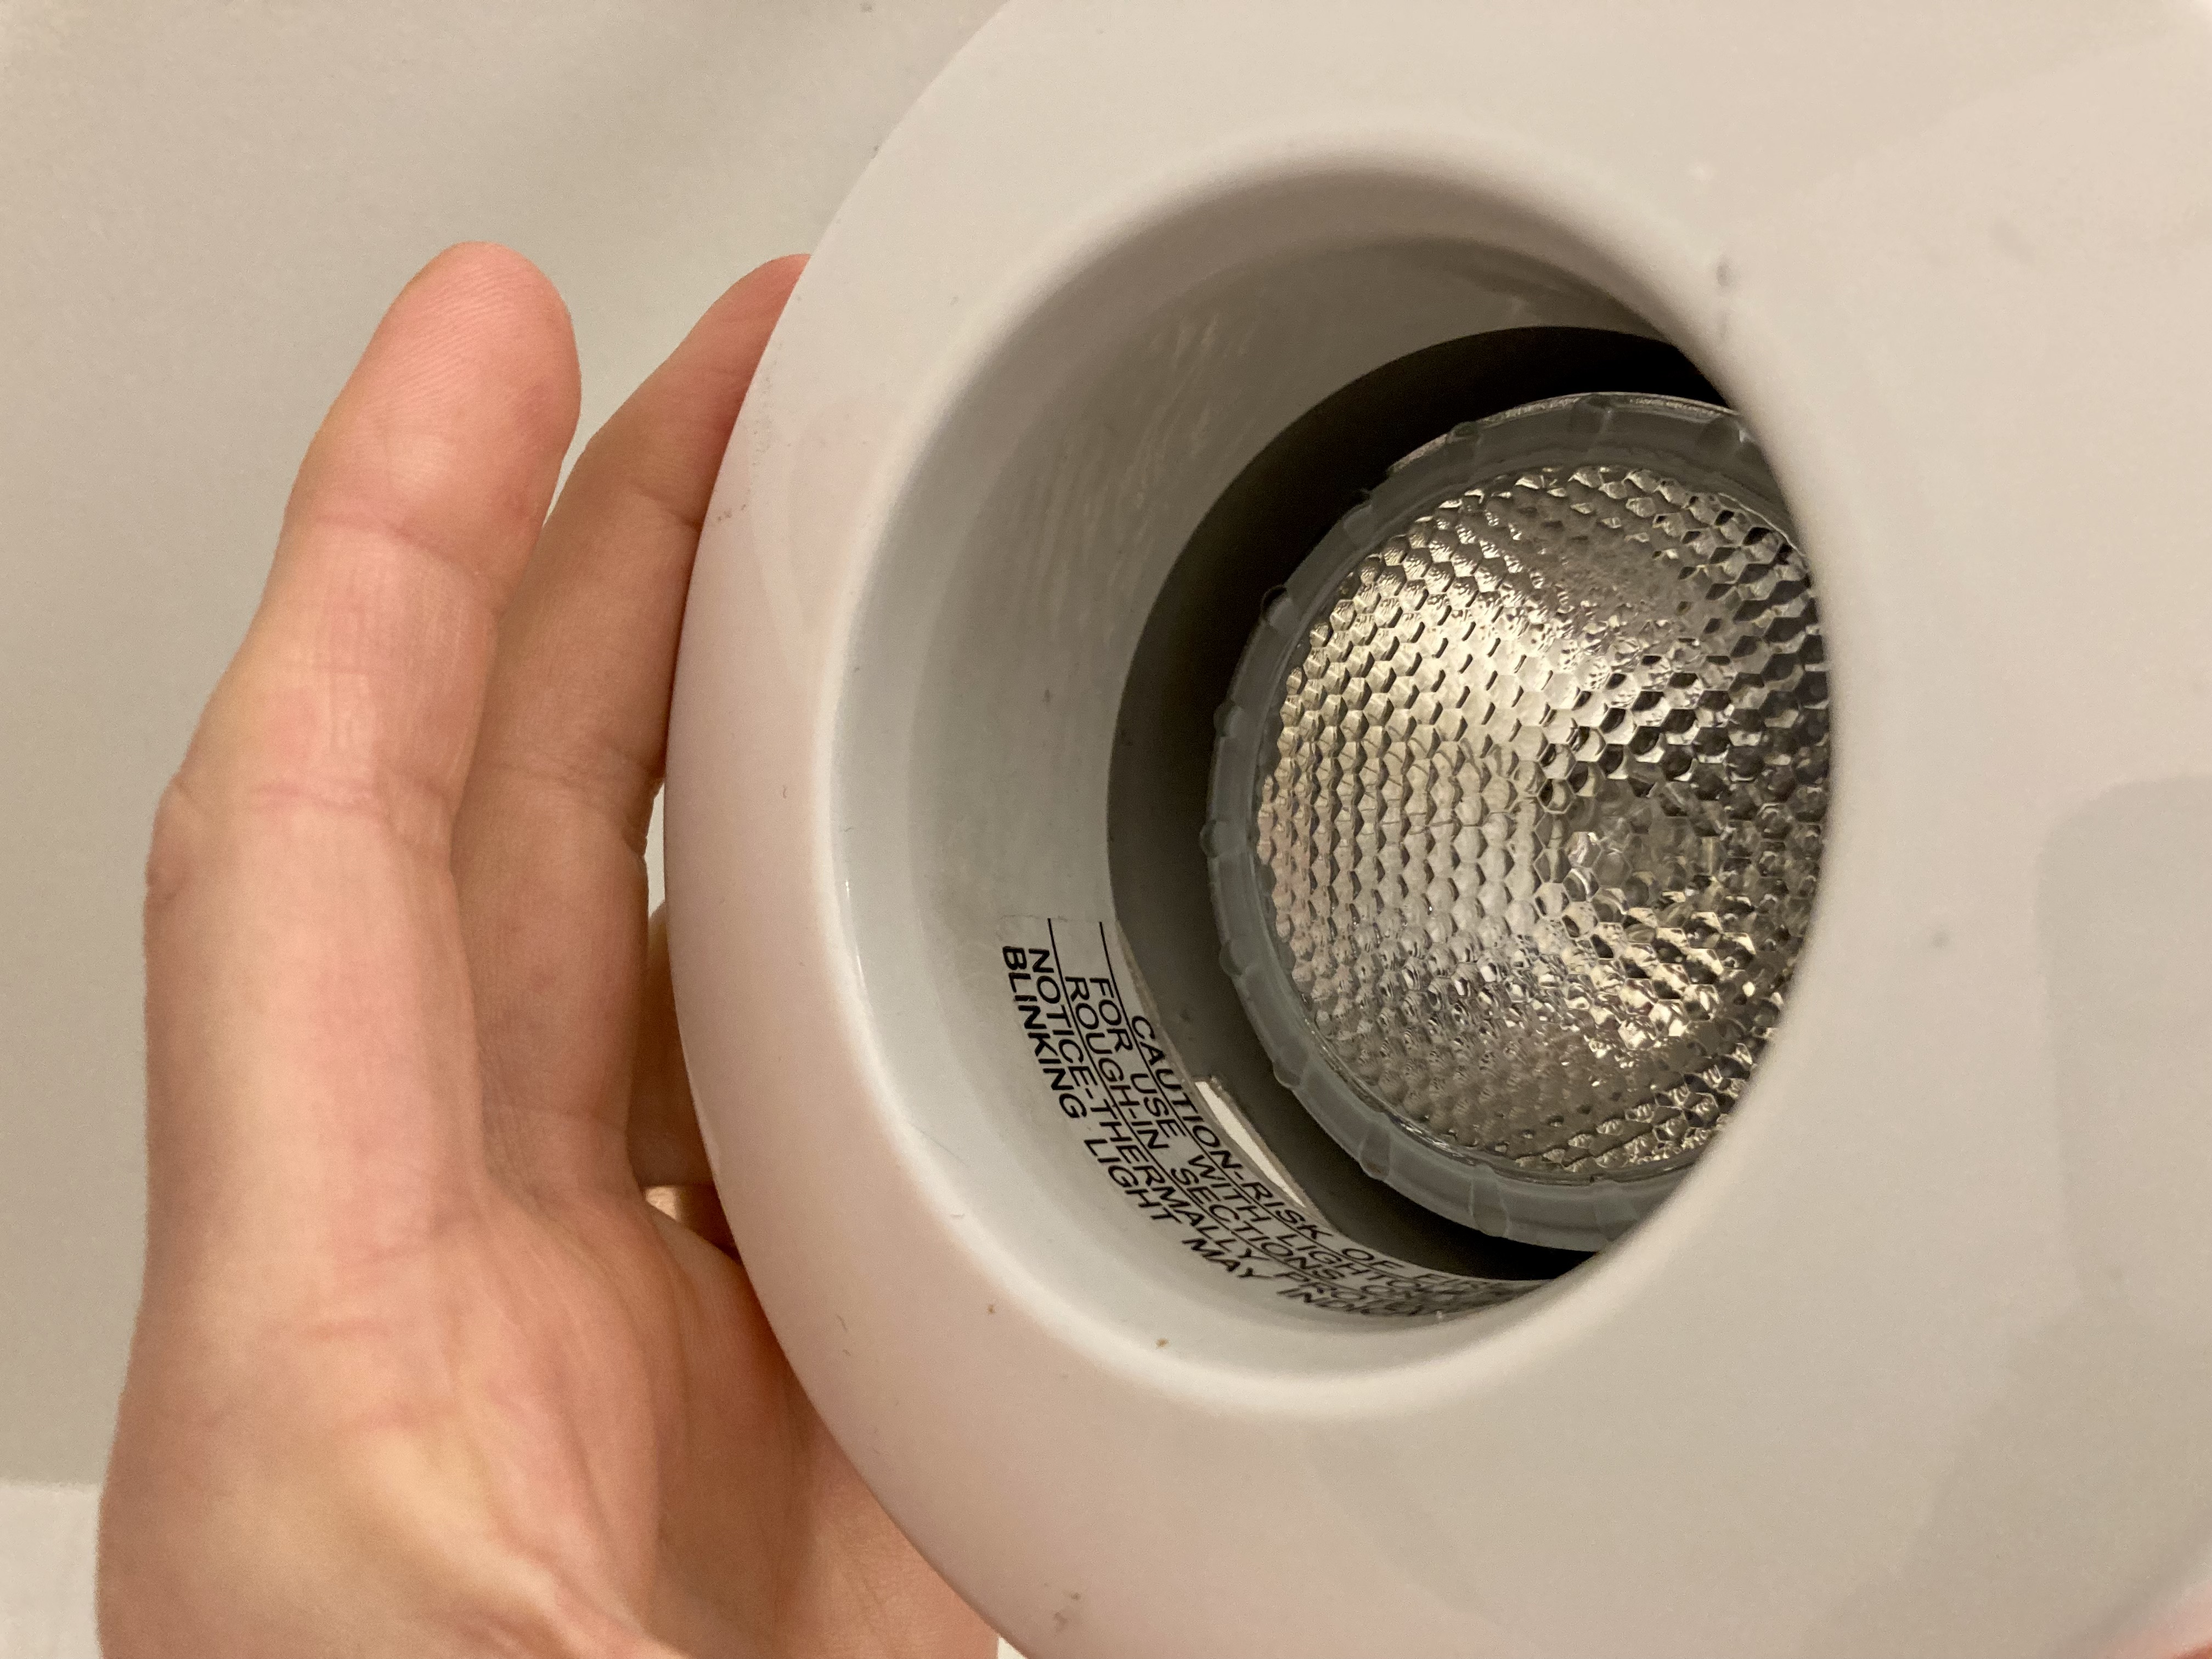
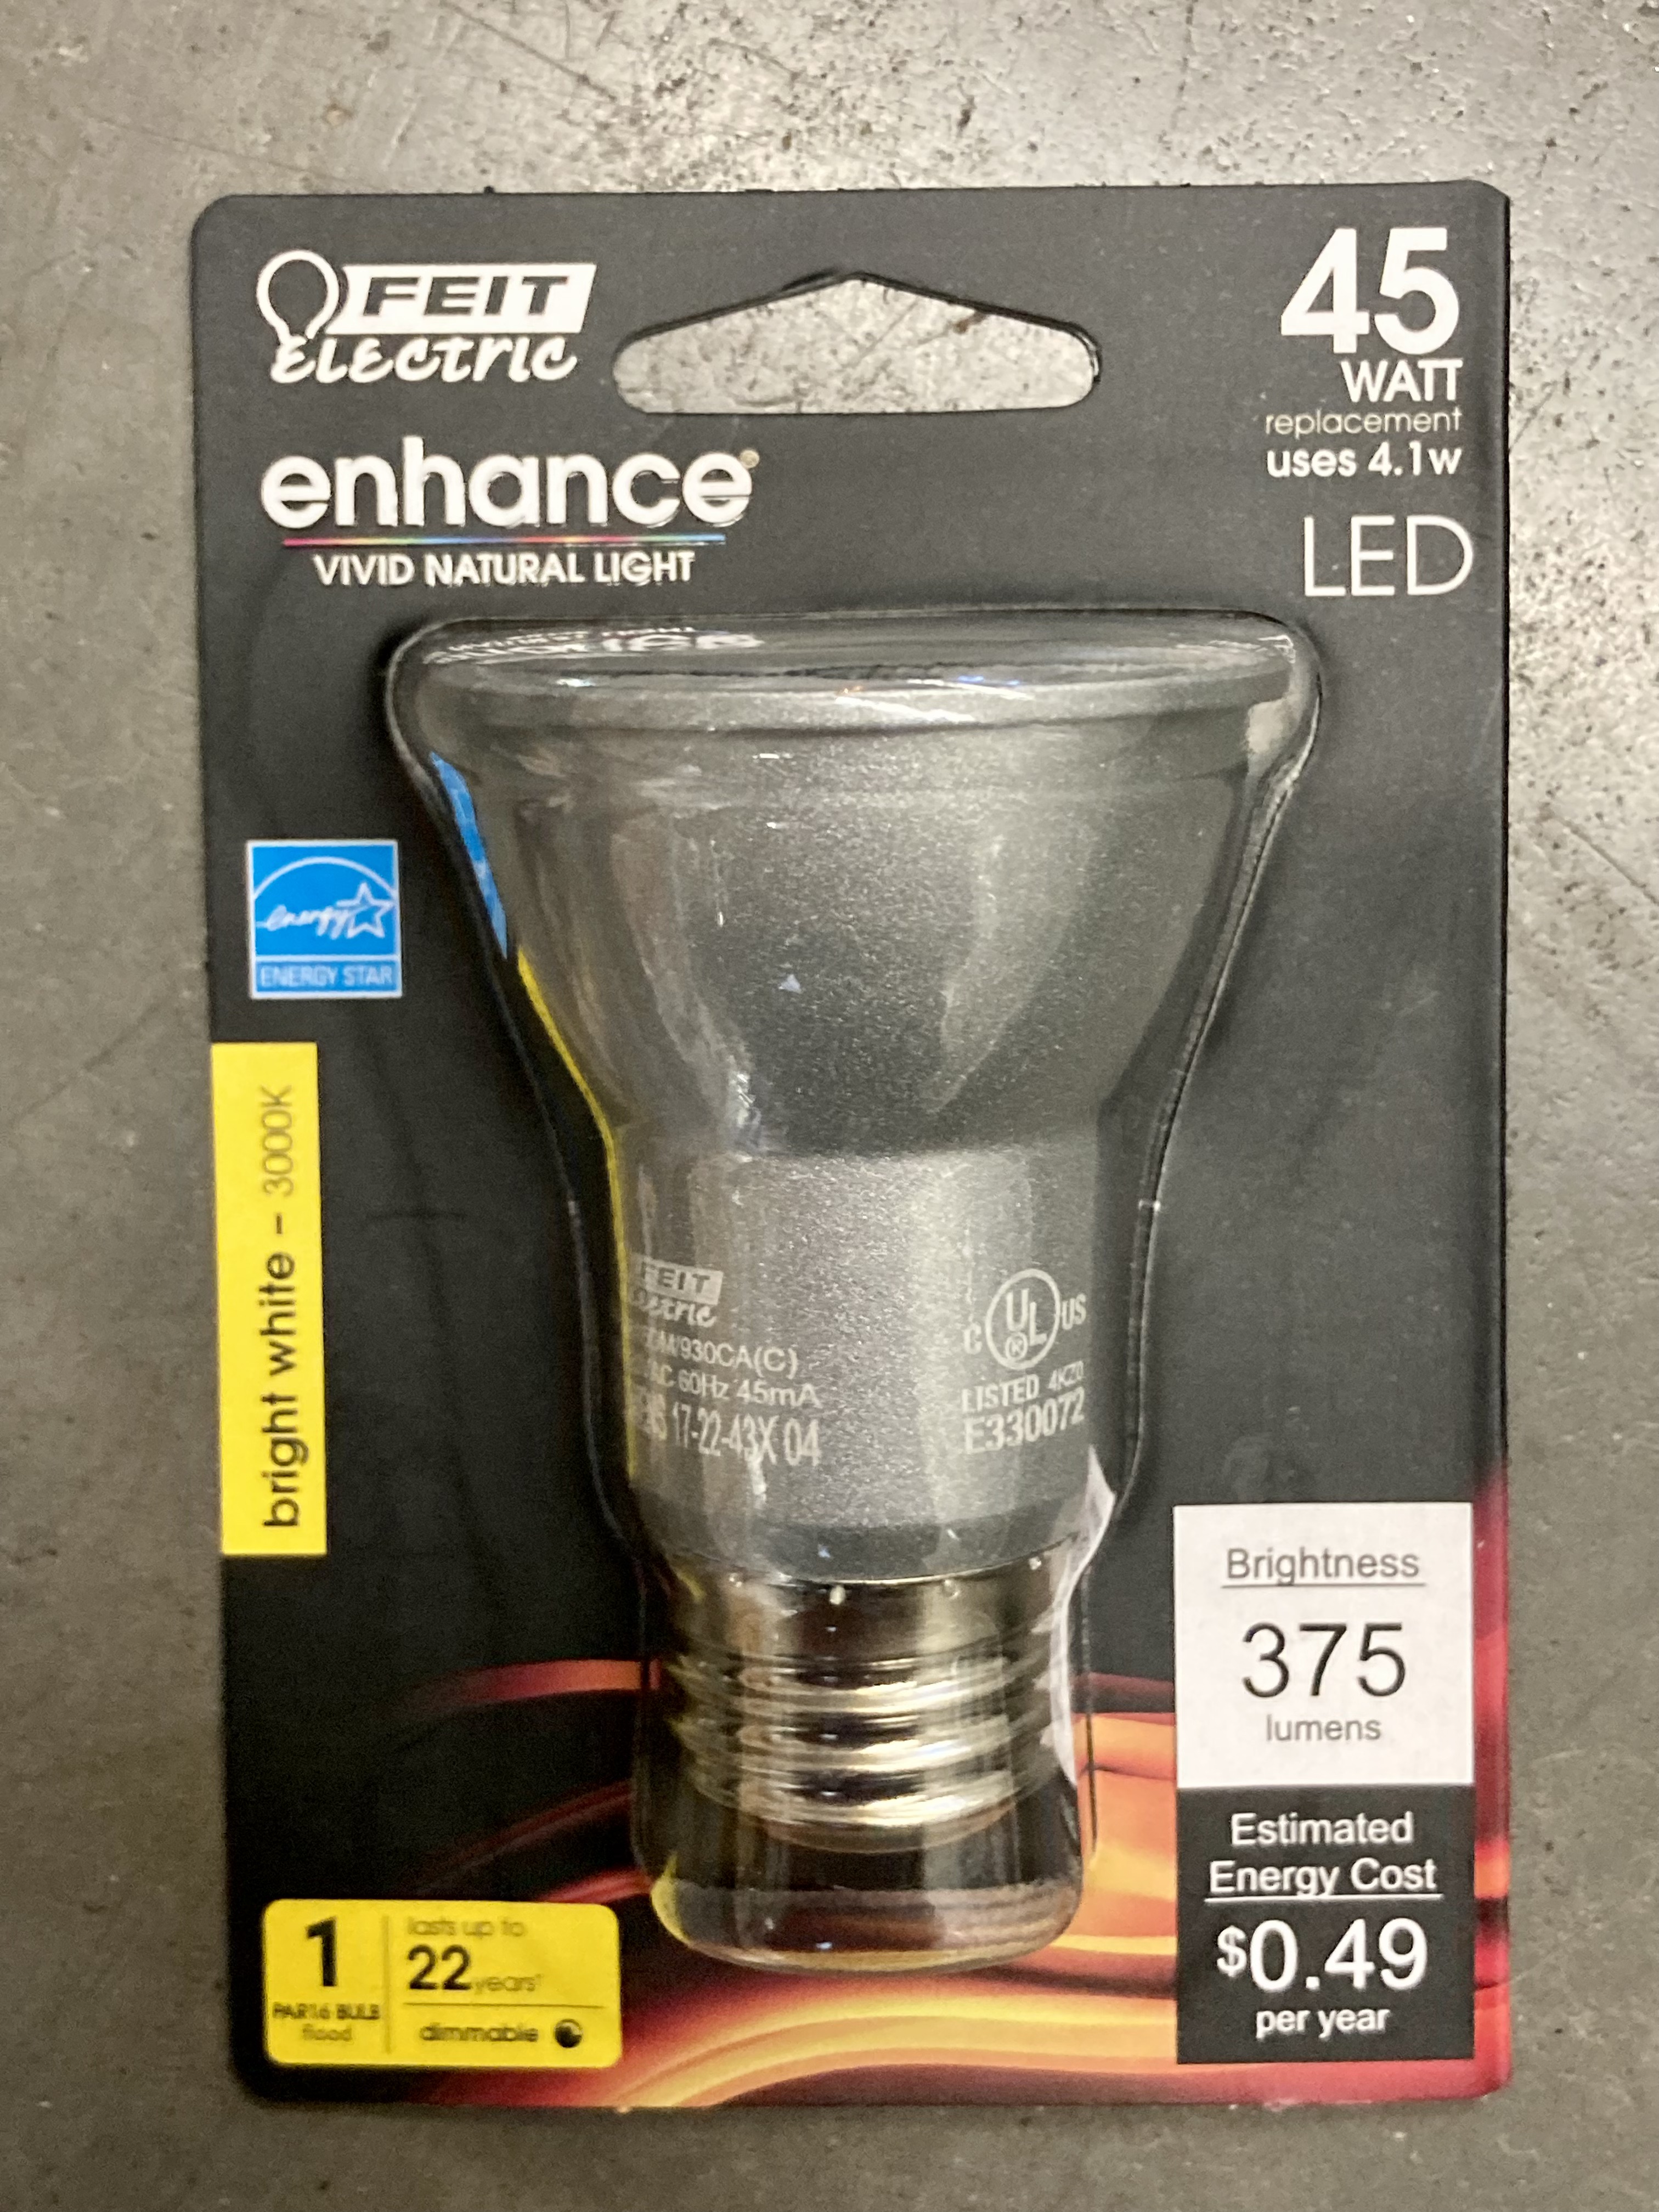
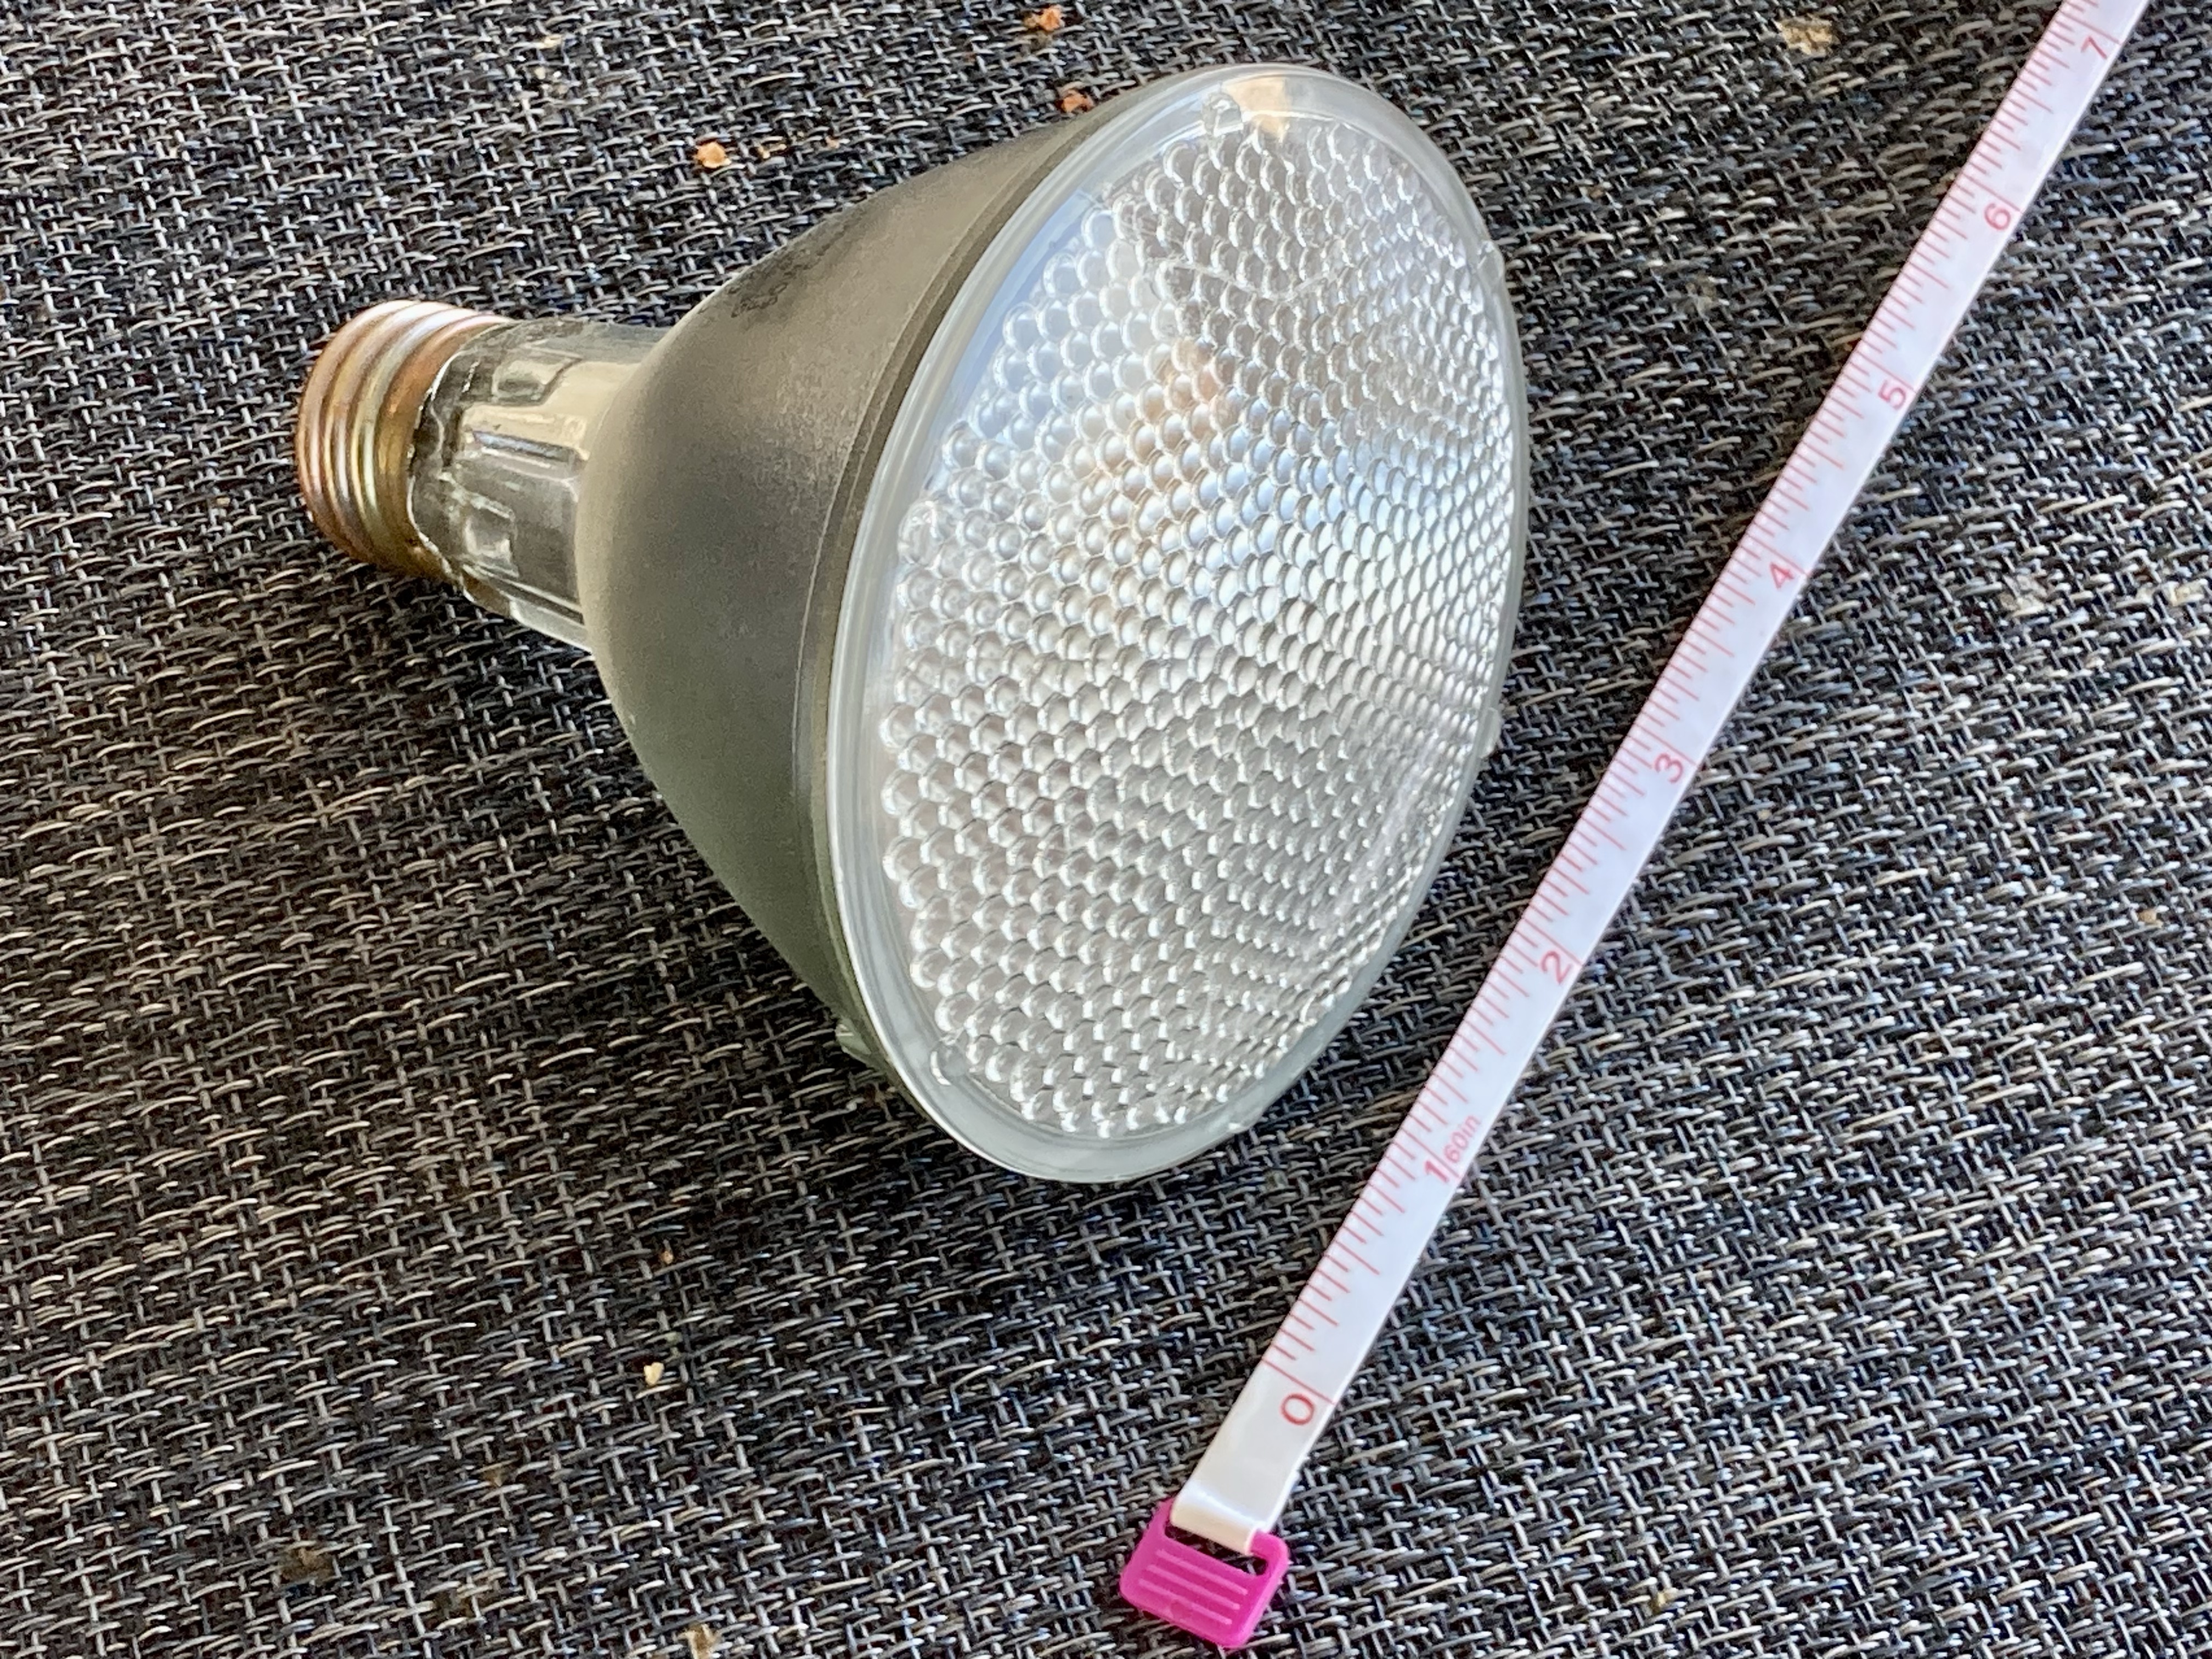
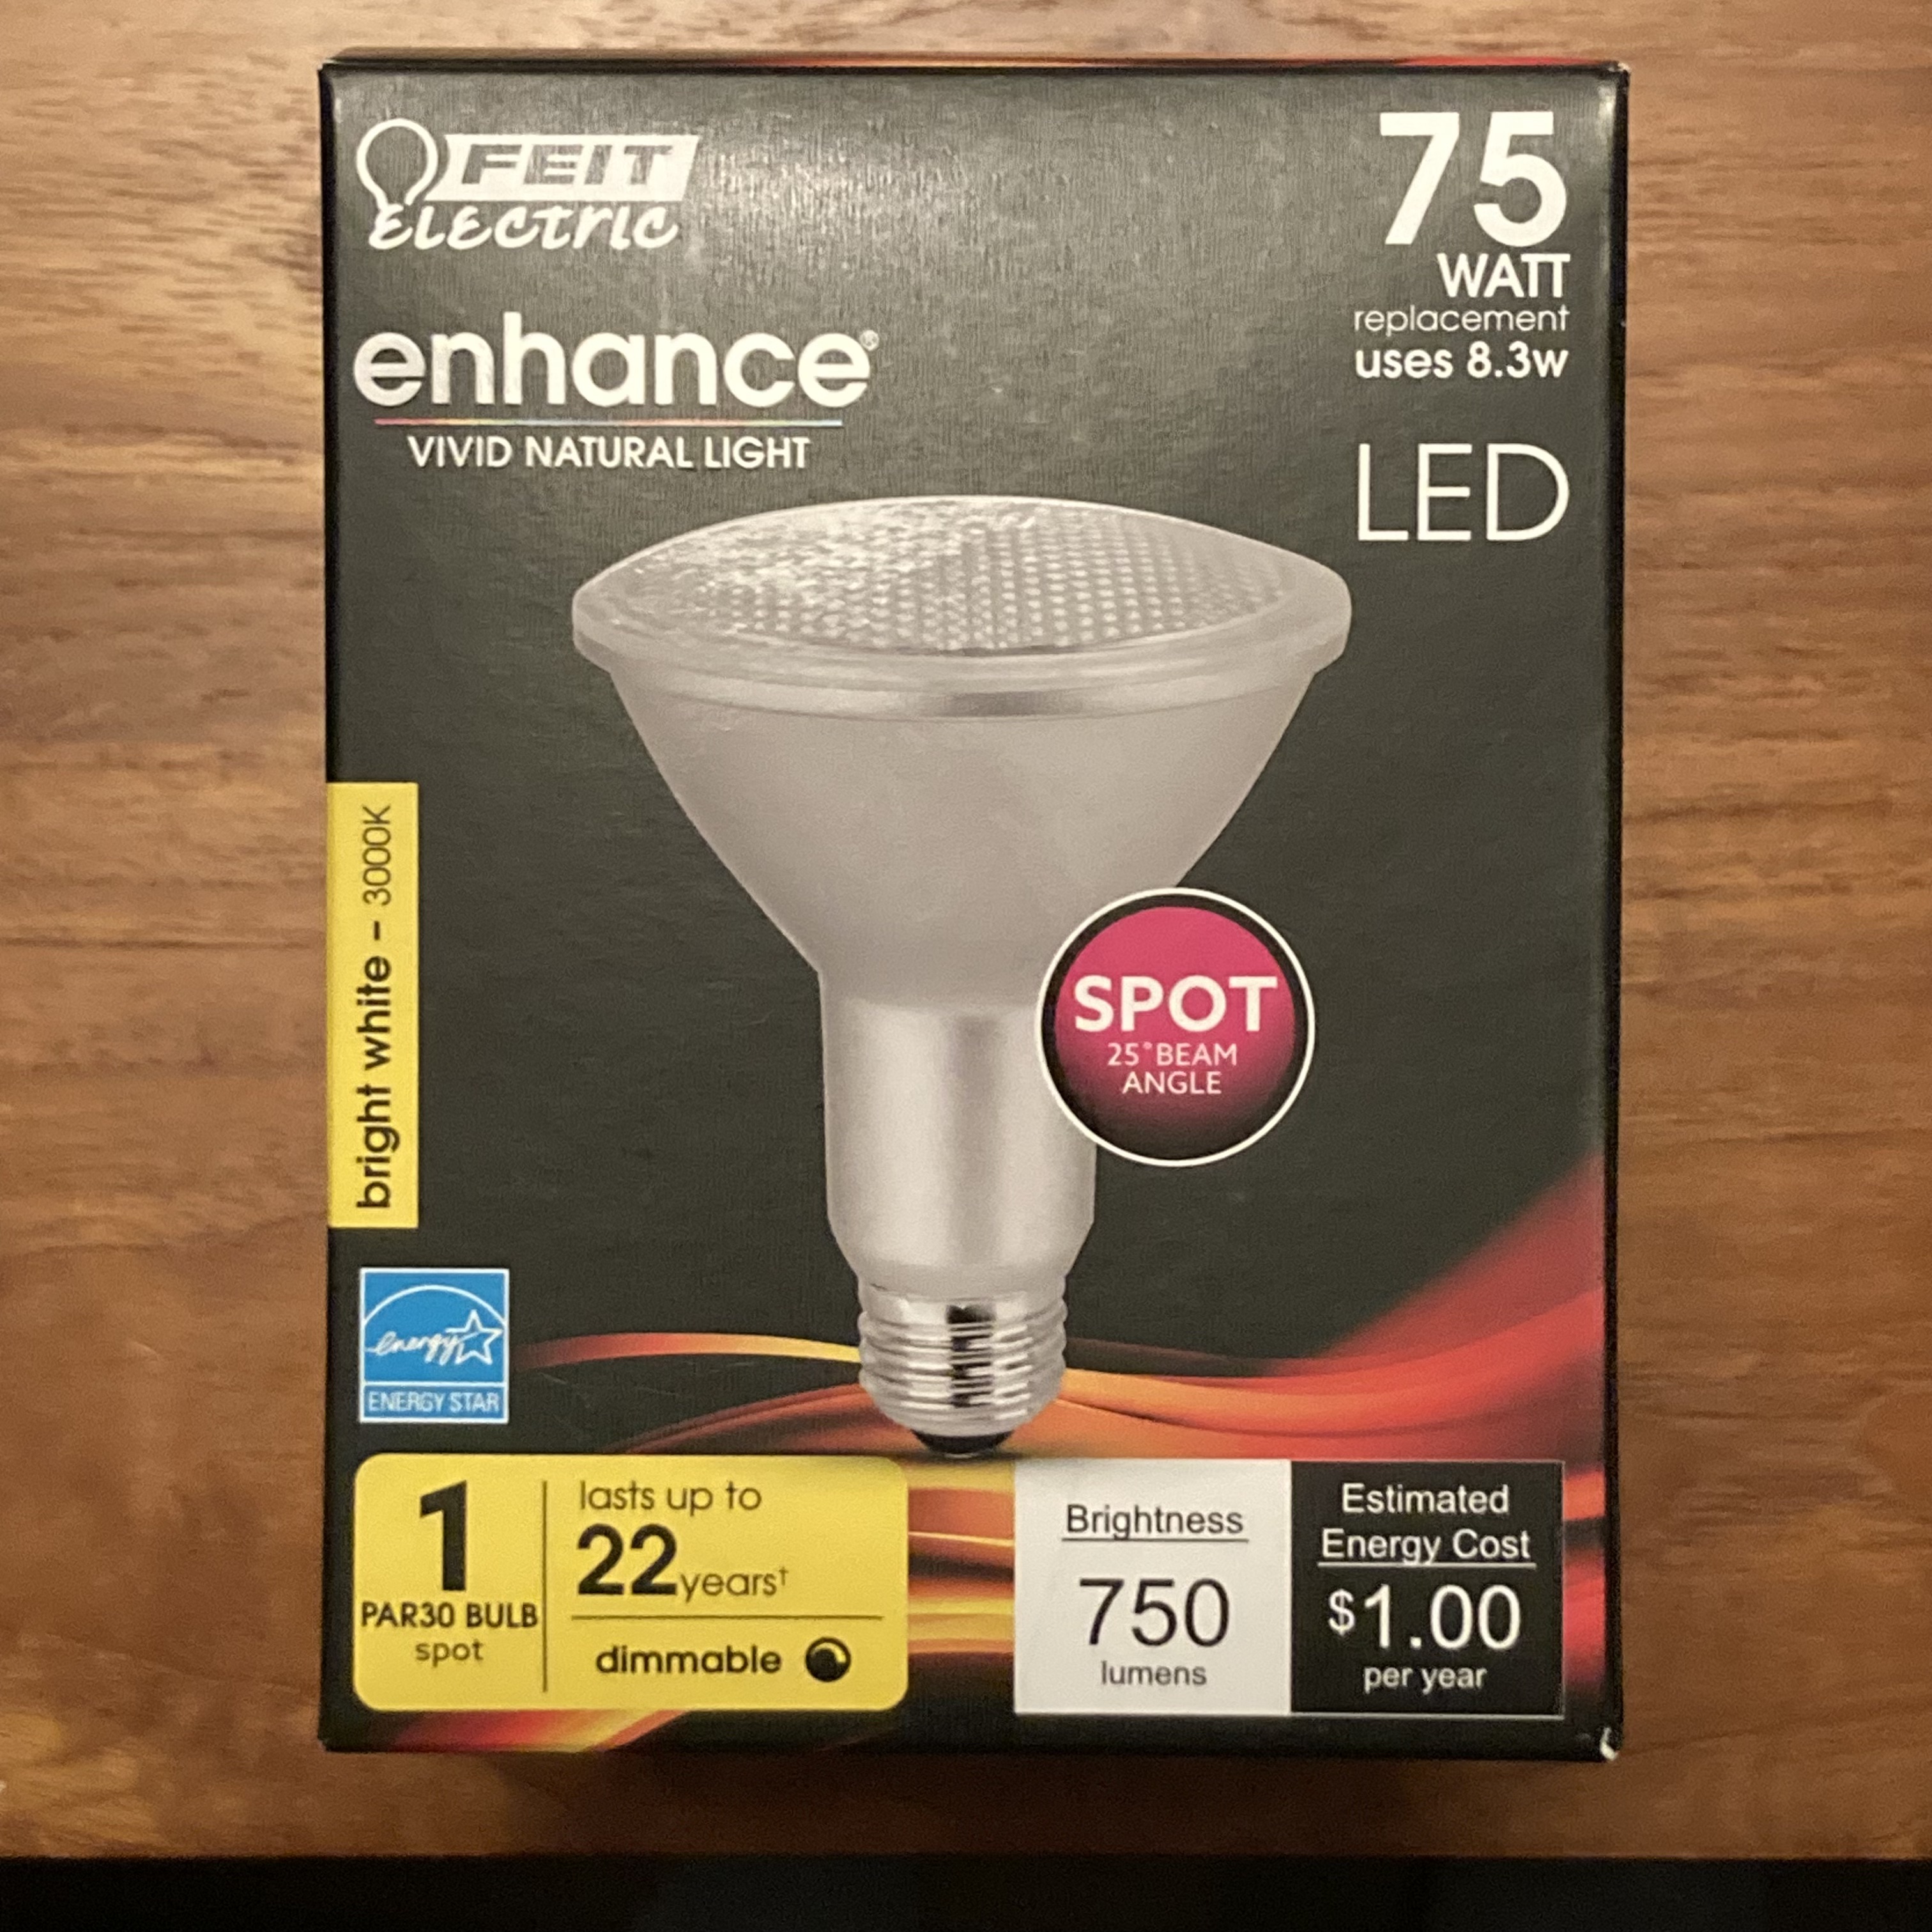
BATHROOM BULBS – VENT FANS
In some units (x32 the vent fan is actually over the shower tub combo) These are 120V 50W Halogen Bulbs PAR 30, which means they are a wide looking bulb.
They have an screw in / out base – E26 Base (medium kind) and are designated FL for floodlit
They twist out easy and don’t need you to remove anything to replace the bulb.
Feit make an LED version shown in the photograph for about $9
BATHROOM MIRROR / Strip lighting
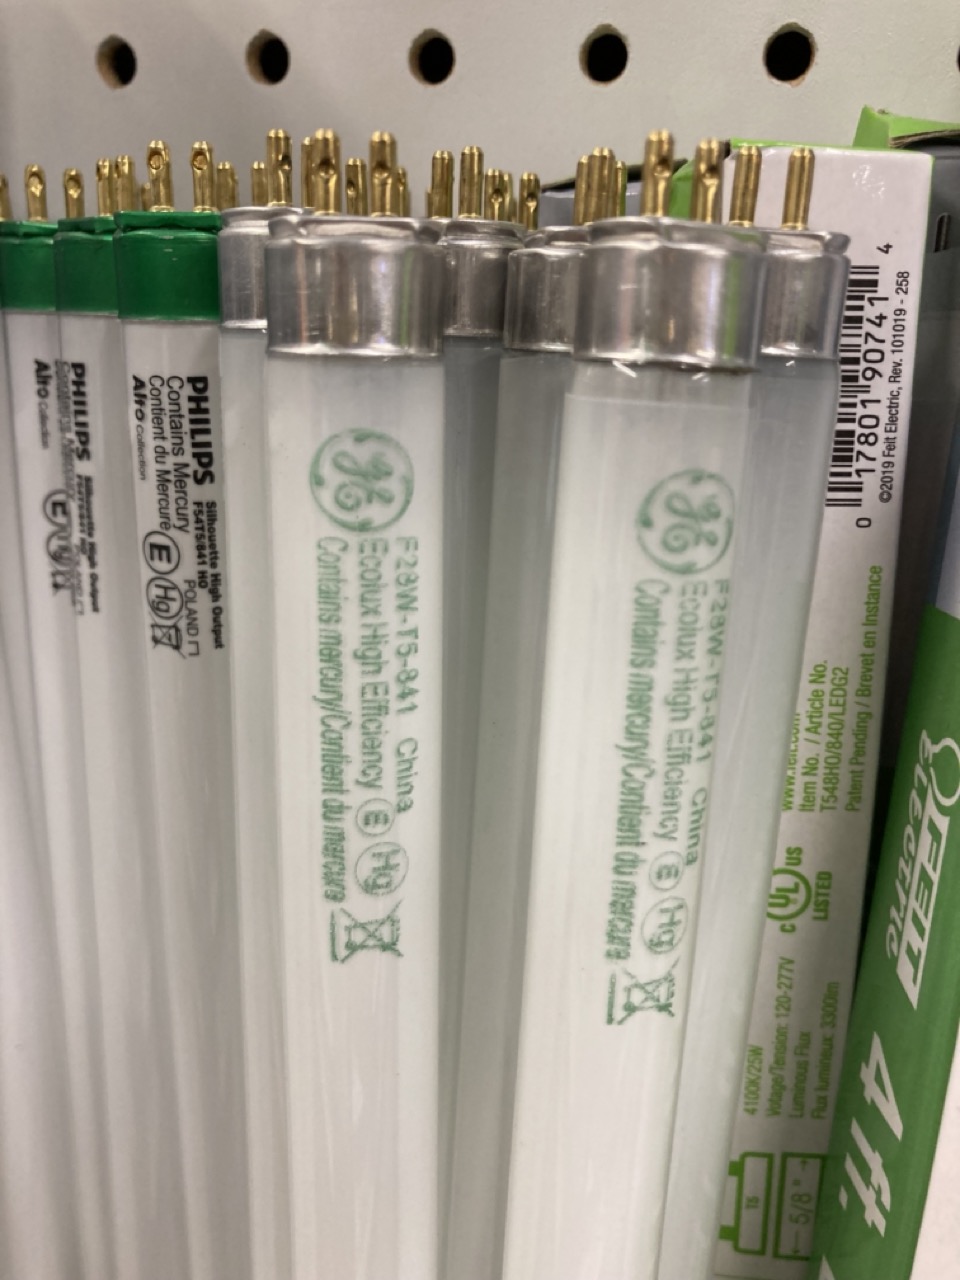
These bulbs are Fluorescent by default (scroll down for LED), pretty long, almost 4 feet. This is a T5 fixture at 28 watts. The original bulb is an F28W T5 830, which means it’s a T5 fixture with a 28-watt output (brightness) and a color temperature of 3000K, which is a warm tone.
Note the model number on the bulb from Ace Hardware… Bulb code is F28W-T5-841 – this will work but will be a “cooler” bluer tone light. its 4100k vs 3000k So might look a little strange in your bathroom.
Normally, on top of the mirror, there are two bulbs, and below there are two bulbs. They rotate 180 degrees and pop out, which can be a bit tricky. Nimble fingers are good for this. The bulbs can be bought from Ace Hardware up the street for $10 or online for $7 plus $5,000 shipping.
If you put in a higher wattage tube, for example, a 45W (F45T5), you will stress the control ballast, and it will soon fail. So pay attention to the numbers. If you do blow the ballast, they are replaceable, they cost about $30 and its a whole rigmarole , the original ballast is a Universal B228PUNV-C which can be hard to find. But a similar spec ballast is an Advance ICN 2S28 or equivalent spec
Note the model number on the bulb from Ace Hardware… Bulb code is F28W-T5-841 – this will work but will be a “cooler” tone light. its 4100k vs 3000k
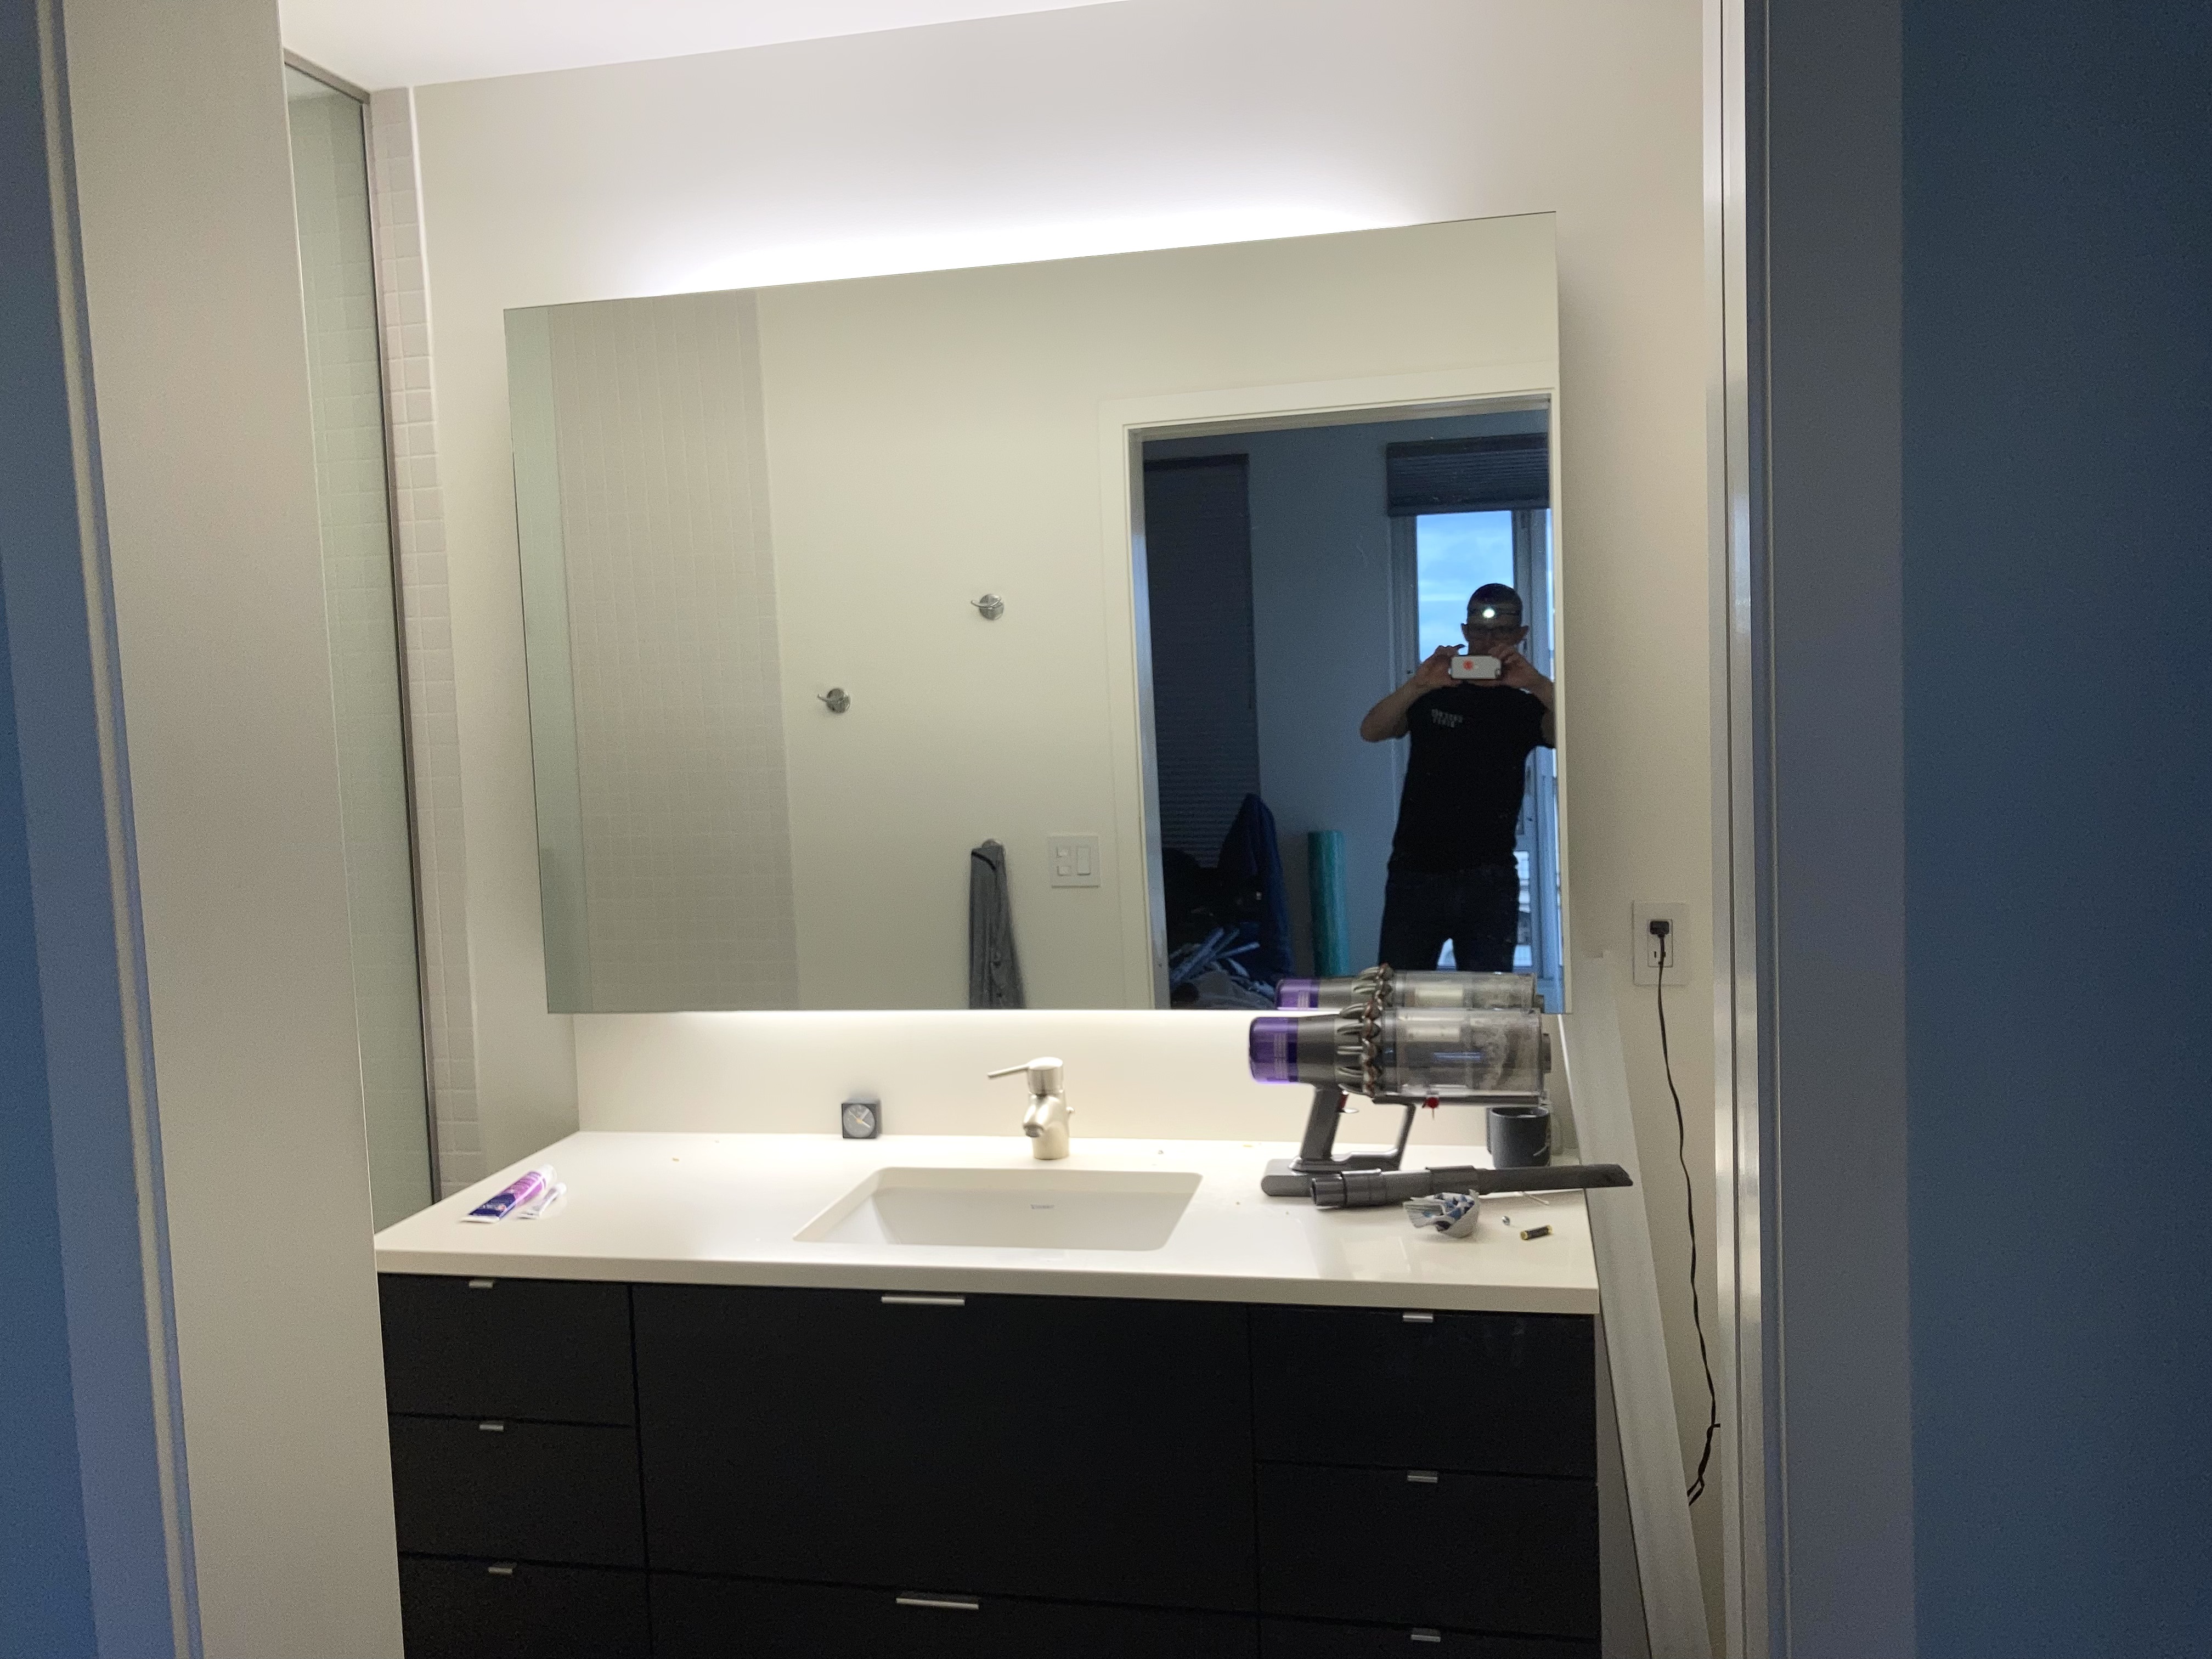
MIRROR LIGHTING LED CONVERSION
(Please note, this only applies to units which use 45″ fluorescent tubes, some units in 937 building use shorter 34″ ones)
Ok here’s the thing. If you don’t want to find a T5 CFL because they are quite rare or if something else has broken like the transformer / ballast, you can do a conversion to LED and use less power and get brighter light. Basically, this means you will keep the same fixture (bulb holders) and put new LED bulbs in place. There is a company (LUXRITE) that sell T5 4ft LED tube lights.
Product: LUXRITE 4FT T5 LED Tube Lights, (Type B, 24W=54W, 4 Colors 3500K | 4000K | 5000K | 6500K, 45.79″, Single and Double End Powered, Ballast Bypass, 3200LM, F54T5 Fluorescent Replacement, UL, DLC (4 Pack)) $62 on Amazon or $64 orderable on Home Depot.
Since this LED tube light setup runs direct on mains 120v and not with a ballast like your old fluorescent tubes, you will need to do a spot of electrical rewiring and remove the ballast. So if you are gonna do this yourself, make sure you know how to bypass a ballast, removal and to check non shunted connections. or, An electrician can do this rewire for $200 and probably much safer if you have no idea what I was just talking about.
The cool thing is after all is done you can slide the switch and choose from 4 different color temperatures.!
We did this conversion, the bathroom is brighter and really like the light color of 4000k, its better for makeup and generally just a better quality. Because the old fluorescents were about 8000 lumens (total 4 bulbs) , this new setup with 12,800 Lumens is brighter by quite a bit. I estimate 35% more light.
If it is too bight you could always use 3 tube lights. Maybe 2 on top and 1 below mirror.
SMALL BATHROOM LIGHTING
I forget what it is! I think its a T8 size and an LED straight swap is readily available for around $11 made by Fiet, so you can get rid of that nasty florescent., sorry I cannot remember details, its pretty common and easy. and I reckon I got mine at the Pearl Ace also!
THERMOSTAT
If you are switching out thermostat controllers to a Google Nest or other types it can be done. On the Nest site there is a compatibility check, BUT there’s a few things you should know. (why do these dudes always make it so difficult!)
NOTE: This info relates to the HVAC system being a Carrier. Carrier was the default when this building was constructed. If you have replaced your entire system with another brand, the info below may not be applicable and you should research the technical details of the unit you have.
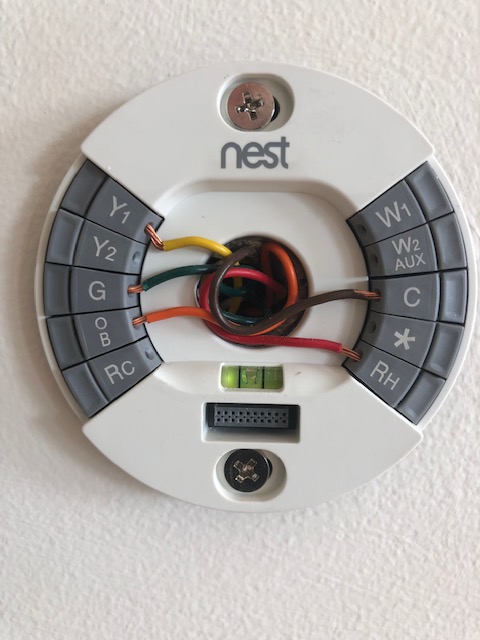
** The biggest difference in our systems is we have heat pumps. Heat pumps have a special wire. it’s called reversing valve that changes the mode of your heat / cool system. On our units that wire is an Orangish Brown Color sometimes labeled OB
** The next thing to note is the Common wire in our systems this wire is Dark Brown (sometimes black) , on other systems it’s often Blue.
If you pull your thermostat off the wall, you will see some colored wires. In general this is what they mean
Yellow – Compressor
Green – Fan
Dark Brown / Black = C – Common
Orangish Brown – O/B – Reversing valve for Heat Pump systems
Red – R – 24vac (Heating transformer)
On your nest you will notice a W or W1 for 937 there is no wire connection for this, leave it un connected.
Using an online compatibility checker? The trick with things here is our system uses a “C” wire which is BROWN in color, in other systems it’s a different color. So if you use a compatibility chart, it’s good to know you have a “C” wire, it just happens to be brown.
Nest wire photo below from a 937 Carrier HVAC / Heatpump

here’s another photo of the same thing, maybe a bit easier to see wire colors
INTERNET
In general the building has fast to very fast internet. If you are on wi-fi, have modern equipment and experiencing slow speed the first thing to do would be to restart your wi-fi router. Unplug, wait 20seconds plug back in.
In most cases if you plug your device straight into the wall (bypassing wifi) via the Ethernet cable, you will find the fastest speeds. This is useful to know for people who are video conferencing and can wire their laptop straight in. You can also do this with your smart TV which will allow for fastest streaming vs over wi fi which can slow it down a smidge.
Assuming your oldest technology is the wi-fi router, If your wi-fi router is over 7 years old you may benefit from buying a new unit. may.
to get techy…
WiFi 6 is the latest and greatest also called AX.
Wi Fi 5 is the last generation, also called AC
Wi Fi 4 is an old generation, also called N
You can google your routers name and model number and it will tell you what “wi fi” it is.
Wi Fi 5 and 6 are fine. If you are on 4, it’s probably time to upgrade and you will see some benefit.
You can measure the relative speed of your connection by searching for Speed Test, run it a few times to get an average number. For comparative reasons here are my tests, taken at the same time,
As of November 2025 the building is on a 10GB Fibre Line into the building, now that doesn’t mean you will get 10GBps speed but it does mean your speed will be extremely high.
BUT, you will probably need to upgrade your switch in your in unit closet / hidden panel and if you haven’t done so in a long while. you might want to upgrade anyway , We upgraded to a 1GBps Switch TP-Link TL-SG105, 5 Port Gigabit Unmanaged Ethernet Switch, for about $15 – links below.
What does the switch do? well in simple terms it’s an intelligent splitter and splits the signal coming into your unit between all the internet sockets in your home. Older splitters can slow you down.
If you use wi fi and have upgraded your Switch, then your wifi router may be old and now being the cause of restricting your speed. We upgraded our wi fi router to WiFi 6 standard . We used a well regarded unit called TP-LInk Ax 1800 – which is not cutting edge technology for 2025 , but highly rated, fast and reliable. and it cost about $55
Now our new speeds are , over wi fi 700Mbps download and 650Mbps upload. Thats superfast. I haven’t measured the speed before the switch but it could be over 1Gbps. (for comparison in 2021 on wifi 4 speeds were 70/90Mbps!)
So for less than a $100 you can be flying. In our unit we have both streamed work videos calls on two computers and we have zero problems with netflix or streaming services.
Link to the 1Gbps Switch we bought : TP-Link TL-SG105, 5 Port Gigabit Unmanaged Ethernet Switch – https://amzn.to/4pKNkgg $20
If you have to have the best wi fi router Wi fi 6E – (note – it probably wont be any faster on our 937 system than the one below, but may offer more future proofing. Then take a look at TP-Link AXE5400 Tri-Band WiFi 6E Router – https://amzn.to/49ieQf2 it’s very fast and costs about $200
We bought the : WiFi 6 – TP-Link Ax 1800 router : https://amzn.to/4918fnU $55 which was pretty much the fastest tech in 2023/24
Also remember if you are using streaming services on your TV a lot it does / can help if you hardwire your TV to the wall port directly, ie not over wi fi. Many smart TV’s allow you to do this with a connector on the back and a few clicks in the interface to setup
DIRECT TV
As of 12/13 DirectTV is serviced by Adcom:
https://adcomm-mdu.com/contact-us-customer-service/
Call on 888-926-5965
your serial number for your decoder box is on your box. Imagine that. They might also ask you for a code on the SIM card, which… wait for it… is on the SIM card.
If there are issues sometimes they need to reset your receiver box remotely and they will need numbers of the label on your box.
As with everything nowadays, it’s a process, they run to a script, so stick with it and it will get sorted.
Also worth noting Direct TV has nothing to do with the Internet at 937, different wires, different things, different holes. So they probably won’t be able to assist with a why is my facebook not working question.
WALL & TRIM PAINTS
Original code is a Rhoda number… ES07E2290 on whatever base you like, eggshell for walls, low gloss for trim / wood. The last base I used was an Eggshell Gloss Level 3, White 53-3001 for wall, but that base number seems to change somewhat often.
Paint Codes: White walls : Colour code is actually a Benjamin Moor color …. OC-117 Simply White on an Eggshell Base – Worth noting the colour code is also called BM for Benjamin Moore OC-117 “Simply White” which you can have a base tinted to.
Feeling fruity…… forget all that white Bob Ross it! , our place had a pink wall, what a refreshing, versatile, soothing great idea (not!)
WINDOWS & SCREENS CLEANING
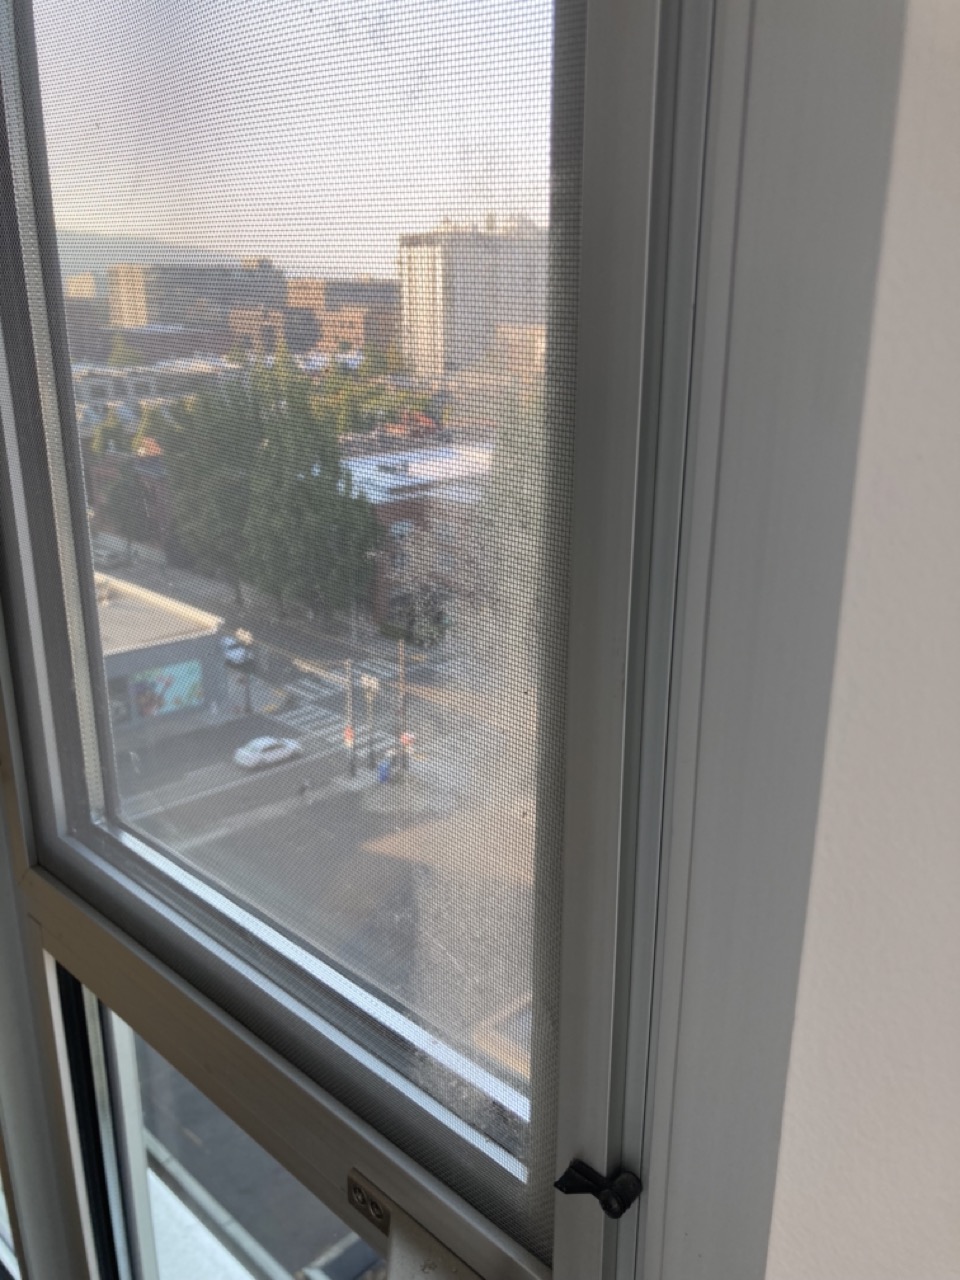
LOOSE SCREWS / PREVENTATIVE
This more applies to people who open and close their windows frequently. The opening and closing can cause one of the mechanisms screws to come loose. The trick is you won’t notice it is loose till it’s broken and gone, and it’s not a common size screw , thus worth checking and tightening.


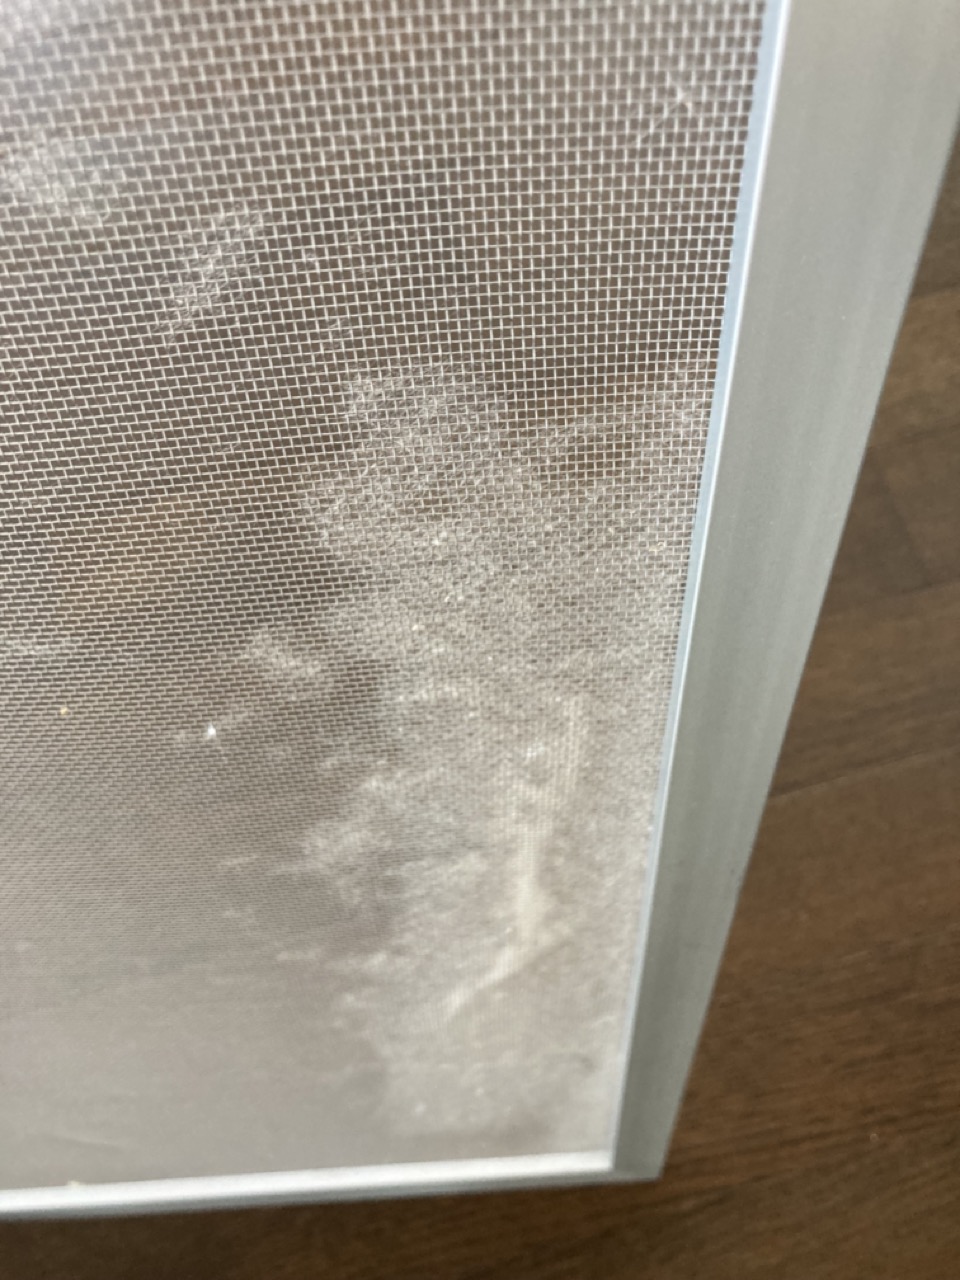
WINDOW SCREEN CLEANING
Our window screens getting pretty shabby they needed a clean. I was dreading this for a while, I kept putting it off from having a not good / faffy experience at trying to clean other screens.
Good news – it was a lot easier than I thought. Trick is like normal, using right tool for the job.
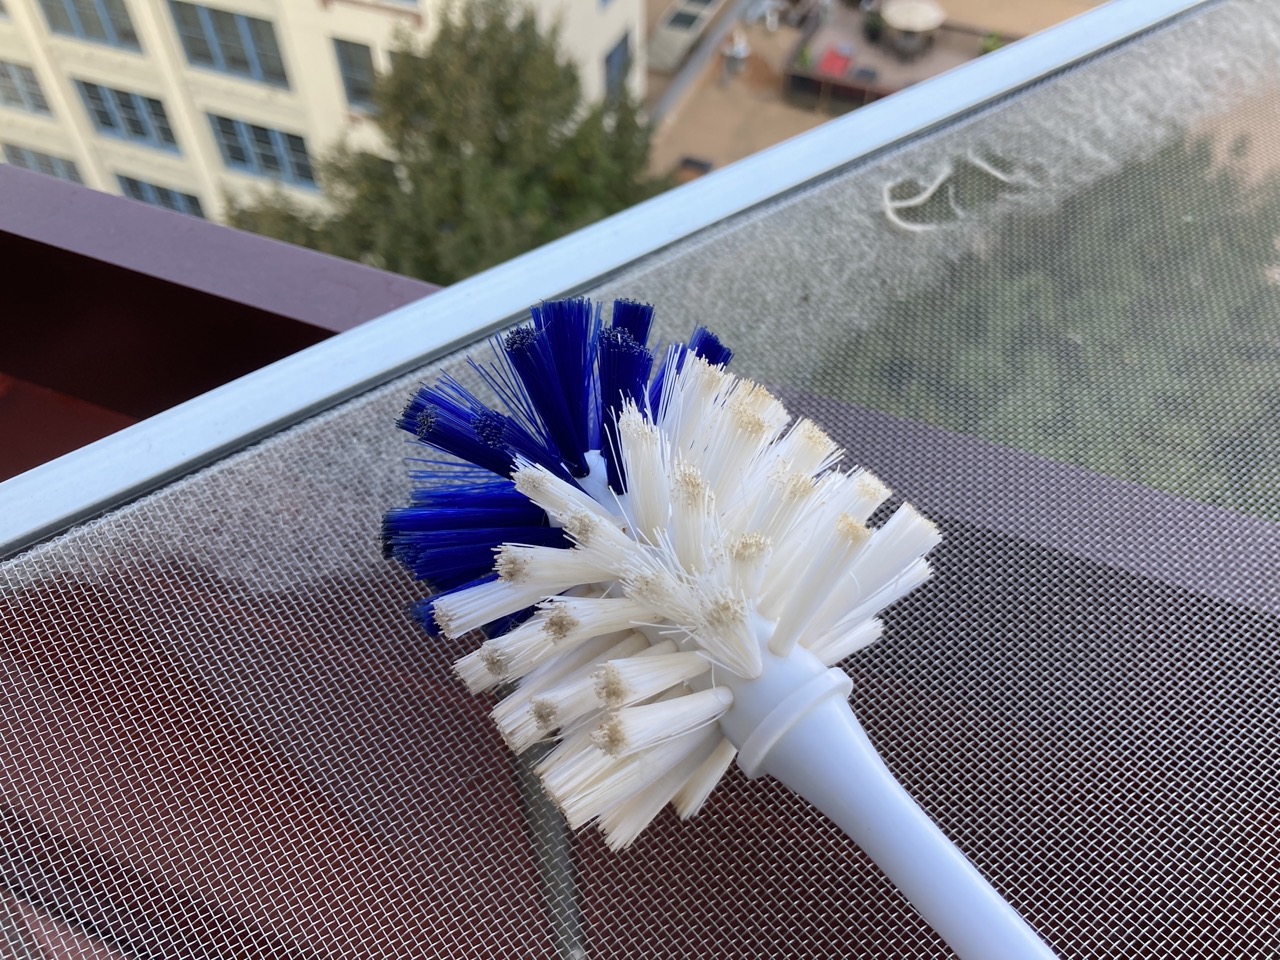
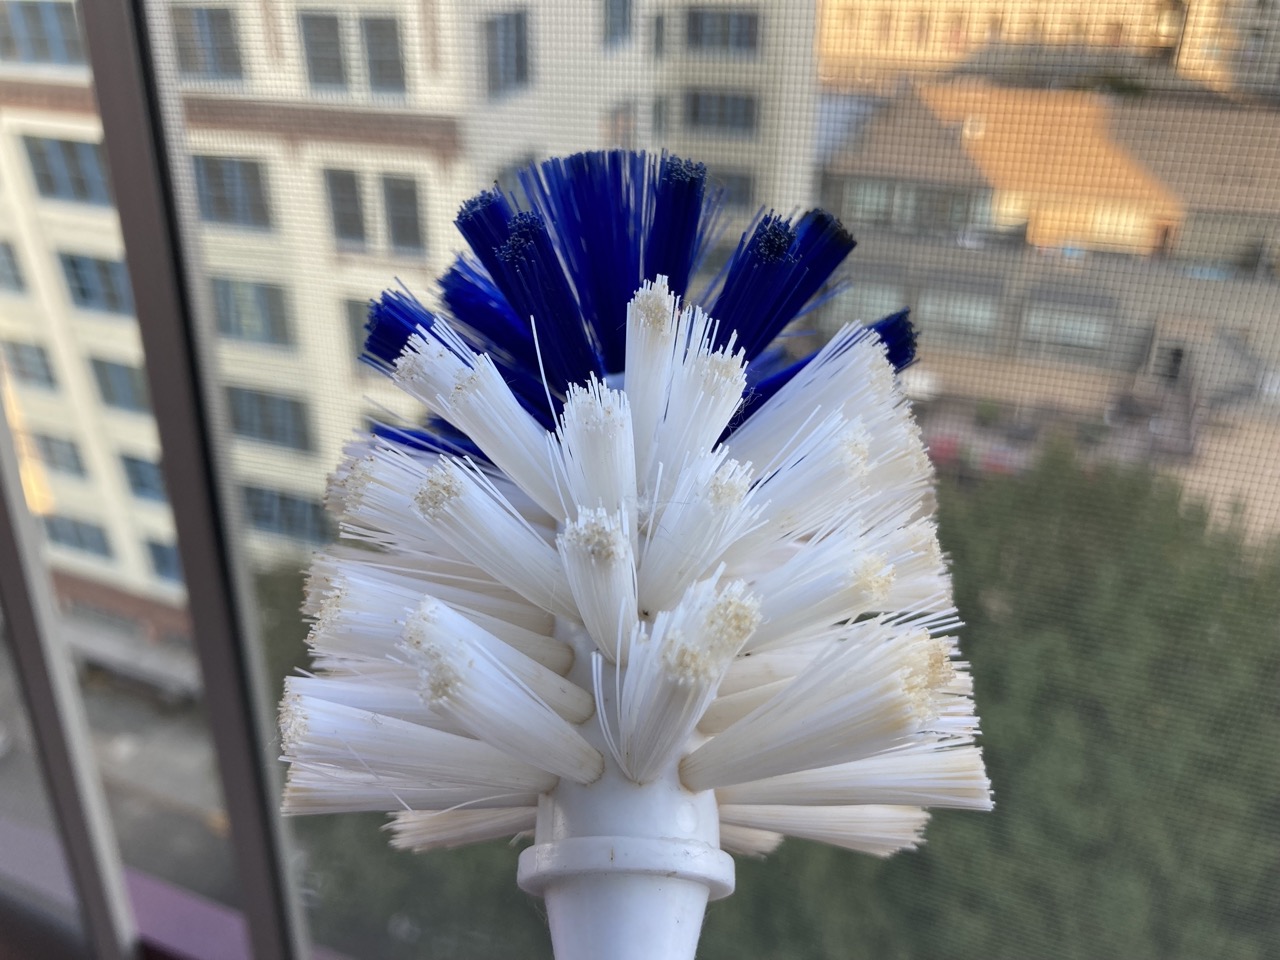
My first instinct is to scrub it, 937 Screen mesh is fine metal, but it’s also delicate so good choice of cleaning tool is essential. I wanted a brush that had small fibres to poke and wick in the mesh holes to get the dirt out but also somewhat soft and flexy so that not a huge amount of pressure would be transferred. A “gentle” brush.
Gentle and perfect brush found! …. its a dishwashing brush found at the supermarket for a few bucks. The fibres in the head are thin and long. Works perfect. No water needed, simply use the brush on the dirtiest side of screen and the lint and dust will be gone in seconds. Ours were pretty bad and it took me a whole minute! gosh – to clean one!
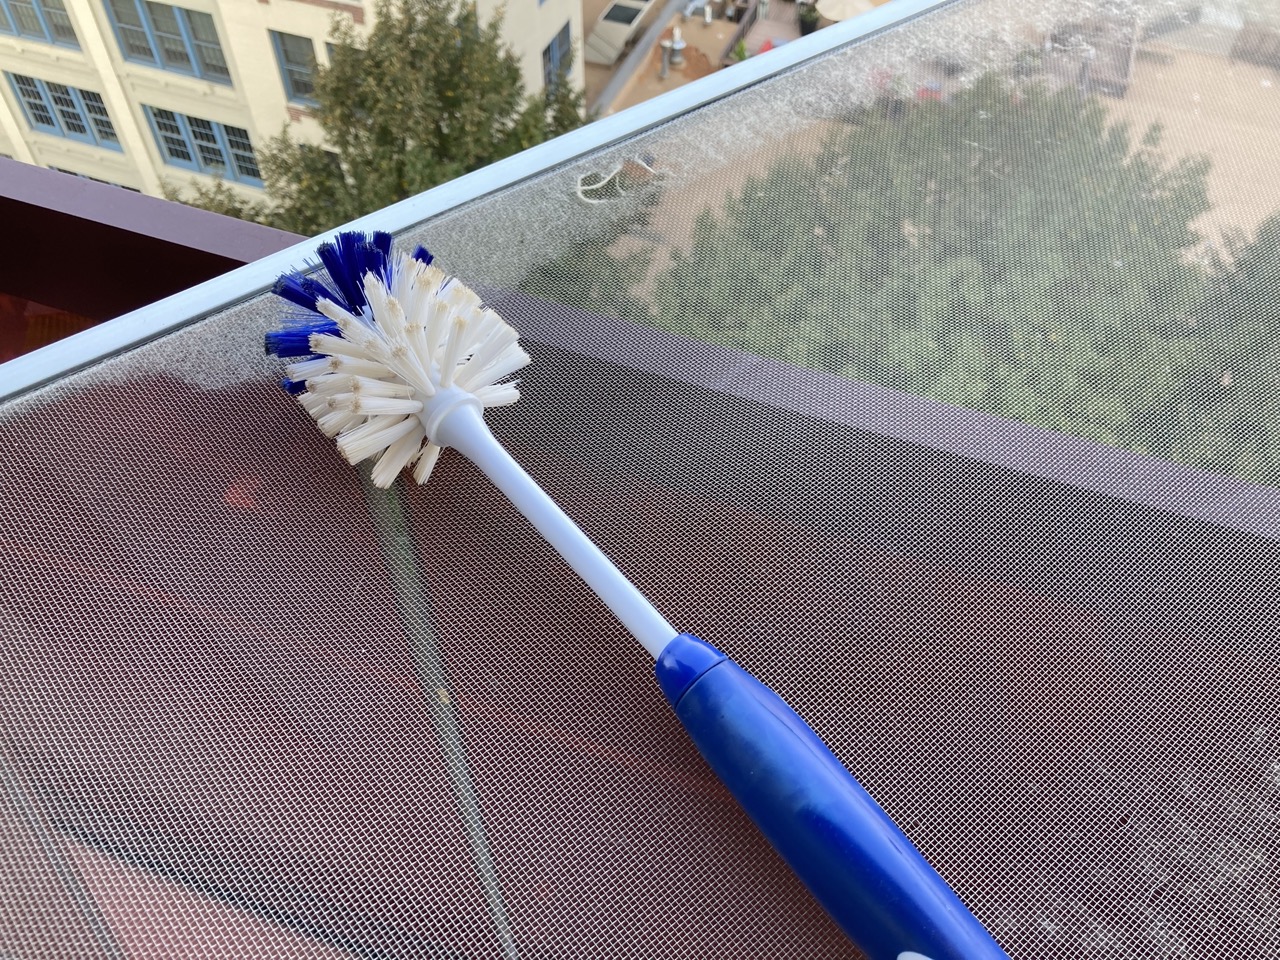
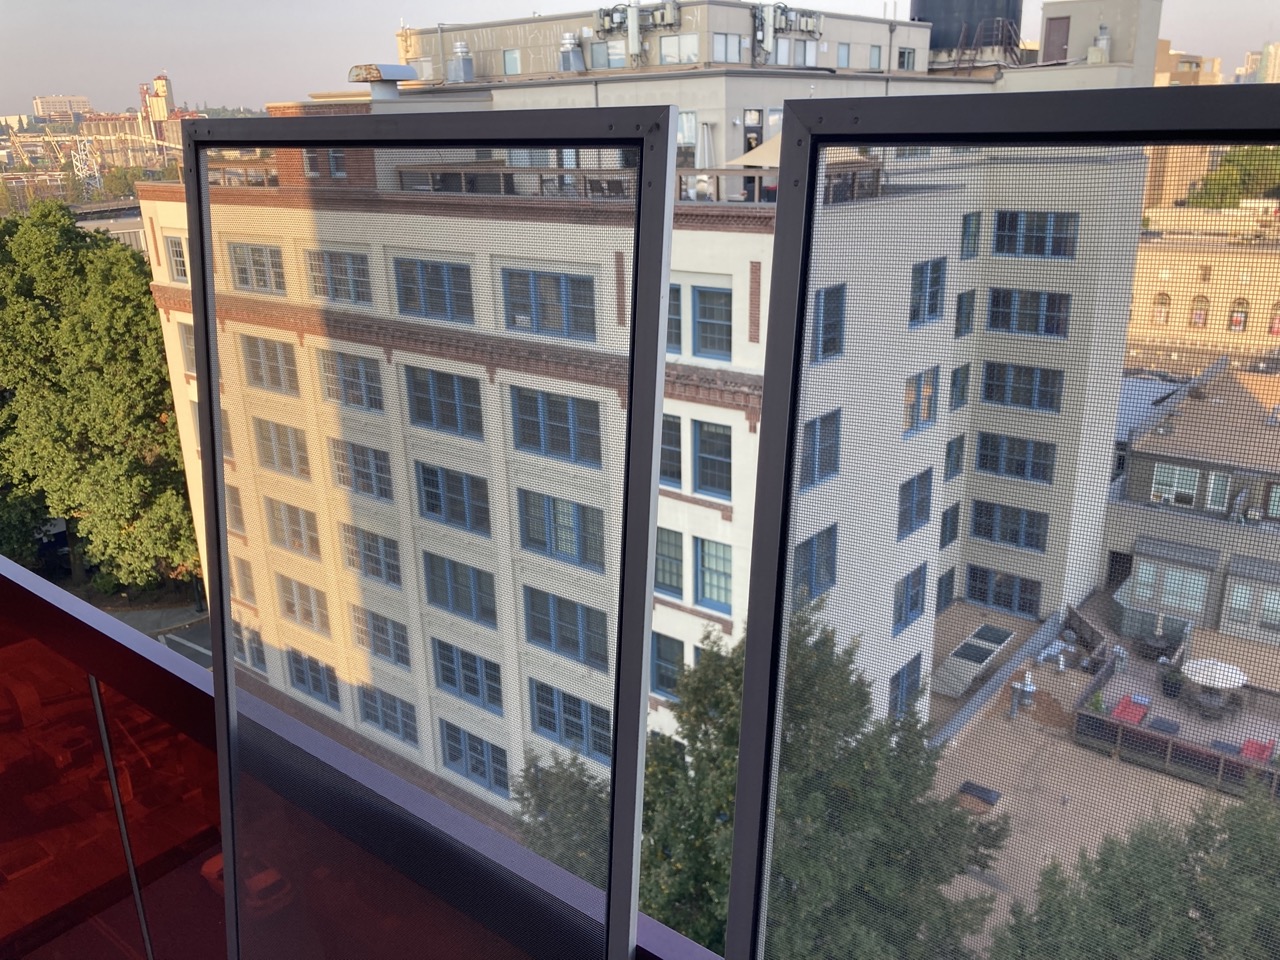
You can also use this technique on your patio screen. Obviously you cannot remove the screen from the tracks but you can use the brush in the same way.
Contractors, Cleaners and Handy People
These are not people I have personally used, but information of contacts gathered from others on the building
Cleaners
These are some cleaners that come highly recommended by residents of 937
“Mauricio and Delia clean for me and they are very thorough and very dependable. Have been using them for about 3 years now and highly recommend them. Mauricio’s phone number is (503) 467-8060. “
“Sofia Zavala and her team have cleaned my place (and my parents’ place) for a few years, and I’ve been very happy with them. By far my favorite of the 4 cleaning services I’ve used. She was recommended to me by other 937 residents. Here’s her number: (503) 929-7544“
” I recommend Krisa Elliot. Her business number is 503-559-9786. She is responsive, and does a great job!”
Handy peoples
Larry Gersh (503) 922-1067, Steve Fox (503) 806-2596, Chad Sulloway (503) 430-9838., Marvin Sweet (503) 577-5386, Daniel Nelson (503) 939-1123 , Brian Brown. (971) 404-4984.
Electrical:
Pro Circuit : 971.235.4555
PDX Electric – Marty , 503 6399708, https://www.pdxelectric.com/
Gary’s Electric – Gary , 503-465-8145 , https://www.electriciangresham.net/
HVAC Repair People
Columbia NW – these are the people recommended by the front desk.
Jacobs Heating – when you call, make sure to tell them you have a Carrier Aquazone Heat Pump so they can send the correct technicians.
Smoke Detectors
Original units were fitted with smoke detectors that were hardwired to the 120vac mains and had a 9volt battery back up. The specific units could be twisted off form a circular bracket which was in the ceiling. You had to twist off to replace the 9v battery, (which should last over 2 years).
https://www.kidde.com/home-safety/en/us/products/fire-safety/smoke-alarms/i4618/
Troubleshooting
If you hear a beeping noise. One of three things might be happening.
1) the battery backups in your detectors is running out – replace the 9v battery
2) the actual smoke detector unit maybe older than 8 or 10 years and some brands beep when expired.
3) you might have tripped a fuse in the circiut breaker to the HOA fire alarm, this will cause it to beep – check the circuit breaker and reset.
Patio
Ever had the screen door pop off the rails? – it’s a quick easy fix.
For those with patios and partners with heavy hands, the patio door can sometimes pop off the lower rail, here is how to fix.
From the inside, with the main glass door all the way open, close the screen door the best you can.
Look at the bottom of the screen door in the left and right corners of the metal frame, you will see two groups of three screws. Note: The middle of each set of screws has a black collar.
This is the area where the rollers are that keep the door on the track.
Loosen the middle screw in each set. 5 or 6 turns should be fine, do not unscrew all the way out.
(The middle screw loosens the spring roller that allows you to pop it back on the track)


After loosening the middle screws its easy to pop the door back on the track, this is best done from on the patio side , so gently slide the screen door open a little so you can get out.
Align the top of the screen door and feel with your fingers under the bottom of the door for the roller, near the screws you adjusted.
Push the roller up and pop the door back on the track.
Gently open the door , making sure it is till on track -allowing you back in the unit
Tighten the middle screws back down. Doesn’t have to be crazy tight, its not going to fall out. Just snug it back to where it was.
Done
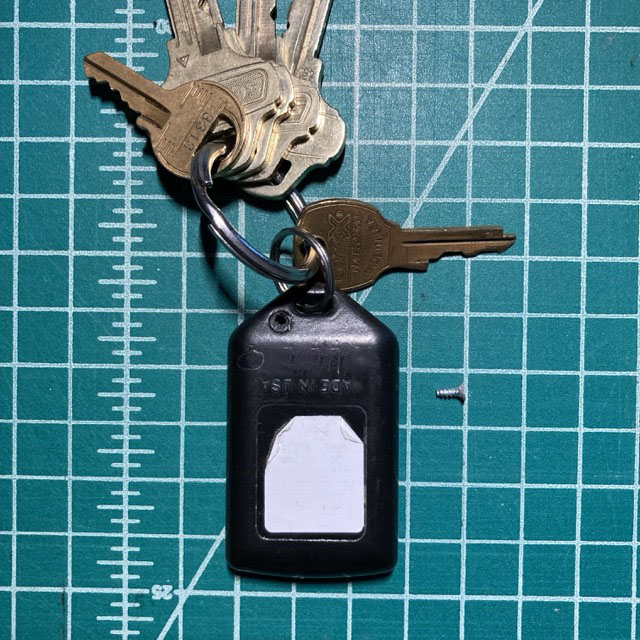
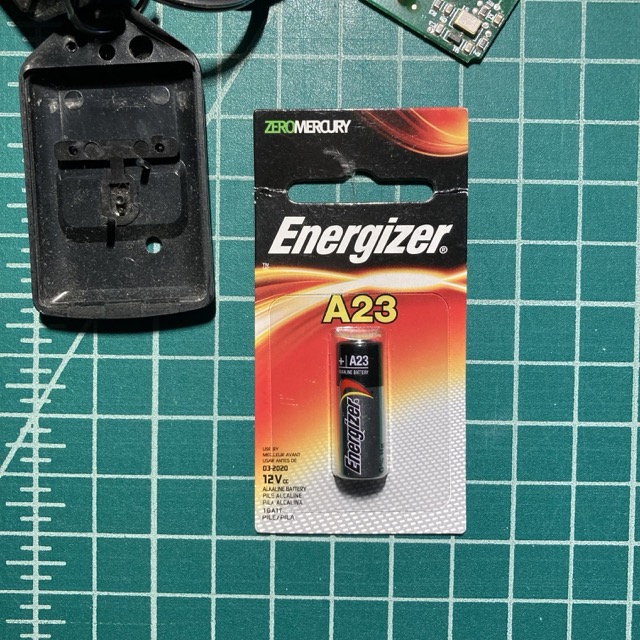
Garage Door Opener Battery Replacement
If you have lived at 937 a while you might find your garage door opener needs a new battery. The battery’s do in general last a long time, but they do wear out and range is affected. Here is how to do it, and it’s easy if you have steady hands.
- remove small screw in back upper left corner.
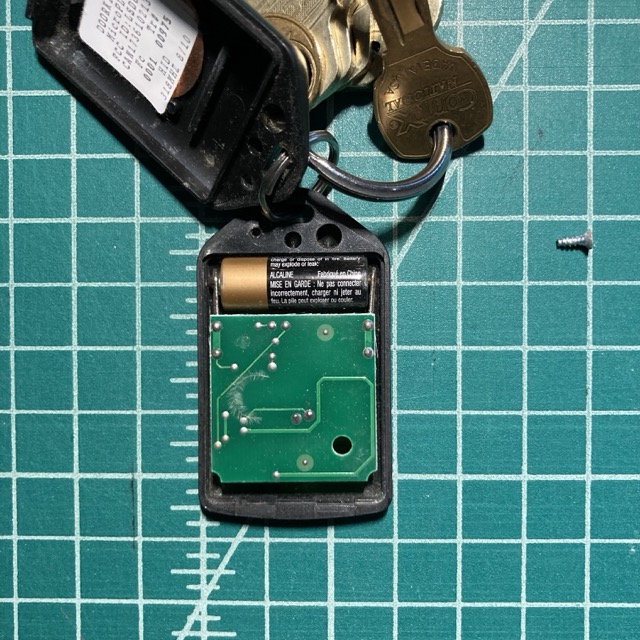
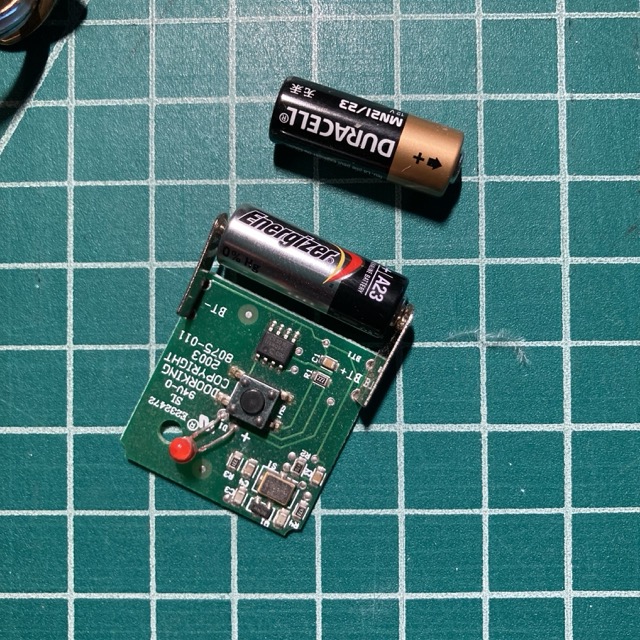
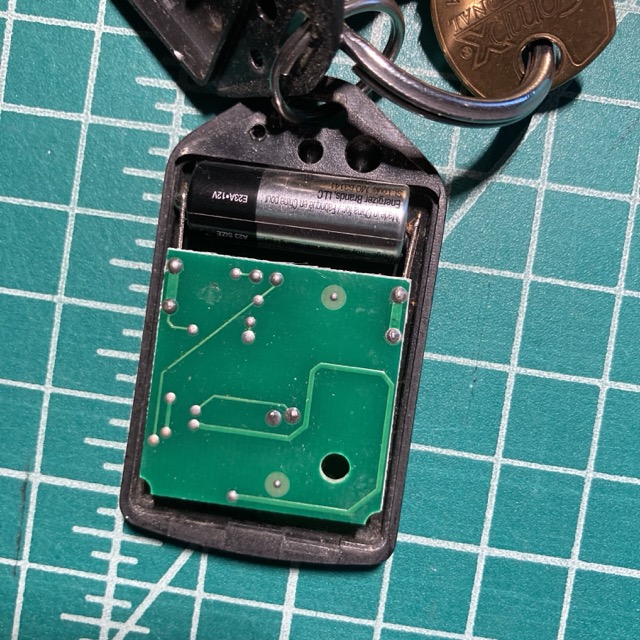
- lift out circuit board carefully, try not to touch the circuit board too much, and not disrupting the plastic case below.
- Note the orientation and polarity of existing battery and add new battery. Can be fiddely as it’s not super friendly and just some metal tabs.
- Place circuit board with new battery back into lower black plastic housing.
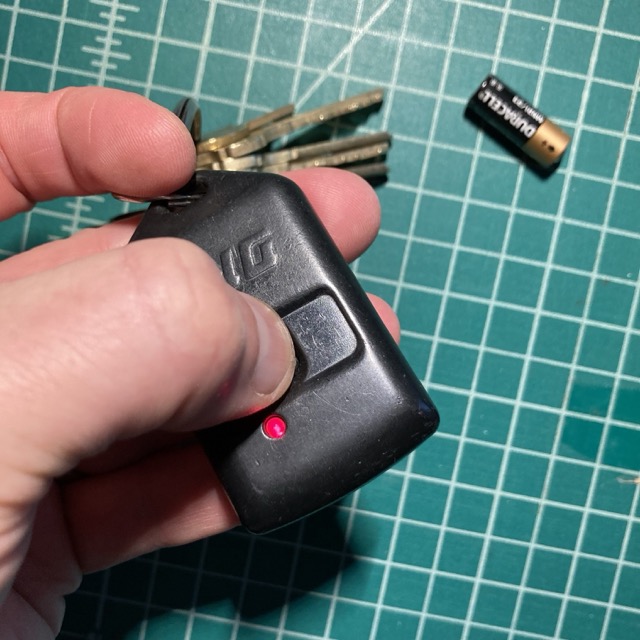
- Snap back on, you will notice two tabs on the lower edge, align these tabs first, hen push top, then replace screw.
- Test and make sure LED lights up.

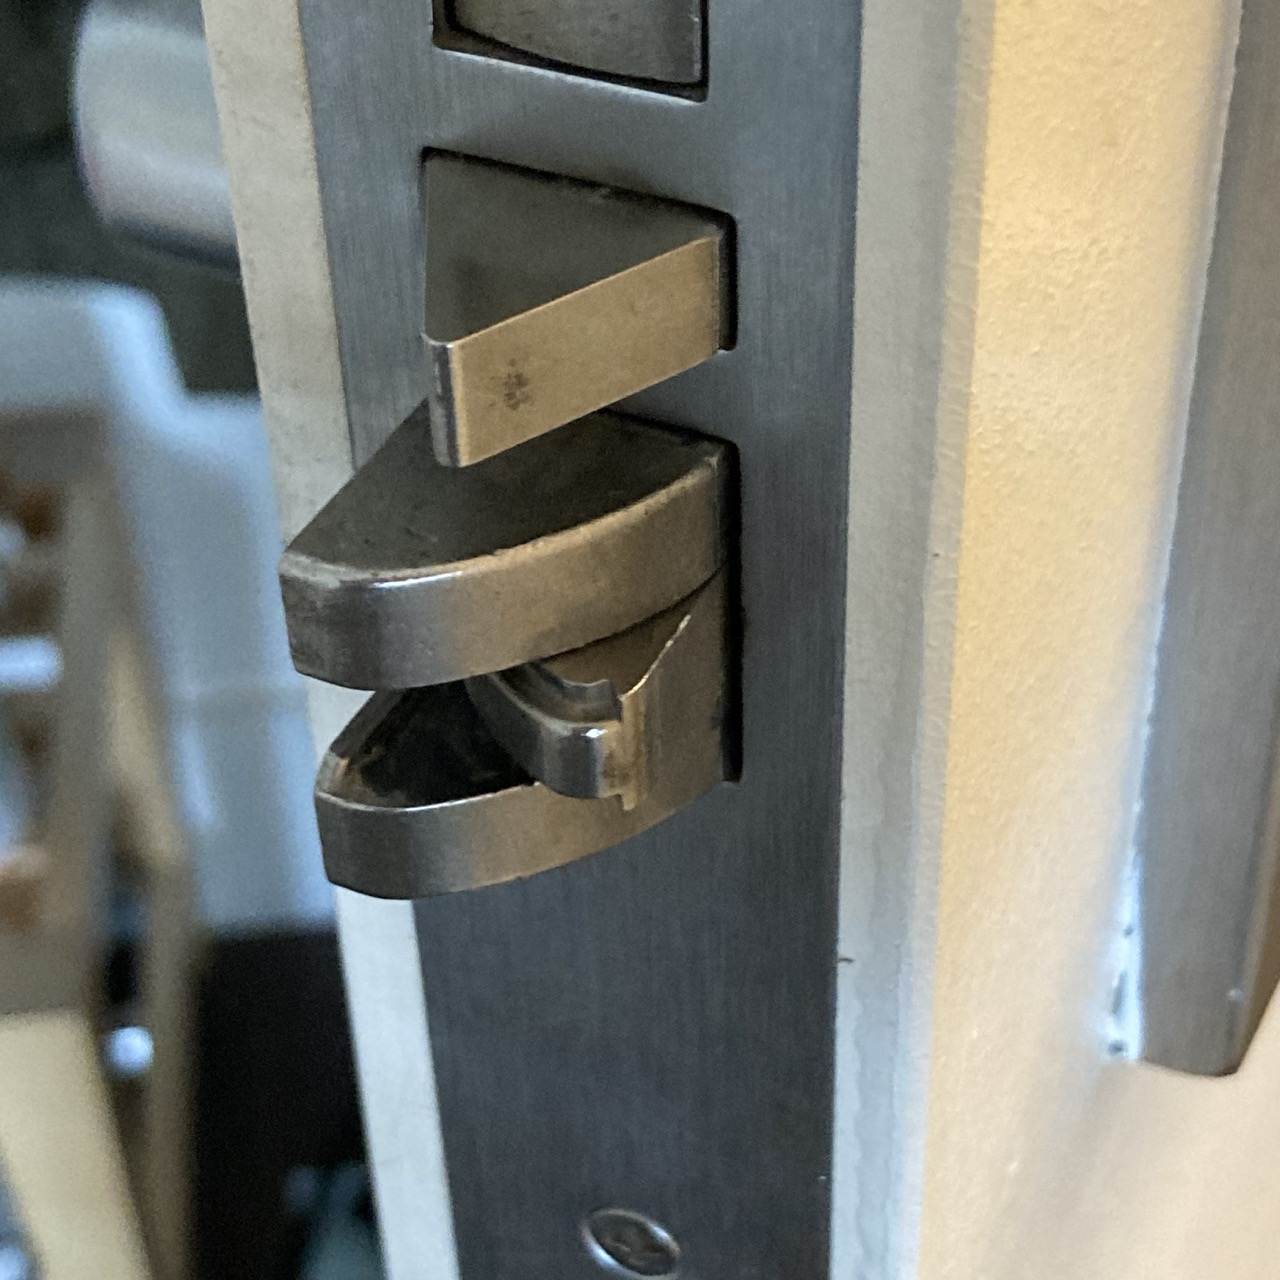
Locks
Janky feeling locks? stiff not smooth and difficult with your key? it might be time for some lube.. You can fix that easily with a careful application of powdered graphite to the inside of the lock. The trick here is to use a key to apply it right in the keyhole, clever right, I know.
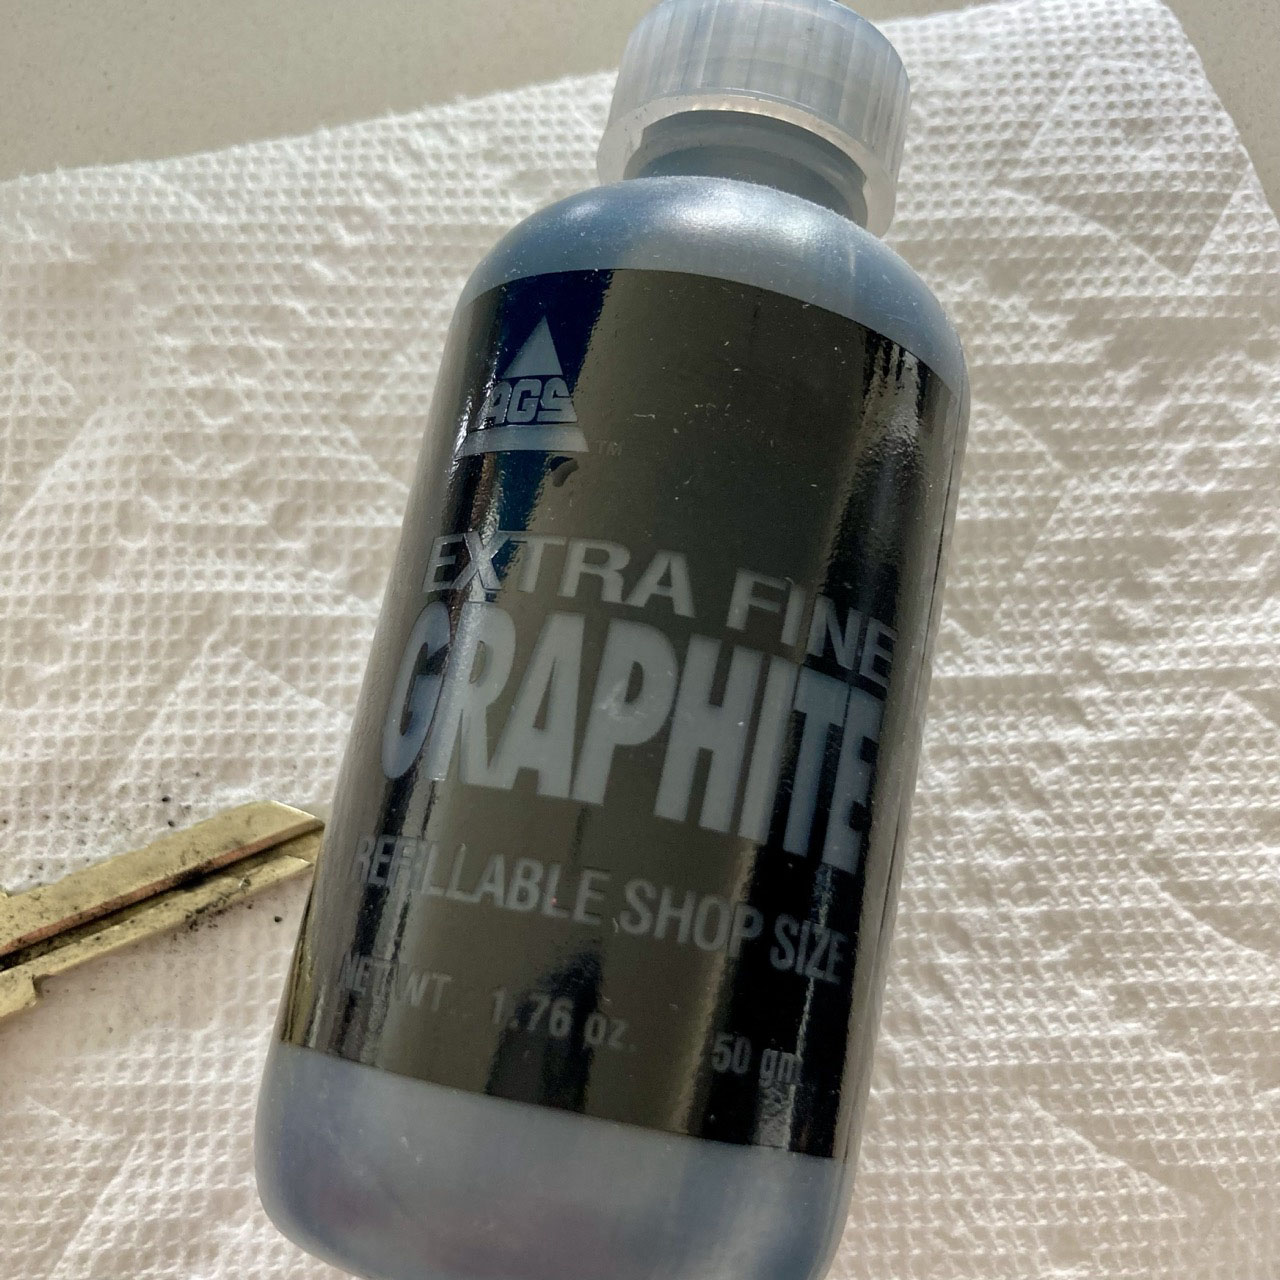
- Use powdered graphite, never oil – powdered graphite is a dry lubricant and doesn’t attract dirt like oil.
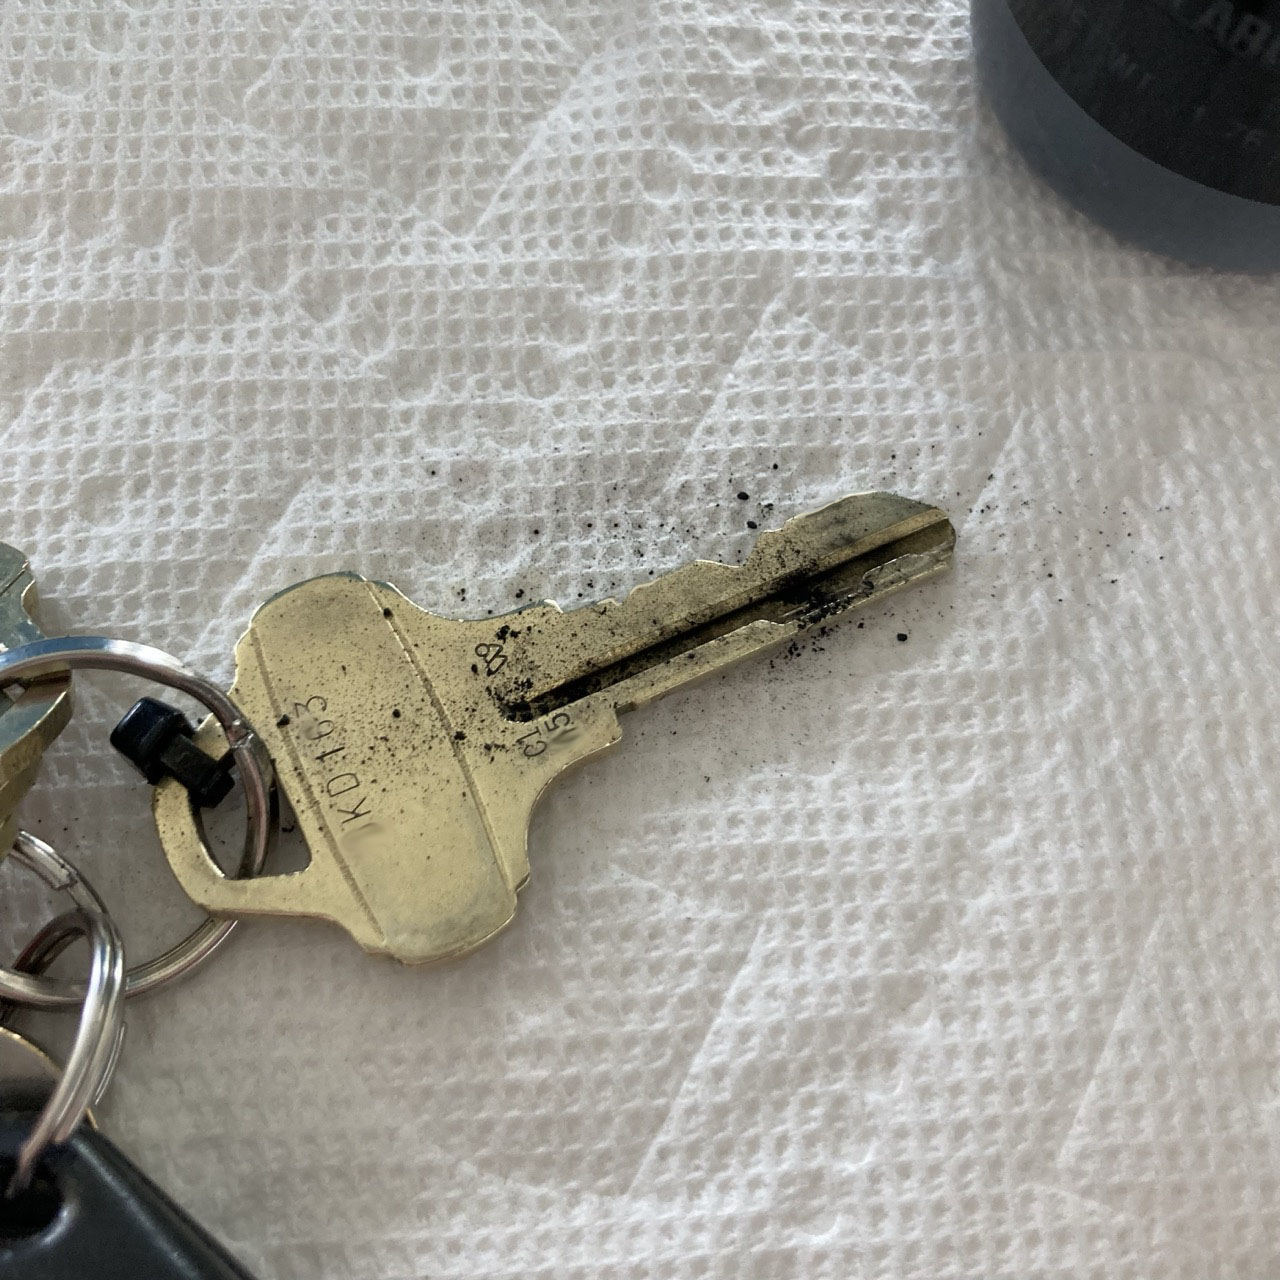
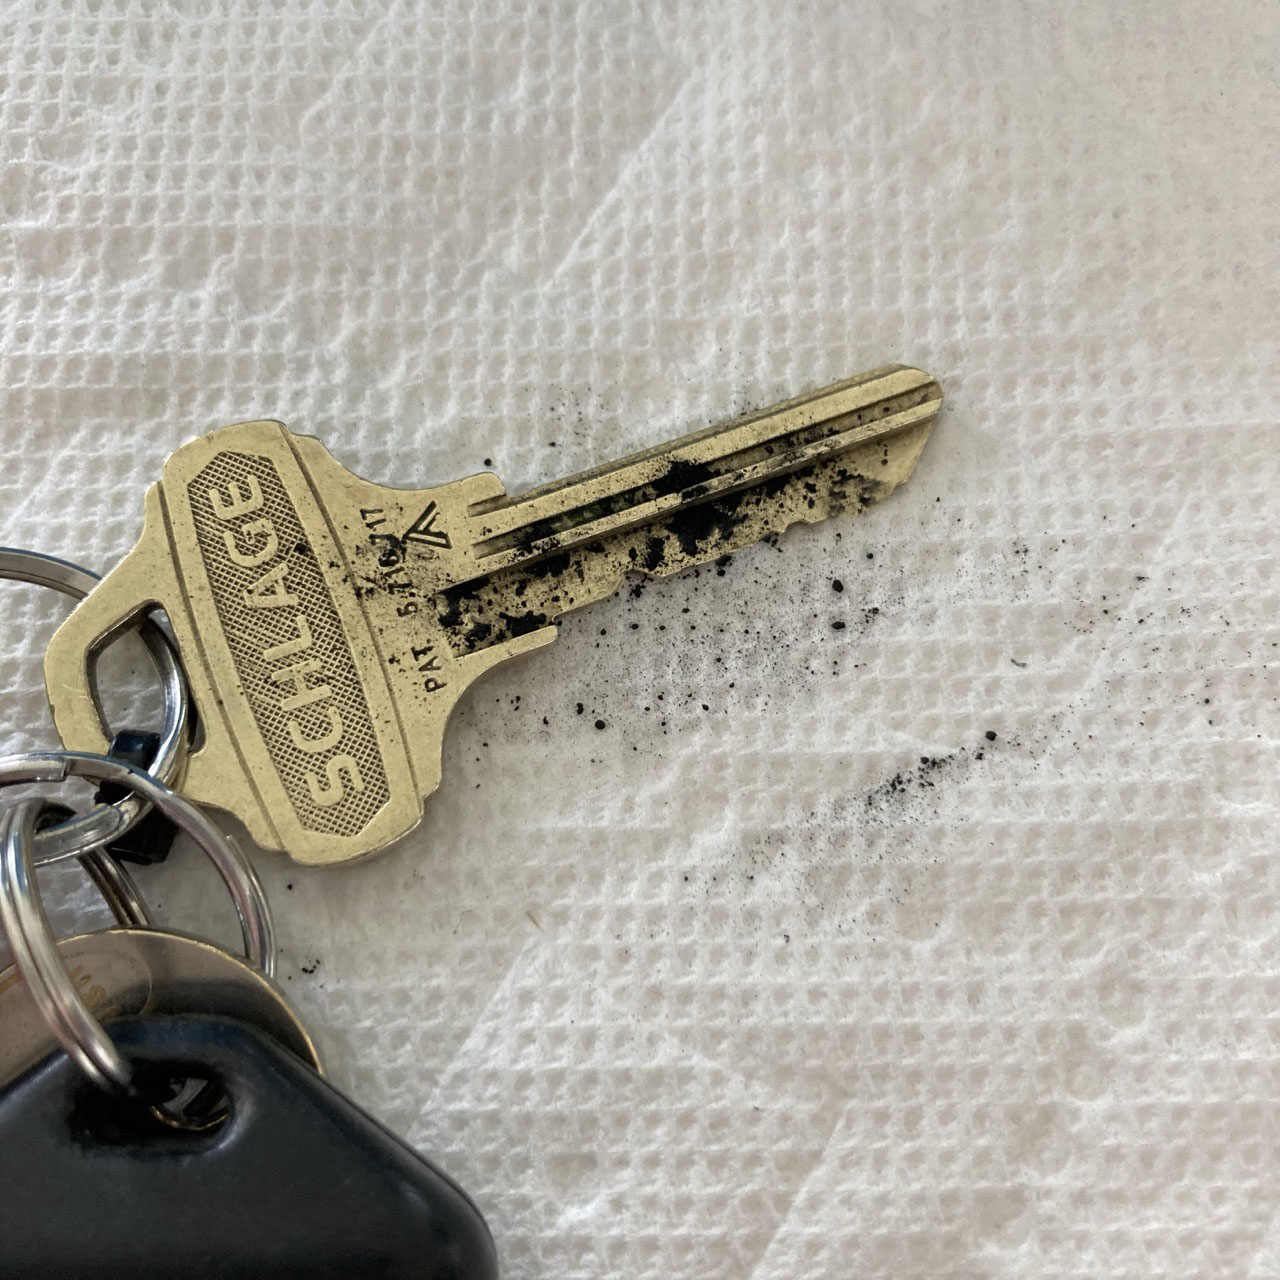
- Apply a very small amount to each side of the key. Be delicate / careful, powdered graphite is very messy, spreads easily and will get everywhere, plus you might have to paint over your fingerprints on your whitewalls. I applied a light dusting on a paper napkin and carefully took it to the door lock.
- Insert the key in the lock and operate the lock a few times. This transfers the lubricant to the lock tumblers.
- Clean your key well (and your hands).
- If needed you can lightly apply some powder at the actual lock mechanism (photo 1) that goes into the door jamb. -Apply a small amount of graphite to kitchen paper or a rag and wipe on the mechanism. Again, a very little goes a long way.
Insurance Details
this one : here
Cleaners
Two highly recommended house cleaners that have done work in 937.
Sofia Zavala – 5039297544
Mauricio – 5034678060
6 responses to “937 Condos”
-
This is where I go first with a question. Over the two years it has helped immensely. I am currently dealing with one of my blinds. It seems to have possibly jumped of the track or stripped therefore I am unable to lower or raise it. Do you have information on the maker or experience fixing?
-
theres a lot of different blinds in 937. So it really depends on what manufacturer you have. Is it a roller blind? is it manual (pull chain) or electric? when you say “jumped track” what do you mean?
-
It is a manual pull chain. I figured it was the original but I have only been in the building for two years. Now when I pull the chain it pulls through both directions but does not move the blind. When I look at it, it appears to be outside of the normal path of travel compared to my other blinds. My hope is to find the manufacturer so I can see about replacing or repairing.
-
Long read, sorry 🙂
There’s two options here:
First, I am currently helping someone in the building fix their mechanical roller blinds. It’s not too difficult if you are handy and have time. In your case the diagnosis is clutch mechanism side of the blind which is attached to the roller tube is somehow broken. There’s generally a large “cog” where the bead chain runs through. Maybe something is bent or teeth are broken. Theoretically you can purchase this new mechanism without having to replace the wall mounting brackets or generally most of the blind. If you want to go this route my suggestion would be to get a ladder and take a look around the end of the roller blind, you may see markings that indicate the original manufacturer, which can then help you to find replacement parts. for example a common manufacturer of roller blind parts is Rollease – they do a lot of commercial stuff, they also have a lot of online presence allowing you to buy spare parts.
Electric roller blinds operate a similar way, although there is a motor, but same fundamentals, very similar mechanics.Second, Another route, (probably easier yet more costly) the way it normally works is a Window Covering company “xx shade store” will be the intermediary between you and the actual part manufacturer. So you could have any Window Covering Company take a look and they will do the whole service, repair or replacement. If its a brand they carry they might repair, if not they might sell you a whole new shade.
In the past we have used a local company called Skyline Window Coverings, which have been very good to us in the past. We have Hunter Douglas shades in our place but I know Skyline works with a lot of different manufacturers.
Hope this helps
-
-
Wow! Thanks so much! I will try option one, and if I screw it up, options two!
As a follow up: Blinds are fixed. They are manual Rollease blinds and the following YouTube video offer nice step by step instructions. https://www.google.com/url?sa=t&source=web&rct=j&opi=89978449&url=https://www.youtube.com/watch%3Fv%3Dya7Cabh-3Z0&ved=2ahUKEwiy08KF3oWNAxWQATQIHcIxI2sQ-4ACegQIGxAH&usg=AOvVaw1HuuOw3Wb3Z7NkcmzROFa4

Leave a comment